


1. asides/AboutAuth0
About Auth0
Auth0 by Okta takes a modern approach to customer identity and enables organizations to provide secure access to any application, for any user. Auth0 is a highly customizable platform that is as simple as development teams want, and as flexible as they need. Safeguarding billions of login transactions each month, Auth0 delivers convenience, privacy, and security so customers can focus on innovation. For more information, visit https://auth0.com.
2. ebook-ads/JwtHandbook
Interested in getting up-to-speed with JWTs as soon as possible?
Download the free ebook
3. asides/Jwt
Aside: Delegating JWT Implementation to the Experts
JWTs are an integral part of the OpenID Connect standard, an identity layer that sits on top of the OAuth2 framework. Auth0 is an OpenID Connect certified identity platform. This means that if you pick Auth0 you can be sure it is 100% interoperable with any third party system that also follows the specification.
The OpenID Connect specification requires the use of the JWT format for ID tokens, which contain user profile information (such as the user's name and email) represented in the form of claims. These claims are statements about the user, which can be trusted if the consumer of the token can verify its signature.
While the OAuth2 specification doesn't mandate a format for access tokens, used to grant applications access to APIs on behalf of users, the industry has widely embraced the use of JWTs for these as well.
As a developer, you shouldn't have to worry about directly validating, verifying, or decoding authentication-related JWTs in your services. You can use modern SDKs from Auth0 to handle the correct implementation and usage of JWTs, knowing that they follow the latest industry best practices and are regularly updated to address known security risks.
For example, the Auth0 SDK for Single Page Applications provides a method for extracting user information from an ID Token, auth0.getUser.
If you want to try out the Auth0 platform, sign up for a free account and get started! With your free account, you will have access to the following features:
- Universal Login for Web, iOS & Android
- Up to 2 social identity providers (like Twitter and Facebook)
- Unlimited Serverless Rules
To learn more about JWTs, their internal structure, the different types of algorithms that can be used with them, and other common uses for them, check out the JWT Handbook.
4. TweetQuote
"It is now possible to securely interact with services like Amazon Cognito from the client code"
Tweet This

5. asides/React
Aside: Securing React Apps with Auth0
As you will learn in this section, you can easily secure your React applications with Auth0, a global leader in Identity-as-a-Service (IDaaS) that provides thousands of enterprise customers with modern identity solutions. Alongside with the classic username and password authentication process, Auth0 allows you to add features like Social Login, Multifactor Authentication, Passwordless Login, and much more with just a few clicks.
To follow along the instruction describe here, you will need an Auth0 account. If you don't have one yet, now is a good time to sign up for a free Auth0 account.
Also, if you want to follow this section in a clean environment, you can easily create a new React application with just one command:
npx create-react-app react-auth0Then, you can move into your new React app (which was created inside a new directory called react-auth0 by the create-react-app tool), and start working as explained in the following subsections.
Setting Up an Auth0 Application
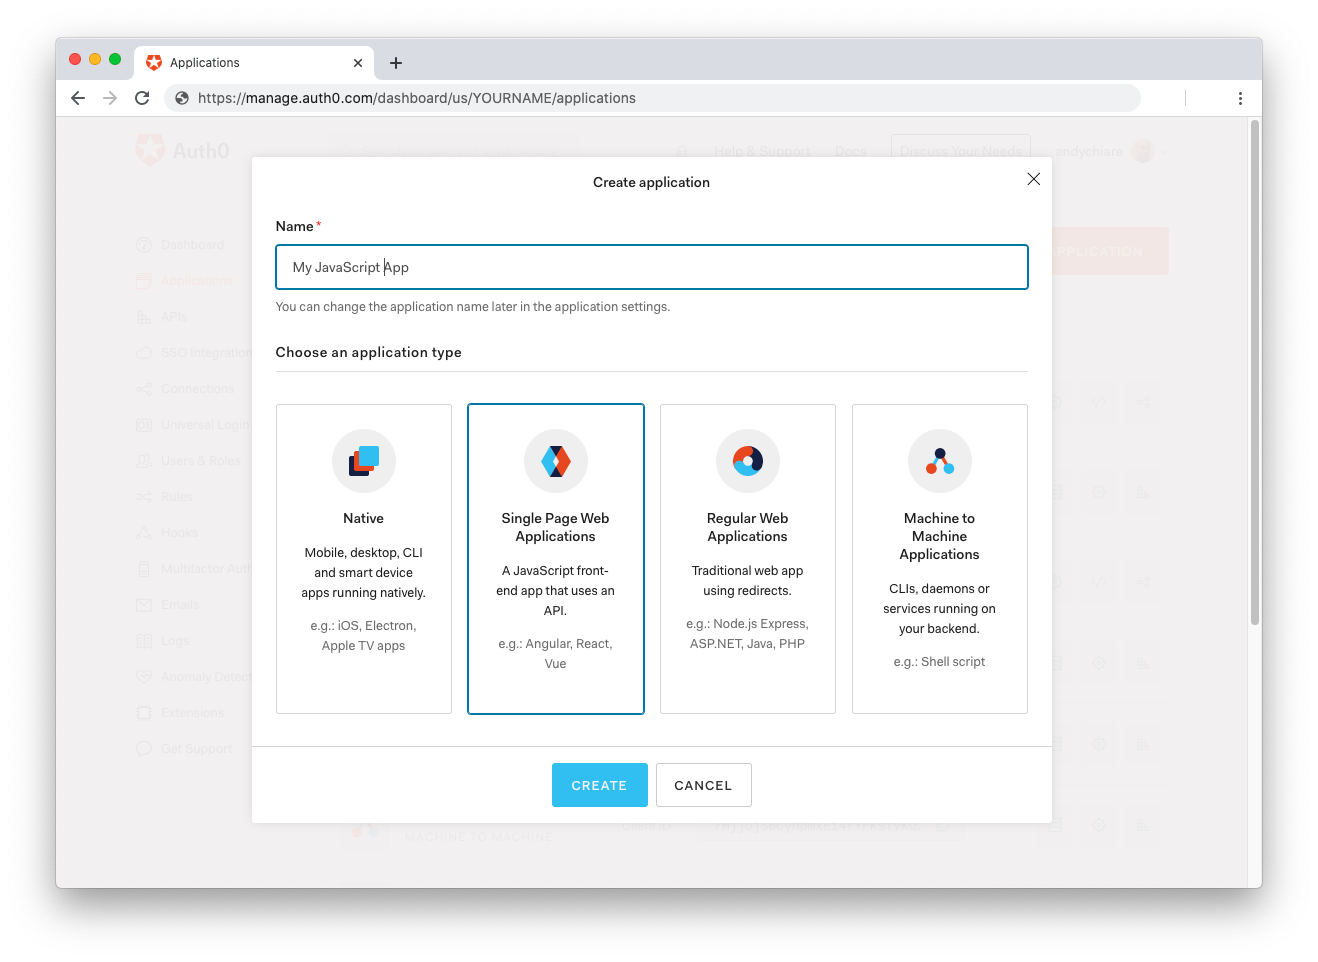
To represent your React application in your Auth0 account, you will need to create an Auth0 Application. So, head to the Applications section on your Auth0 dashboard and proceed as follows:
- click on the Create Application button;
- then define a Name to your new application (e.g., "React Demo");
- then select Single Page Web Applications as its type.
- and hit the Create button to end the process.
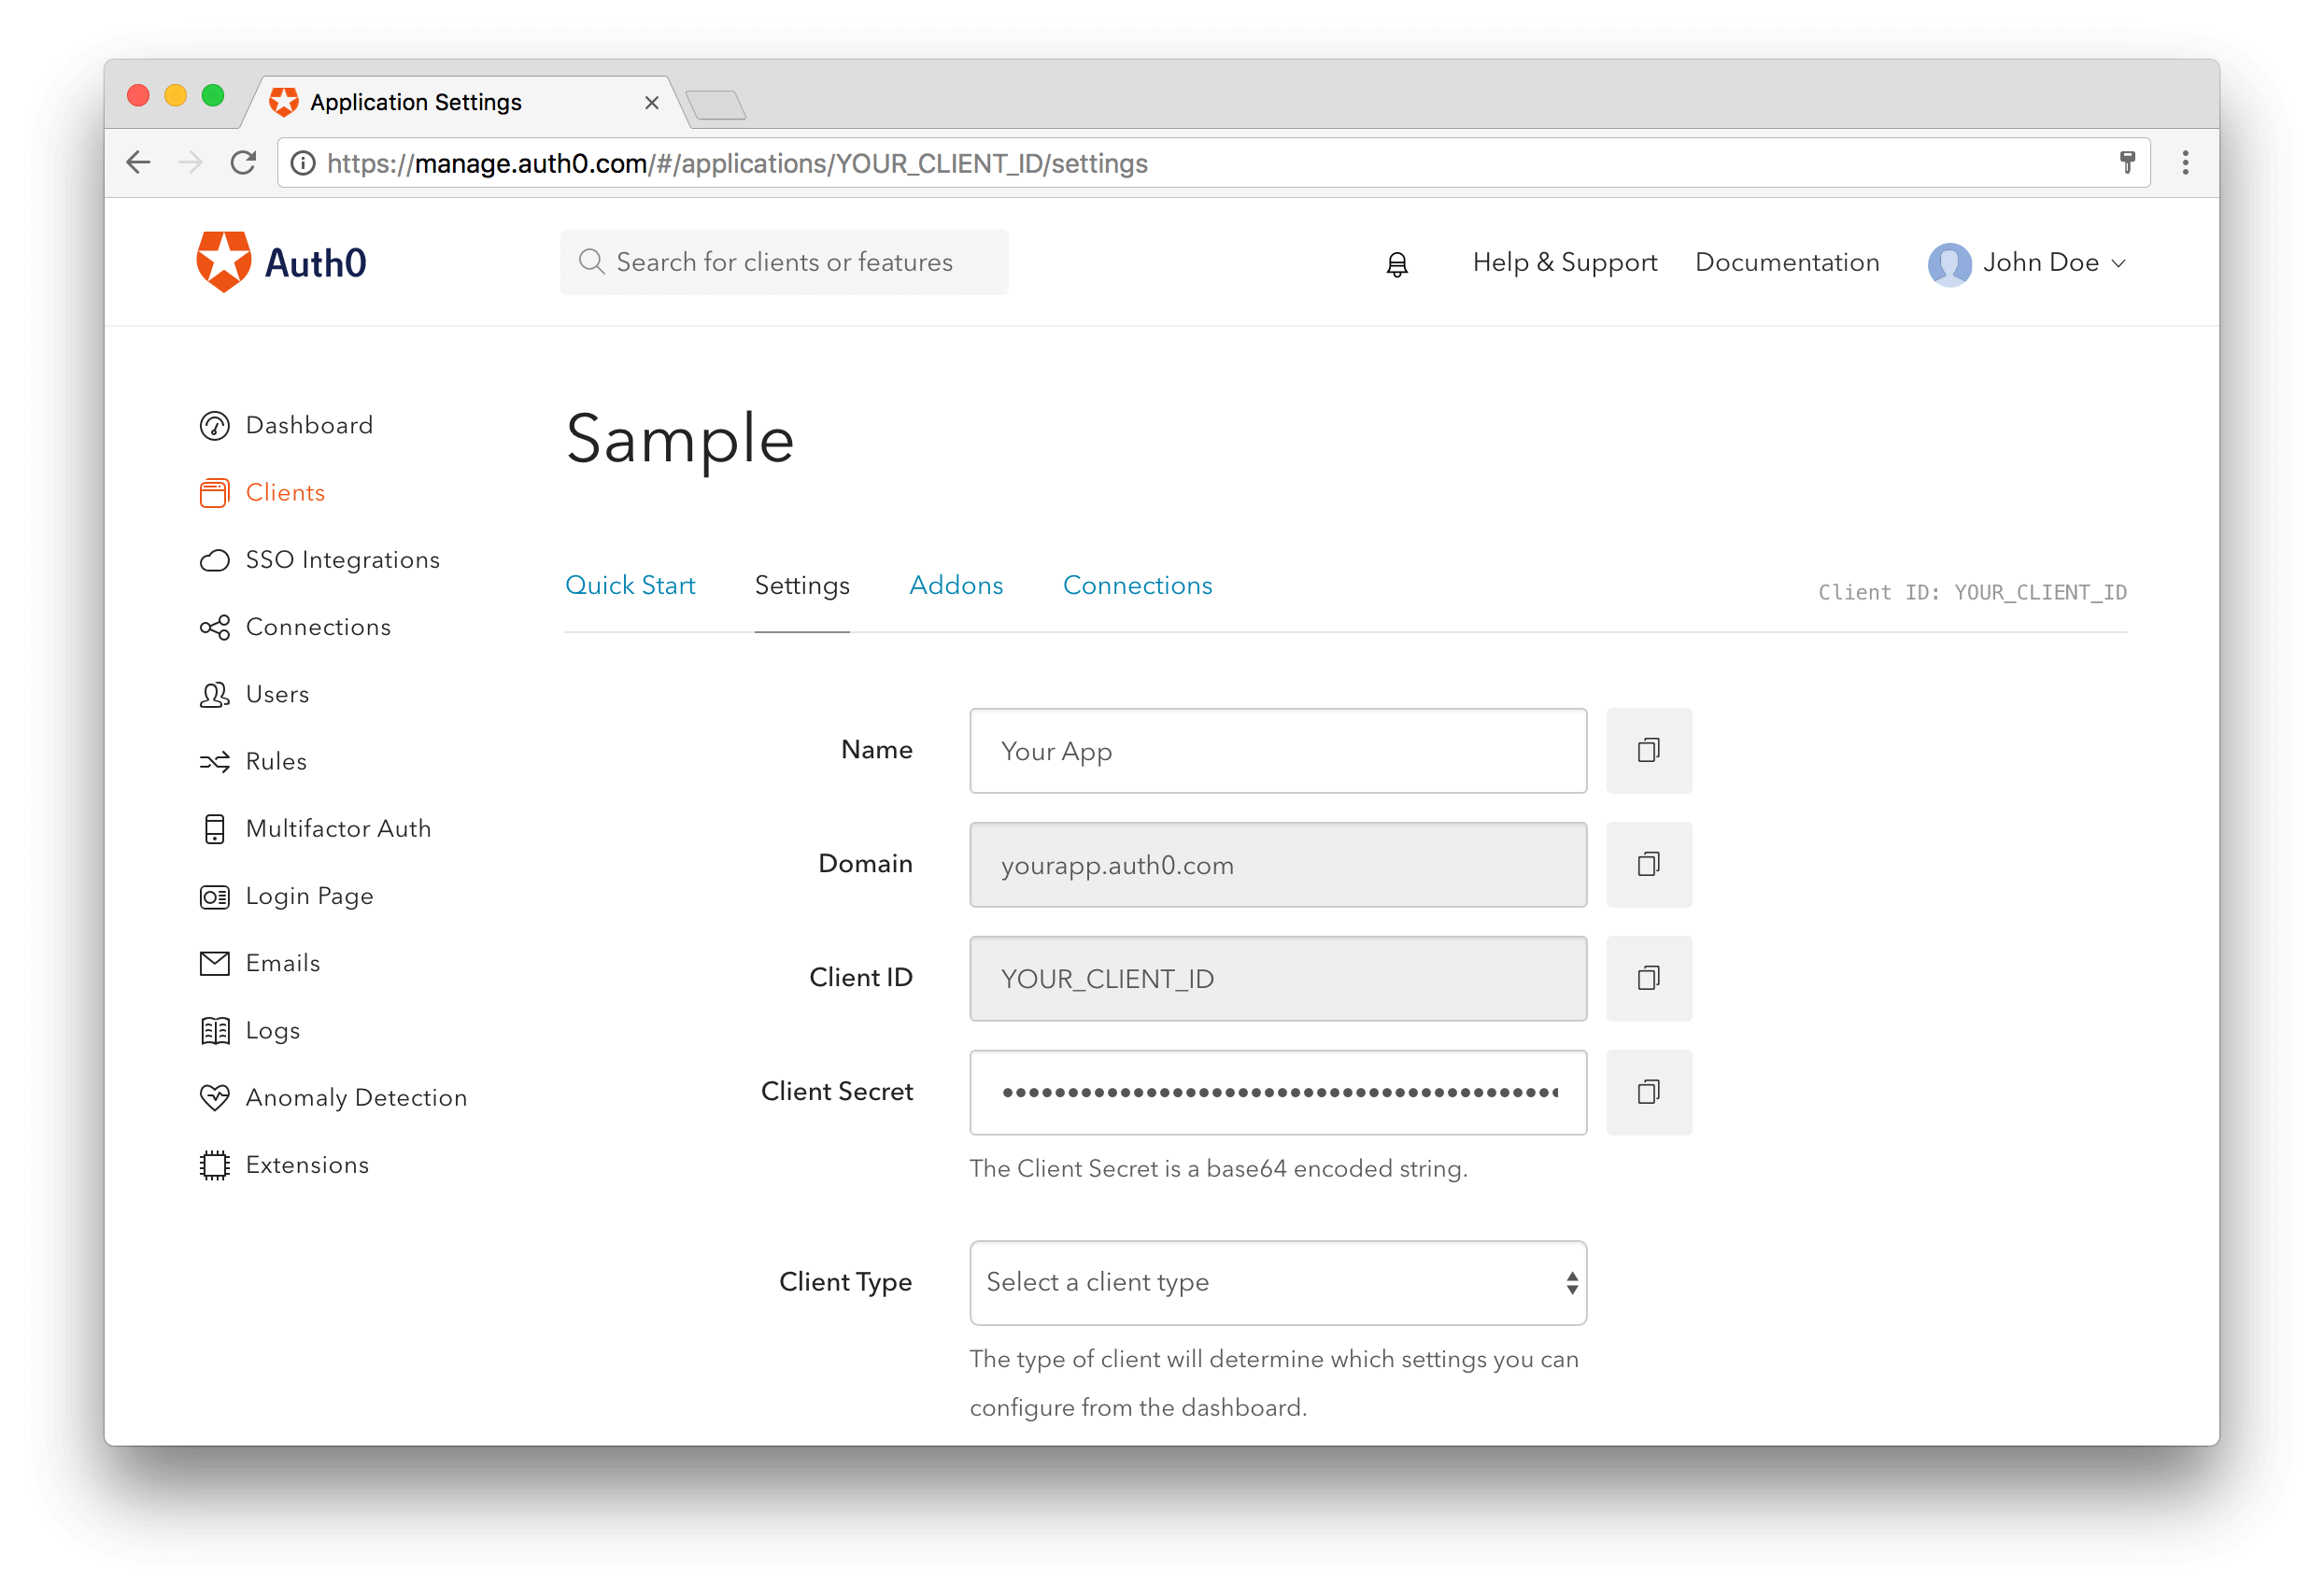
After creating your application, Auth0 will redirect you to its Quick Start tab. From there, you will have to click on the Settings tab to whitelist some URLs that Auth0 can call after the authentication process. This is a security measure implemented by Auth0 to avoid the leaking of sensitive data (like ID Tokens).
So, when you arrive at the Settings tab, search for the Allowed Callback URLs field and add http://localhost:3000/callback into it. For this tutorial, this single URL will suffice.
That's it! From the Auth0 perspective, you are good to go and can start securing your React application.
Dependencies and Setup
To secure your React application with Auth0, there are only three dependencies that you will need to install:
auth0.js: This is the default library to integrate web applications with Auth0.react-router: This is the de-facto library when it comes to routing management in React.react-router-dom: This is the extension to the previous library to web applications.
To install these dependencies, move into your project root and issue the following command:
npm install --save auth0-js react-router react-router-domNote: As you want the best security available, you are going to rely on the Auth0 login page. This method consists of redirecting users to a login page hosted by Auth0 that is easily customizable right from your Auth0 dashboard. If you want to learn why this is the best approach, check the Universal vs. Embedded Login article.
After installing all three libraries, you can create a service to handle the authentication process. You can call this service Auth and create it in the src/Auth/ directory with the following code:
// src/Auth/Auth.js
import auth0 from 'auth0-js';

export default class Auth {
  constructor() {
    this.auth0 = new auth0.WebAuth({
      // the following three lines MUST be updated
      domain: '<AUTH0_DOMAIN>',
      audience: 'https://<AUTH0_DOMAIN>/userinfo',
      clientID: '<AUTH0_CLIENT_ID>',
      redirectUri: 'http://localhost:3000/callback',
      responseType: 'token id_token',
      scope: 'openid profile',
    });

    this.getProfile = this.getProfile.bind(this);
    this.handleAuthentication = this.handleAuthentication.bind(this);
    this.isAuthenticated = this.isAuthenticated.bind(this);
    this.login = this.login.bind(this);
    this.logout = this.logout.bind(this);
    this.setSession = this.setSession.bind(this);
  }

  getProfile() {
    return this.profile;
  }

  handleAuthentication() {
    return new Promise((resolve, reject) => {
      this.auth0.parseHash((err, authResult) => {
        if (err) return reject(err);
        console.log(authResult);
        if (!authResult || !authResult.idToken) {
          return reject(err);
        }
        this.setSession(authResult);
        resolve();
      });
    });
  }

  isAuthenticated() {
    return new Date().getTime() < this.expiresAt;
  }

  login() {
    this.auth0.authorize();
  }

  logout() {
    // clear id token and expiration
    this.idToken = null;
    this.expiresAt = null;
  }

  setSession(authResult) {
    this.idToken = authResult.idToken;
    this.profile = authResult.idTokenPayload;
    // set the time that the id token will expire at
    this.expiresAt = authResult.expiresIn * 1000 + new Date().getTime();
  }
}
The Auth service that you just created contains functions to deal with different steps of the sign in/sign up process. The following list briefly summarizes these functions and what they do:
getProfile: This function returns the profile of the logged-in user.handleAuthentication: This function looks for the result of the authentication process in the URL hash. Then, the function processes the result with theparseHashmethod fromauth0-js.isAuthenticated: This function checks whether the expiry time for the user's ID token has passed.login: This function initiates the login process, redirecting users to the login page.logout: This function removes the user's tokens and expiry time.setSession: This function sets the user's ID token, profile, and expiry time.
Besides these functions, the class contains a field called auth0 that is initialized with values extracted from your Auth0 application. It is important to keep in mind that you have to replace the <AUTH0_DOMAIN> and <AUTH0_CLIENT_ID> placeholders that you are passing to the auth0 field.
Note: For the
<AUTH0_DOMAIN>placeholders, you will have to replace them with something similar toyour-subdomain.auth0.com, whereyour-subdomainis the subdomain you chose while creating your Auth0 account (or your Auth0 tenant). For the<AUTH0_CLIENT_ID>, you will have to replace it with the random string copied from the Client ID field of the Auth0 Application you created previously.
Since you are using the Auth0 login page, your users are taken away from the application. However, after they authenticate, users automatically return to the callback URL that you set up previously (i.e., http://localhost:3000/callback). This means that you need to create a component responsible for this route.
So, create a new file called Callback.js inside src/Callback (i.e., you will need to create the Callback directory) and insert the following code into it:
// src/Callback/Callback.js
import React from 'react';
import { withRouter } from 'react-router';

function Callback(props) {
  props.auth.handleAuthentication().then(() => {
    props.history.push('/');
  });

  return <div>Loading user profile.</div>;
}

export default withRouter(Callback);
This component, as you can see, is responsible for triggering the handleAuthentication process and, when the process ends, for pushing users to your home page. While this component processes the authentication result, it simply shows a message saying that it is loading the user profile.
After creating the Auth service and the Callback component, you can refactor your App component to integrate everything together:
// src/App.js

import React from 'react';
import { withRouter } from 'react-router';
import { Route } from 'react-router-dom';
import Callback from './Callback/Callback';
import './App.css';

function HomePage(props) {
  const { authenticated } = props;

  const logout = () => {
    props.auth.logout();
    props.history.push('/');
  };

  if (authenticated) {
    const { name } = props.auth.getProfile();
    return (
      <div>
        <h1>Howdy! Glad to see you back, {name}.</h1>
        <button onClick={logout}>Log out</button>
      </div>
    );
  }

  return (
    <div>
      <h1>I don't know you. Please, log in.</h1>
      <button onClick={props.auth.login}>Log in</button>
    </div>
  );
}

function App(props) {
  const authenticated = props.auth.isAuthenticated();

  return (
    <div className="App">
      <Route
        exact
        path="/callback"
        render={() => <Callback auth={props.auth} />}
      />
      <Route
        exact
        path="/"
        render={() => (
          <HomePage
            authenticated={authenticated}
            auth={props.auth}
            history={props.history}
          />
        )}
      />
    </div>
  );
}

export default withRouter(App);
In this case, you are actually defining two components inside the same file (just for the sake of simplicity). You are defining a HomePage component that shows a message with the name of the logged-in user (that is, when the user is logged in, of course), and a message telling unauthenticated users to log in.
Also, this file is making the App component responsible for deciding what component it must render. If the user is requesting the home page (i.e., the / route), the HomePage component is shown. If the user is requesting the callback page (i.e., /callback), then the Callback component is shown.
Note that you are using the Auth service in all your components (App, HomePage, and Callback) and also inside the Auth service. As such, you need to have a global instance for this service, and you have to include it in your App component.
So, to create this global Auth instance and to wrap things up, you will need to update your index.js file as shown here:
// src/index.js

import React from 'react';
import ReactDOM from 'react-dom';
import { BrowserRouter } from 'react-router-dom';
import Auth from './Auth/Auth';
import './index.css';
import App from './App';
import registerServiceWorker from './registerServiceWorker';

const auth = new Auth();

ReactDOM.render(
  <BrowserRouter>
    <App auth={auth} />
  </BrowserRouter>,
  document.getElementById('root'),
);
registerServiceWorker();
After that, you are done! You just finished securing your React application with Auth0. If you take your app for a spin now (npm start), you will be able to authenticate yourself with the help of Auth0, and you will be able to see your React app show your name (that is, if your identity provider does provide a name).
If you are interested in learning more, please, refer to the official React Quick Start guide to see, step by step, how to properly secure a React application. Besides the steps shown in this section, the guide also shows:
6. JpTweetQuote
"Access Tokenは秘密にしなければなりませんが、存続期間が短いため、セキュリティの考慮事項の制限も緩くなります。"
これをツイートする
7. asides/JavascriptAtAuth0
Aside: Auth0 Authentication with JavaScript
At Auth0, we make heavy use of full-stack JavaScript to help our customers to manage user identities, including password resets, creating, provisioning, blocking, and deleting users. Therefore, it must come as no surprise that using our identity management platform on JavaScript web apps is a piece of cake.
Auth0 offers a free tier to get started with modern authentication. Check it out, or sign up for a free Auth0 account here!
Then, go to the Applications section of the Auth0 Dashboard and click on "Create Application". On the dialog shown, set the name of your application and select Single Page Web Applications as the application type:
After the application has been created, click on "Settings" and take note of the domain and client id assigned to your application. In addition, set the Allowed Callback URLs and Allowed Logout URLs fields to the URL of the page that will handle login and logout responses from Auth0. In the current example, the URL of the page that will contain the code you are going to write (e.g. http://localhost:8080).
Now, in your JavaScript project, install the auth0-spa-js library like so:
npm install @auth0/auth0-spa-jsThen, implement the following in your JavaScript app:
import createAuth0Client from '@auth0/auth0-spa-js';

let auth0Client;

async function createClient() {
  return await createAuth0Client({
    domain: 'YOUR_DOMAIN',
    client_id: 'YOUR_CLIENT_ID',
  });
}

async function login() {
  await auth0Client.loginWithRedirect();
}

function logout() {
  auth0Client.logout();
}

async function handleRedirectCallback() {
  const isAuthenticated = await auth0Client.isAuthenticated();

  if (!isAuthenticated) {
    const query = window.location.search;
    if (query.includes('code=') && query.includes('state=')) {
      await auth0Client.handleRedirectCallback();
      window.history.replaceState({}, document.title, '/');
    }
  }

  await updateUI();
}

async function updateUI() {
  const isAuthenticated = await auth0Client.isAuthenticated();

  const btnLogin = document.getElementById('btn-login');
  const btnLogout = document.getElementById('btn-logout');

  btnLogin.addEventListener('click', login);
  btnLogout.addEventListener('click', logout);

  btnLogin.style.display = isAuthenticated ? 'none' : 'block';
  btnLogout.style.display = isAuthenticated ? 'block' : 'none';

  if (isAuthenticated) {
    const username = document.getElementById('username');
    const user = await auth0Client.getUser();

    username.innerText = user.name;
  }
}

window.addEventListener('load', async () => {
  auth0Client = await createClient();

  await handleRedirectCallback();
});
Replace the
YOUR_DOMAINandYOUR_CLIENT_IDplaceholders with the actual values for the domain and client id you found in your Auth0 Dashboard.
Then, create your UI with the following markup:
<p>Welcome <span id="username"></span></p>
<button type="submit" id="btn-login">Sign In</button>
<button type="submit" id="btn-logout" style="display:none;">Sign Out</button>
Your application is ready to authenticate with Auth0!
Check out the Auth0 SPA SDK documentation to learn more about authentication and authorization with JavaScript and Auth0.
8. asides/Angular
Aside: Authenticate an Angular App with Auth0
By integrating Auth0 in your Angular application, you will be able to manage user identities, including password resets, creating, provisioning, blocking, and deleting users. It requires just a few steps.
Set up an Auth0 application
First, sign up for a free account here. Then, set up an Auth0 application with the following steps:
- Go to your Applications section of the Auth0 Dashboard and click the "Create Application" button.
- Name your new app and select "Single Page Web Applications" as the application type.
- In the Settings for your new Auth0 app, add
http://localhost:4200to the Allowed Callback URLs, Allowed Web Origins, and Allowed Logout URLs. Click the "Save Changes" button. - If you'd like, you can set up some social connections. You can then enable them for your app in the Application options under the Connections tab. The example shown in the screenshot above uses username/password database, Facebook, Google, and Twitter.
Note: Set up your own social keys and do not leave social connections set to use Auth0 dev keys, or you will encounter issues with token renewal.
Add dependencies and configure
In the root folder of your Angular project, install the auth0-spa-js library by typing the following command in a terminal window:
npm install @auth0/auth0-spa-jsThen, edit the environment.ts file in the src/environments folder and add the CLIENT_DOMAIN and CLIENT_ID keys as follows:
// src/environments/environment.ts

export const environment = {
  production: false,
  auth: {
    CLIENT_DOMAIN: 'YOUR_DOMAIN',
    CLIENT_ID: 'YOUR_CLIENT_ID',
  },
};

export const config = {};
Replace the
YOUR_DOMAINandYOUR_CLIENT_IDplaceholders with the actual values for the domain and client id you found in your Auth0 Dashboard.
Add the authentication service
Authentication logic in your Angular application is handled with an AuthService authentication service. So, use Angular CLI to generate this new service by running the following command:
ng generate service authNow, open the src/app/auth.service.ts file and replace its content with the following:
//src/app/auth.service.ts

import { Injectable } from '@angular/core';
import createAuth0Client from '@auth0/auth0-spa-js';
import Auth0Client from '@auth0/auth0-spa-js/dist/typings/Auth0Client';
import {
  from,
  of,
  Observable,
  BehaviorSubject,
  combineLatest,
  throwError,
} from 'rxjs';
import { tap, catchError, concatMap, shareReplay } from 'rxjs/operators';
import { Router } from '@angular/router';
import { environment } from './../environments/environment';

@Injectable({
  providedIn: 'root',
})
export class AuthService {
  // Create an observable of Auth0 instance of client
  auth0Client$ = (from(
    createAuth0Client({
      domain: environment.auth.CLIENT_DOMAIN,
      client_id: environment.auth.CLIENT_ID,
      redirect_uri: `${window.location.origin}`,
    }),
  ) as Observable<Auth0Client>).pipe(
    shareReplay(1), // Every subscription receives the same shared value
    catchError((err) => throwError(err)),
  );
  // Define observables for SDK methods that return promises by default
  // For each Auth0 SDK method, first ensure the client instance is ready
  // concatMap: Using the client instance, call SDK method; SDK returns a promise
  // from: Convert that resulting promise into an observable
  isAuthenticated$ = this.auth0Client$.pipe(
    concatMap((client: Auth0Client) => from(client.isAuthenticated())),
    tap((res) => (this.loggedIn = res)),
  );
  handleRedirectCallback$ = this.auth0Client$.pipe(
    concatMap((client: Auth0Client) => from(client.handleRedirectCallback())),
  );
  // Create subject and public observable of user profile data
  private userProfileSubject$ = new BehaviorSubject<any>(null);
  userProfile$ = this.userProfileSubject$.asObservable();
  // Create a local property for login status
  loggedIn: boolean = null;

  constructor(private router: Router) {
    // On initial load, check authentication state with authorization server
    // Set up local auth streams if user is already authenticated
    this.localAuthSetup();
    // Handle redirect from Auth0 login
    this.handleAuthCallback();
  }

  // When calling, options can be passed if desired
  // https://auth0.github.io/auth0-spa-js/classes/auth0client.html#getuser
  getUser$(options?): Observable<any> {
    return this.auth0Client$.pipe(
      concatMap((client: Auth0Client) => from(client.getUser(options))),
      tap((user) => this.userProfileSubject$.next(user)),
    );
  }

  private localAuthSetup() {
    // This should only be called on app initialization
    // Set up local authentication streams
    const checkAuth$ = this.isAuthenticated$.pipe(
      concatMap((loggedIn: boolean) => {
        if (loggedIn) {
          // If authenticated, get user and set in app
          // NOTE: you could pass options here if needed
          return this.getUser$();
        }
        // If not authenticated, return stream that emits 'false'
        return of(loggedIn);
      }),
    );
    checkAuth$.subscribe();
  }

  login(redirectPath: string = '/') {
    // A desired redirect path can be passed to login method
    // (e.g., from a route guard)
    // Ensure Auth0 client instance exists
    this.auth0Client$.subscribe((client: Auth0Client) => {
      // Call method to log in
      client.loginWithRedirect({
        redirect_uri: `${window.location.origin}`,
        appState: { target: redirectPath },
      });
    });
  }

  private handleAuthCallback() {
    // Call when app reloads after user logs in with Auth0
    const params = window.location.search;
    if (params.includes('code=') && params.includes('state=')) {
      let targetRoute: string; // Path to redirect to after login processed
      const authComplete$ = this.handleRedirectCallback$.pipe(
        // Have client, now call method to handle auth callback redirect
        tap((cbRes) => {
          // Get and set target redirect route from callback results
          targetRoute =
            cbRes.appState && cbRes.appState.target
              ? cbRes.appState.target
              : '/';
        }),
        concatMap(() => {
          // Redirect callback complete; get user and login status
          return combineLatest([this.getUser$(), this.isAuthenticated$]);
        }),
      );
      // Subscribe to authentication completion observable
      // Response will be an array of user and login status
      authComplete$.subscribe(([user, loggedIn]) => {
        // Redirect to target route after callback processing
        this.router.navigate([targetRoute]);
      });
    }
  }

  logout() {
    // Ensure Auth0 client instance exists
    this.auth0Client$.subscribe((client: Auth0Client) => {
      // Call method to log out
      client.logout({
        client_id: environment.auth.CLIENT_ID,
        returnTo: `${window.location.origin}`,
      });
    });
  }
}
This service provides the properties and methods necessary to manage authentication across your Angular application.
Add the login and logout buttons
To add a new component that allows you to authenticate with Auth0, run the following command in a terminal window:
ng generate component login-buttonOpen the src/app/login-button/login-button.component.ts file and replace its content with the following:
//src/app/login-button/login-button.component.ts

import { Component, OnInit } from '@angular/core';
import { AuthService } from '../auth.service';

@Component({
  selector: 'app-login-button',
  templateUrl: './login-button.component.html',
  styleUrls: ['./login-button.component.css'],
})
export class LoginButtonComponent implements OnInit {
  constructor(public auth: AuthService) {}

  ngOnInit() {}
}
Next, define the component's UI by replacing the content of the src/app/login-button/login-button.component.html with the following markup:
<!-- src/app/login-button/login-button.component.html -->
<div>
  <button (click)="auth.login()" *ngIf="!auth.loggedIn">Log In</button>
  <button (click)="auth.logout()" *ngIf="auth.loggedIn">Log Out</button>
</div>
Finally, put the <app-login-button></app-login-button> tag within the src/app/app.component.html file, wherever you want the component to appear.
Your Angular application is ready to authenticate with Auth0!
Check out the Angular Quickstart to learn more about integrating Auth0 with Angular applications.
9. ebook-ads/OidcHandbook
Learn about the de facto standard for handling authentication in the modern world.
DOWNLOAD THE FREE EBOOK
10. asides/Node
Aside: Securing Node.js Applications with Auth0
Securing Node.js applications with Auth0 is easy and brings a lot of great features to the table. With Auth0, we only have to write a few lines of code to get solid identity management solution, single sign-on, support for social identity providers (like Facebook, GitHub, Twitter, etc.), and support for enterprise identity providers (like Active Directory, LDAP, SAML, custom, etc.).
In the following sections, we are going to learn how to use Auth0 to secure Node.js APIs written with Express.
Creating the Express API
Let's start by defining our Node.js API. With Express and Node.js, we can do this in two simple steps. The first one is to use NPM to install three dependencies: npm i express body-parser cors.
Note: If we are starting from scratch, we will have to initialize an NPM project first:
npm init -y. This will make NPM create a new project in the current directory. As such, before running this command, we have to create a new directory for our new project and move into it.
The second one is to create a Node.js script with the following code (we can call it index.js):
// importing dependencies
const express = require('express');
const bodyParser = require('body-parser');
const cors = require('cors');

// configuring Express
const app = express();
app.use(bodyParser.json());
app.use(cors());

// defining contacts array
const contacts = [
  { name: 'Bruno Krebs', phone: '+555133334444' },
  { name: 'John Doe', phone: '+191843243223' },
];

// defining endpoints to manipulate the array of contacts
app.get('/contacts', (req, res) => res.send(contacts));
app.post('/contacts', (req, res) => {
  contacts.push(req.body);
  res.send();
});

// starting Express
app.listen(3000, () => console.log('Example app listening on port 3000!'));
The code above creates the Express application and adds two middleware to it: body-parser to parse JSON requests, and cors to signal that the app accepts requests from any origin. The app also registers two endpoints on Express to deal with POST and GET requests. Both endpoints use the contacts array as some sort of in-memory database.
Now, we can run and test our application by issuing node index in the project root and then by submitting requests to it. For example, with cURL, we can send a GET request by issuing curl localhost:3000/contacts. This command will output the items in the contacts array.
Registering the API at Auth0
After creating our application, we can focus on securing it. Let's start by registering an API on Auth0 to represent our app. To do this, let's head to the API section of our management dashboard (we can create a free account) if needed) and click on "Create API". On the dialog that appears, we can name our API as "Contacts API" (the name isn't really important) and identify it as https://contacts.blog-samples.com/ (we will use this value later).
Securing Express with Auth0
Now that we have registered the API in our Auth0 account, let's secure the Express API with Auth0. Let's start by installing three dependencies with NPM: npm i express-jwt jwks-rsa. Then, let's create a file called auth0.js and use these dependencies:
const jwt = require('express-jwt');
const jwksRsa = require('jwks-rsa');

module.exports = jwt({
  // Fetch the signing key based on the KID in the header and
  // the singing keys provided by the JWKS endpoint.
  secret: jwksRsa.expressJwtSecret({
    cache: true,
    rateLimit: true,
    jwksUri: `https://${process.env.AUTH0_DOMAIN}/.well-known/jwks.json`,
  }),

  // Validate the audience and the issuer.
  audience: process.env.AUTH0_AUDIENCE,
  issuer: `https://${process.env.AUTH0_DOMAIN}/`,
  algorithms: ['RS256'],
});
The goal of this script is to export an Express middleware that guarantees that requests have an access_token issued by a trust-worthy party, in this case Auth0. Note that this script expects to find two environment variables:
AUTH0_AUDIENCE: the identifier of our API (https://contacts.mycompany.com/)AUTH0_DOMAIN: our domain at Auth0 (in my casebk-samples.auth0.com)
We will set these variable soons, but it is important to understand that the domain variable defines how the middleware finds the signing keys.
After creating this middleware, we can update our index.js file to import and use it:
// ... other require statements ...
const auth0 = require('./auth0');

// ... app definition and contacts array ...

// redefining both endpoints
app.get('/contacts', auth0(), (req, res) => res.send(contacts));
app.post('/contacts', auth0(), (req, res) => {
  contacts.push(req.body);
  res.send();
});

// ... app.listen ...
In this case, we have replaced the previous definition of our endpoints to use the new middleware that enforces requests to be sent with valid access tokens.
Running the application now is slightly different, as we need to set the environment variables:
export AUTH0_DOMAIN=blog-samples.auth0.com
export AUTH0_AUDIENCE="https://contacts.blog-samples.com/"
node index
After running the API, we can test it to see if it is properly secured. So, let's open a terminal and issue the following command:
curl localhost:3000/contactsIf we set up everything together, we will get a response from the server saying that "no authorization token was found".
Now, to be able to interact with our endpoints again, we will have to obtain an access token from Auth0. There are multiple ways to do this and the strategy that we will use depends on the type of the client application we are developing. For example, if we are developing a Single Page Application (SPA), we will use what is called the Implicit Grant. If we are developing a mobile application, we will use the Authorization Code Grant Flow with PKCE. There are other flows available at Auth0. However, for a simple test like this one, we can use our Auth0 dashboard to get one.
Therefore, we can head back to the APIs section in our Auth0 dashboard, click on the API we created before, and then click on the Test section of this API. There, we will find a button called Copy Token. Let's click on this button to copy an access token to our clipboard.
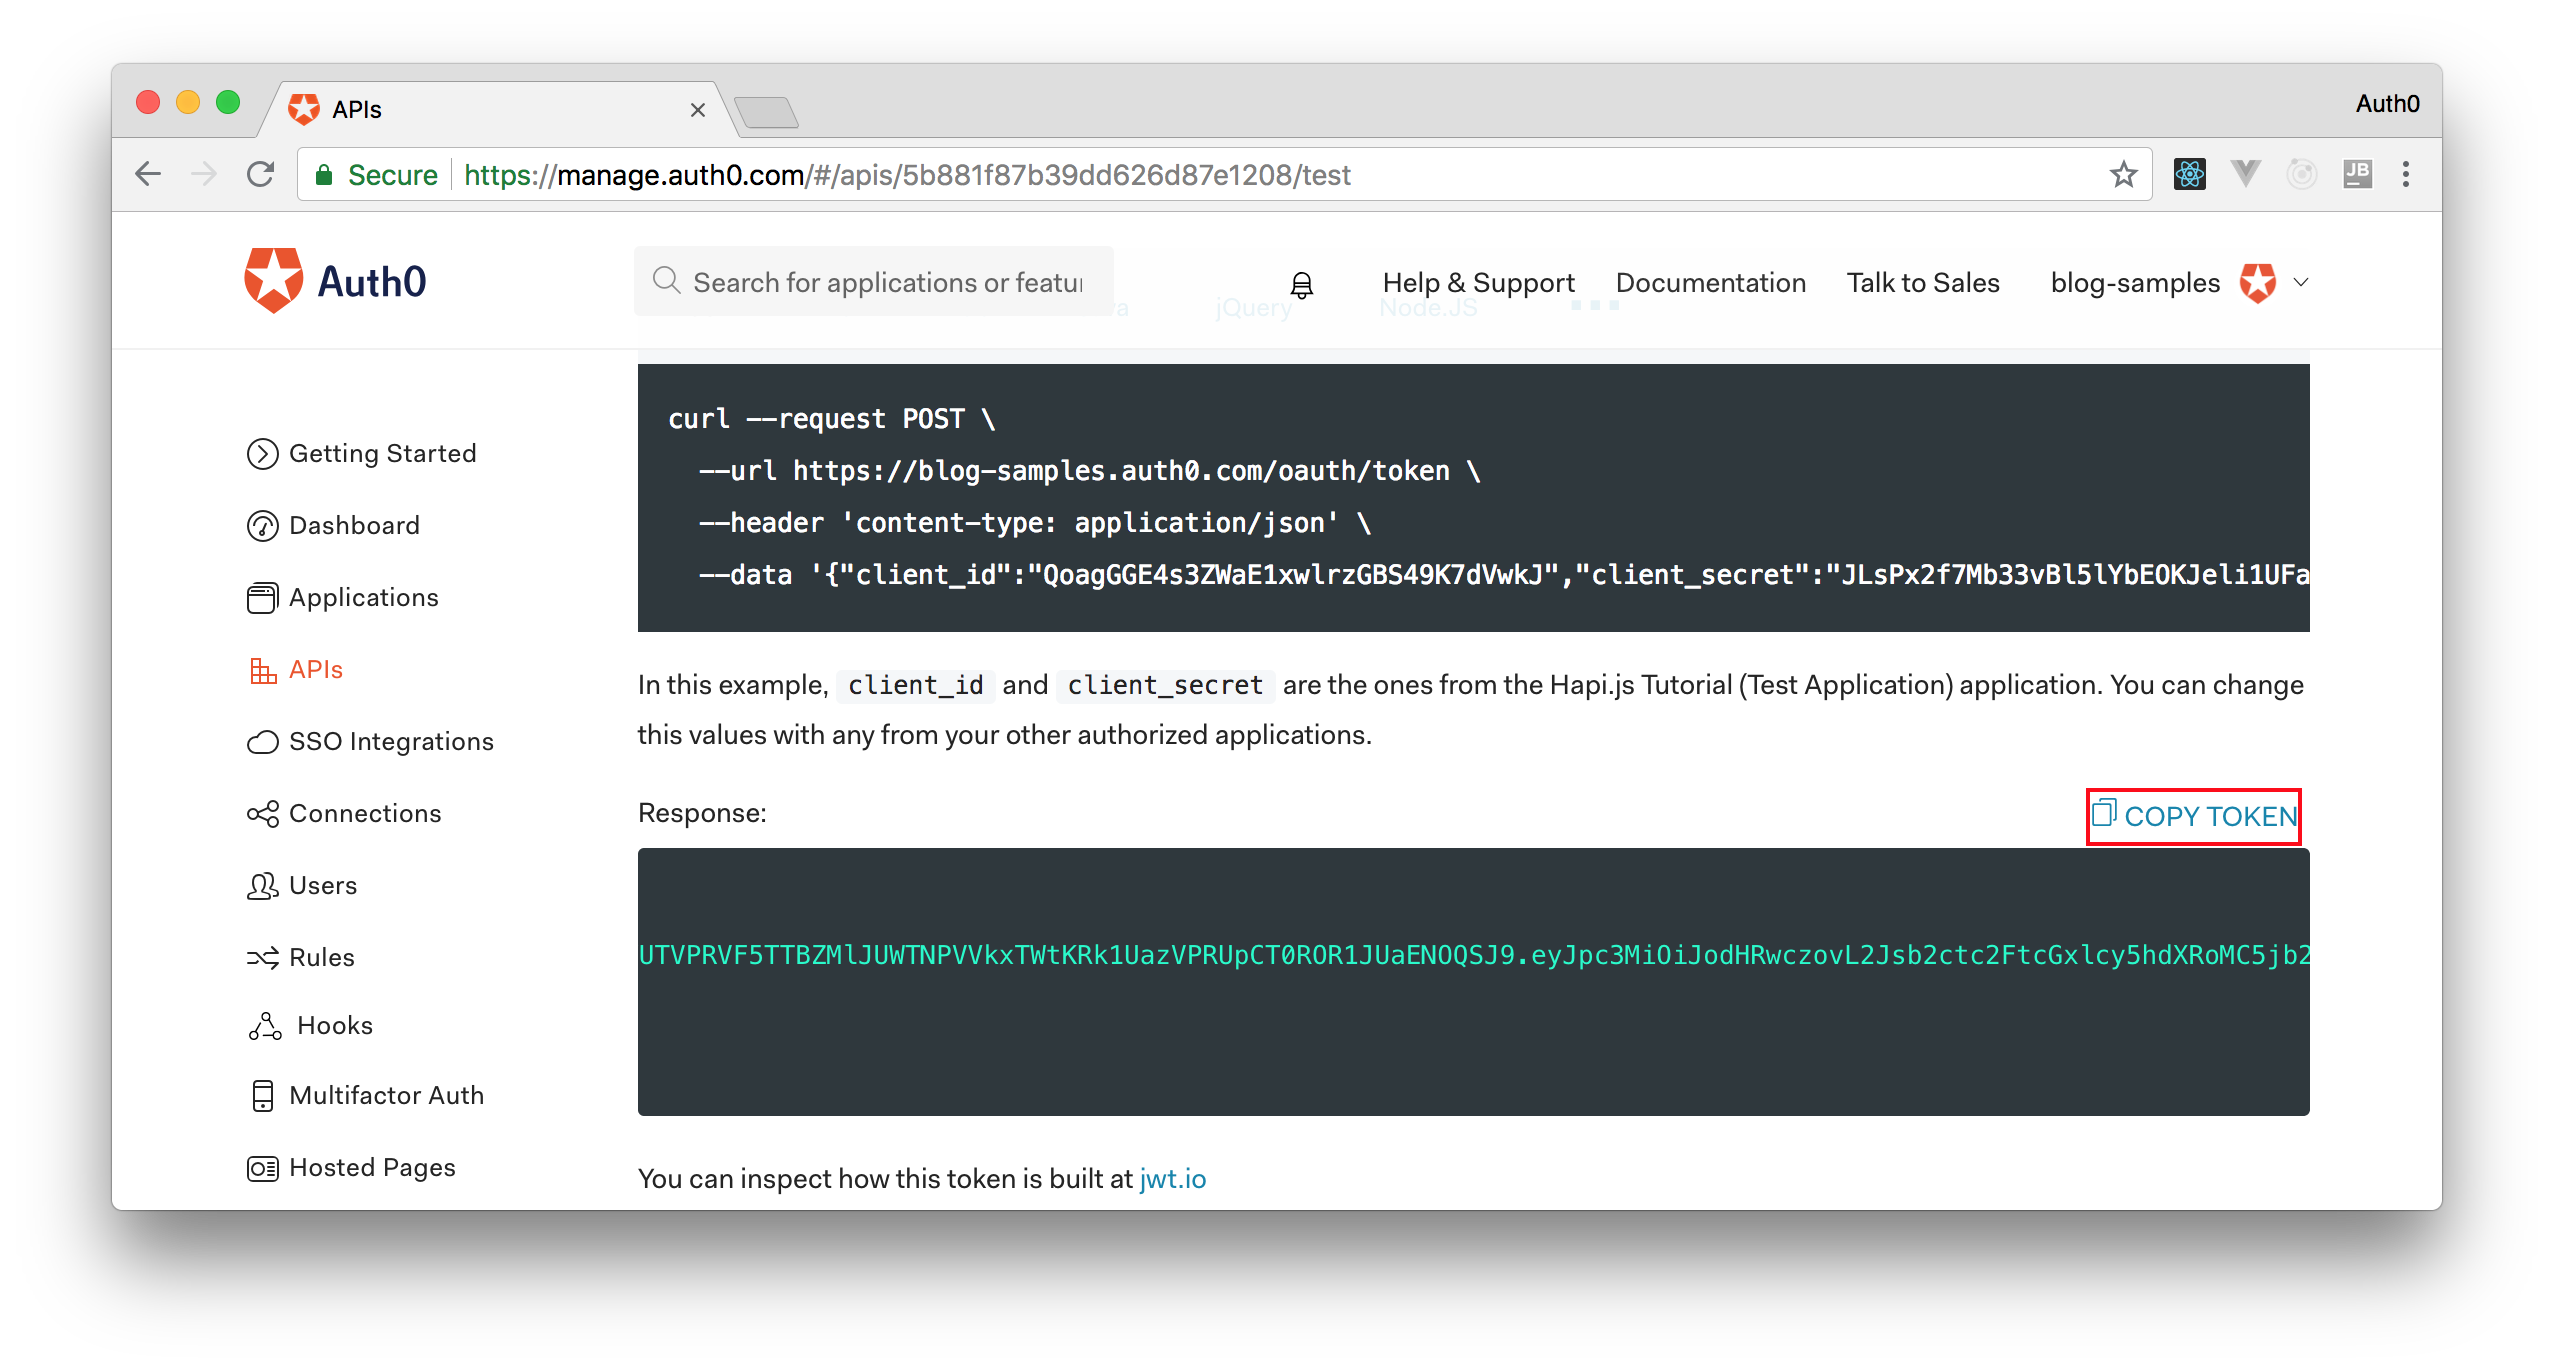
After copying this token, we can open a terminal and issue the following commands:
# create a variable with our token
ACCESS_TOKEN=<OUR_ACCESS_TOKEN>

# use this variable to fetch contacts
curl -H 'Authorization: Bearer '$ACCESS_TOKEN http://localhost:3000/contacts/
Note: We will have to replace
<OUR_ACCESS_TOKEN>with the token we copied from our dashboard.
As we are now using our access token on the requests we are sending to our API, we will manage to get the list of contacts again.
That's how we secure our Node.js backend API. Easy, right?
11. asides/SpringBoot
Aside: Securing Spring APIs with Auth0
Securing Spring Boot APIs with Auth0 is easy and brings a lot of great features to the table. With Auth0, we only have to write a few lines of code to get solid identity management solution, single sign-on, support for social identity providers (like Facebook, GitHub, Twitter, etc.), and support for enterprise identity providers (like Active Directory, LDAP, SAML, custom, etc.).
In the following sections, we are going to learn how to use Auth0 to secure APIs written with Spring Boot.
Creating the API
First, we need to create an API on our free Auth0 account. To do that, we have to go to the APIs section of the management dashboard and click on "Create API". On the dialog that appears, we can name our API as "Contacts API" (the name isn't really important) and identify it as https://contacts.blog-samples.com (we will use this value later).
Registering the Auth0 Dependency
The second step is to import a dependency called auth0-spring-security-api. This can be done on a Maven project by including the following configuration to pom.xml (it's not harder to do this on Gradle, Ivy, and so on):
<project ...>
    <!-- everything else ... -->
    <dependencies>
        <!-- other dependencies ... -->
        <dependency>
            <groupId>com.auth0</groupId>
            <artifactId>auth0-spring-security-api</artifactId>
            <version>1.0.0-rc.3</version>
        </dependency>
    </dependencies>
</project>
Integrating Auth0 with Spring Security
The third step consists of extending the WebSecurityConfigurerAdapter class. In this extension, we use JwtWebSecurityConfigurer to integrate Auth0 and Spring Security:
package com.auth0.samples.secure;

import com.auth0.spring.security.api.JwtWebSecurityConfigurer;
import org.springframework.beans.factory.annotation.Value;
import org.springframework.context.annotation.Configuration;
import org.springframework.security.config.annotation.method.configuration.EnableGlobalMethodSecurity;
import org.springframework.security.config.annotation.web.builders.HttpSecurity;
import org.springframework.security.config.annotation.web.configuration.EnableWebSecurity;
import org.springframework.security.config.annotation.web.configuration.WebSecurityConfigurerAdapter;

@Configuration
@EnableWebSecurity
@EnableGlobalMethodSecurity(prePostEnabled = true)
public class SecurityConfig extends WebSecurityConfigurerAdapter {
    @Value(value = "${auth0.apiAudience}")
    private String apiAudience;
    @Value(value = "${auth0.issuer}")
    private String issuer;

    @Override
    protected void configure(HttpSecurity http) throws Exception {
        JwtWebSecurityConfigurer
                .forRS256(apiAudience, issuer)
                .configure(http)
                .cors().and().csrf().disable().authorizeRequests()
                .anyRequest().permitAll();
    }
}
As we don't want to hard code credentials in the code, we make SecurityConfig depend on two environment properties:
auth0.apiAudience: This is the value that we set as the identifier of the API that we created at Auth0 (https://contacts.blog-samples.com).auth0.issuer: This is our domain at Auth0, including the HTTP protocol. For example:https://blog-samples.auth0.com/.
Let's set them in a properties file on our Spring application (e.g. application.properties):
auth0.issuer:https://blog-samples.auth0.com/
auth0.apiAudience:https://contacts.blog-samples.com/
Securing Endpoints with Auth0
After integrating Auth0 and Spring Security, we can easily secure our endpoints with Spring Security annotations:
package com.auth0.samples.secure;

import com.google.common.collect.Lists;
import org.springframework.security.access.prepost.PreAuthorize;
import org.springframework.web.bind.annotation.GetMapping;
import org.springframework.web.bind.annotation.PostMapping;
import org.springframework.web.bind.annotation.RequestBody;
import org.springframework.web.bind.annotation.RequestMapping;
import org.springframework.web.bind.annotation.RestController;

import java.util.List;

@RestController
@RequestMapping(value = "/contacts/")
public class ContactController {
    private static final List<Contact> contacts = Lists.newArrayList(
            Contact.builder().name("Bruno Krebs").phone("+5551987654321").build(),
            Contact.builder().name("John Doe").phone("+5551888884444").build()
    );

    @GetMapping
    public List<Contact> getContacts() {
        return contacts;
    }

    @PostMapping
    public void addContact(@RequestBody Contact contact) {
        contacts.add(contact);
    }
}
Now, to be able to interact with our endpoints, we will have to obtain an access token from Auth0. There are multiple ways to do this and the strategy that we will use depends on the type of the client application we are developing. For example, if we are developing a Single Page Application (SPA), we will use what is called the Implicit Grant. If we are developing a mobile application, we will use the Authorization Code Grant Flow with PKCE. There are other flows available at Auth0. However, for a simple test like this one, we can use our Auth0 dashboard to get one.
Therefore, we can head back to the APIs section in our Auth0 dashboard, click on the API we created before, and then click on the Test section of this API. There, we will find a button called Copy Token. Let's click on this button to copy an access token to our clipboard.

After copying this token, we can open a terminal and issue the following commands:
# create a variable with our token
ACCESS_TOKEN=<OUR_ACCESS_TOKEN>

# use this variable to fetch contacts
curl -H 'Authorization: Bearer '$ACCESS_TOKEN http://localhost:8080/contacts/
Note: We will have to replace
<OUR_ACCESS_TOKEN>with the token we copied from our dashboard.
As we are now using our access token on the requests we are sending to our API, we will manage to get the list of contacts again.
That's how we secure our Node.js backend API. Easy, right?
12. asides/MarketBasketLinksAbout
Aside: Securing Applications with Auth0
Are you building a B2C, B2B, or B2E tool? Auth0, can help you focus on what matters the most to you, the special features of your product. Auth0 can improve your product's security with state-of-the-art features like passwordless, breached password surveillance, and multifactor authentication.
We offer a generous free tier so you can get started with modern authentication.
13. asides/Python
Securing Python APIs with Auth0
Securing Python APIs with Auth0 is very easy and brings a lot of great features to the table. With Auth0, we only have to write a few lines of code to get:
- A solid identity management solution, including single sign-on
- User management
- Support for social identity providers (like Facebook, GitHub, Twitter, etc.)
- Enterprise identity providers (Active Directory, LDAP, SAML, etc.)
- Our own database of users
For example, to secure Python APIs written with Flask, we can simply create a requires_auth decorator:
# Format error response and append status code

def get_token_auth_header():
    """Obtains the access token from the Authorization Header
    """
    auth = request.headers.get("Authorization", None)
    if not auth:
        raise AuthError({"code": "authorization_header_missing",
                        "description":
                            "Authorization header is expected"}, 401)

    parts = auth.split()

    if parts[0].lower() != "bearer":
        raise AuthError({"code": "invalid_header",
                        "description":
                            "Authorization header must start with"
                            " Bearer"}, 401)
    elif len(parts) == 1:
        raise AuthError({"code": "invalid_header",
                        "description": "Token not found"}, 401)
    elif len(parts) > 2:
        raise AuthError({"code": "invalid_header",
                        "description":
                            "Authorization header must be"
                            " Bearer token"}, 401)

    token = parts[1]
    return token

def requires_auth(f):
    """Determines if the access token is valid
    """
    @wraps(f)
    def decorated(*args, **kwargs):
        token = get_token_auth_header()
        jsonurl = urlopen("https://"+AUTH0_DOMAIN+"/.well-known/jwks.json")
        jwks = json.loads(jsonurl.read())
        unverified_header = jwt.get_unverified_header(token)
        rsa_key = {}
        for key in jwks["keys"]:
            if key["kid"] == unverified_header["kid"]:
                rsa_key = {
                    "kty": key["kty"],
                    "kid": key["kid"],
                    "use": key["use"],
                    "n": key["n"],
                    "e": key["e"]
                }
        if rsa_key:
            try:
                payload = jwt.decode(
                    token,
                    rsa_key,
                    algorithms=ALGORITHMS,
                    audience=API_AUDIENCE,
                    issuer="https://"+AUTH0_DOMAIN+"/"
                )
            except jwt.ExpiredSignatureError:
                raise AuthError({"code": "token_expired",
                                "description": "token is expired"}, 401)
            except jwt.JWTClaimsError:
                raise AuthError({"code": "invalid_claims",
                                "description":
                                    "incorrect claims,"
                                    "please check the audience and issuer"}, 401)
            except Exception:
                raise AuthError({"code": "invalid_header",
                                "description":
                                    "Unable to parse authentication"
                                    " token."}, 400)

            _app_ctx_stack.top.current_user = payload
            return f(*args, **kwargs)
        raise AuthError({"code": "invalid_header",
                        "description": "Unable to find appropriate key"}, 400)
    return decorated
Then use it in our endpoints:
# Controllers API

# This doesn't need authentication
@app.route("/ping")
@cross_origin(headers=['Content-Type', 'Authorization'])
def ping():
    return "All good. You don't need to be authenticated to call this"

# This does need authentication
@app.route("/secured/ping")
@cross_origin(headers=['Content-Type', 'Authorization'])
@requires_auth
def secured_ping():
    return "All good. You only get this message if you're authenticated"
To learn more about securing Python APIs with Auth0, take a look at this tutorial. Alongside with tutorials for backend technologies (like Python, Java, and PHP), the Auth0 Docs webpage also provides tutorials for Mobile/Native apps and Single-Page applications.
14. asides/Android
Aside: Securing Android Apps with Auth0
Securing applications with Auth0 is very easy and brings a lot of great features to the table. With Auth0, we only have to write a few lines of code to get solid identity management solution, single sign-on, support for social identity providers (like Facebook, GitHub, Twitter, etc.), and support for enterprise identity providers (Active Directory, LDAP, SAML, custom, etc.).
In the following sections, we are going to learn how to use Auth0 to secure Android apps. As we will see, the process is simple and fast.
Dependencies
To secure Android apps with Auth0, we just need to import the Auth0.Android library. This library is a toolkit that let us communicate with many of the basic Auth0 API functions in a neat way.
To import this library, we have to include the following dependency in our build.gradle file:
dependencies {
    compile 'com.auth0.android:auth0:1.12.0'
}
After that, we need to open our app's AndroidManifest.xml file and add the following permission:
<uses-permission android:name="android.permission.INTERNET" />Create an Auth0 Application
After importing the library and adding the permission, we need to register the application in our Auth0 dashboard. By the way, if we don't have an Auth0 account, this is a great time to create a free one .
In the Auth0 dashboard, we have to go to Applications and then click on the Create Application button. In the form that is shown, we have to define a name for the application and select the Native type for it. After that, we can hit the Create button. This will lead us to a screen similar to the following one:

On this screen, we have to configure a callback URL. This is a URL in our Android app where Auth0 redirects the user after they have authenticated.
We need to whitelist the callback URL for our Android app in the Allowed Callback URLs field in the Settings page of our Auth0 application. If we do not set any callback URL, our users will see a mismatch error when they log in.
demo://bkrebs.auth0.com/android/OUR_APP_PACKAGE_NAME/callbackLet's not forget to replace OURAPPPACKAGE_NAME with our Android application's package name. We can find this name in the applicationId attribute of the app/build.gradle file.
Set Credentials
Our Android application needs some details from Auth0 to communicate with it. We can get these details from the Settings section for our Auth0 application in the Auth0 dashboard.
We need the following information:
- Client ID
- Domain
It's suggested that we do not hardcode these values as we may need to change them in the future. Instead, let's use String Resources, such as @string/com_auth0_domain, to define the values.
Let's edit our res/values/strings.xml file as follows:
<resources>
    <string name="com_auth0_client_id">2qu4Cxt4h2x9In7Cj0s7Zg5FxhKpjooK</string>
    <string name="com_auth0_domain">bkrebs.auth0.com</string>
</resources>
These values have to be replaced by those found in the Settings section of our Auth0 application.
Android Login
To implement the login functionality in our Android app, we need to add manifest placeholders required by the SDK. These placeholders are used internally to define an intent-filter that captures the authentication callback URL configured previously.
To add the manifest placeholders, let's add the next line:
apply plugin: 'com.android.application'
android {
    compileSdkVersion 25
    buildToolsVersion "25.0.3"
    defaultConfig {
        applicationId "com.auth0.samples"
        minSdkVersion 15
        targetSdkVersion 25
        //...

        //---> Add the next line
        manifestPlaceholders = [auth0Domain: "@string/com_auth0_domain", auth0Scheme: "demo"]
        //<---
    }
}
After that, we have to run Sync Project with Gradle Files inside Android Studio or execute ./gradlew clean assembleDebug from the command line.
Start the Authentication Process
The Auth0 login page is the easiest way to set up authentication in our application. It's recommended using the Auth0 login page for the best experience, best security, and the fullest array of features.
Now we have to implement a method to start the authentication process. Let's call this method login and add it to our MainActivity class.
private void login() {
    Auth0 auth0 = new Auth0(this);
    auth0.setOIDCConformant(true);
    WebAuthProvider.init(auth0)
                  .withScheme("demo")
                  .withAudience(String.format("https://%s/userinfo", getString(R.string.com_auth0_domain)))
                  .start(MainActivity.this, new AuthCallback() {
                      @Override
                      public void onFailure(@NonNull Dialog dialog) {
                        // Show error Dialog to user
                      }

                      @Override
                      public void onFailure(AuthenticationException exception) {
                        // Show error to user
                      }

                      @Override
                      public void onSuccess(@NonNull Credentials credentials) {
                          // Store credentials
                          // Navigate to your main activity
                      }
                });
}
As we can see, we had to create a new instance of the Auth0 class to hold user credentials. We can use a constructor that receives an Android Context if we have added the following String resources:
R.string.com_auth0_client_idR.string.com_auth0_domain
If we prefer to hardcode the resources, we can use the constructor that receives both strings. Then, we can use the WebAuthProvider class to authenticate with any connection enabled on our application in the Auth0 dashboard.
After we call the WebAuthProvider#start function, the browser launches and shows the Auth0 login page. Once the user authenticates, the callback URL is called. The callback URL contains the final result of the authentication process.
Capture the Result
After authentication, the browser redirects the user to our application with the authentication result. The SDK captures the result and parses it.
We do not need to declare a specific
intent-filterfor our activity because we have defined the manifest placeholders with we Auth0 Domain and Scheme values.
The AndroidManifest.xml file should look like this:
<manifest xmlns:android="http://schemas.android.com/apk/res/android"
    package="com.auth0.samples">
    <uses-permission android:name="android.permission.INTERNET" />
    <application
        android:allowBackup="true"
        android:icon="@mipmap/ic_launcher"
        android:label="@string/app_name"
        android:theme="@style/AppTheme">
        <activity android:name="com.auth0.samples.MainActivity">
          <intent-filter>
              <action android:name="android.intent.action.MAIN" />
              <category android:name="android.intent.category.LAUNCHER" />
          </intent-filter>
        </activity>
    </application>
</manifest>
That's it, we now have an Android application secured with Auth0. To learn more about this, we can check the official documentation. There, we will find more topics like Session Handling and Fetching User Profile.
15. asides/JpAndroid
補足:Android アプリを Auth0 でセキュアにする
アプリケーションを Auth0 でセキュアにすることは非常に簡単で、たくさんの素晴らしい機能を提供します。Auth0 を使うと、数行のコード行を書くだけで、強固なID 管理ソリューション、シングル サインオン、ソーシャル ID プロバイダー(Facebook、GitHub、Twitter など)のサポート、およびエンタープライズ ID プロバイダー(Active Directory、LDAP、SAML、カスタムなど)のサポートを得ることができます。
以下のセクションでは、Android アプリをセキュアにする Auth0 を使用する方法を学んでいきます。ご覧のように、そのプロセスはシンプルで素早くできます。
依存関係
Android アプリを Auth0 でセキュアにするには、Auth0.Android ライブラリをインポートするだけです。このライブラリはツールキットで、基本的な多数の Auth0 API 機能と素晴らしい方法で通信することができます。
このライブラリをインポートするには、build.gradle ファイルに次の依存関係を含みます。
dependencies {
    compile 'com.auth0.android:auth0:1.12.0'
}
その後、アプリの AndroidManifest.xml ファイルを開き、次のアクセス許可を追加します。
<uses-permission android:name="android.permission.INTERNET" />クライアントを作成する
ライブラリをインポートしてアクセス許可を追加した後、新しいクライアントアプリケーションを Auth0 ダッシュボードに作成します。ところで、Auth0 アカウントをお持ちでない方は、無料アカウントを作成する でアカウントを作成されることをお勧めします。
Auth0 ダッシュボードで、クライアント に移動し、クライアントを作成する ボタンをクリックします。表示のフォームで、クライアントの名前を定義し、その ネイティブ タイプを選択します。その後、作成 ボタンを押します。これで、次のようなスクリーンが表示されます。
このスクリーンで、コールバック URL を構成します。これは、Auth0 がユーザーを認証した後にリダイレクトするアプリケーションの URL です。
クライアント 設定 ページの 許可されたコールバック URL フィールドにあるアプリのコールバック URL をホワイトリストします。コールバック URL を設定しなければ、ユーザーがログインしたときに不一致のエラーが表示されます。
demo://bkrebs.auth0.com/android/OUR_APP_PACKAGE_NAME/callbackOURAPPPACKAGE_NAME とアプリケーションのパッケージ名を置換することを忘れないようにしましょう。この名前は app/build.gradle ファイルの applicationId 属性にあります。
資格情報を設定する
アプリケーションは Auth0 と通信するために、クライアントの詳細情報が必要です。この詳細情報は Auth0 ダッシュボード にあるクライアントの 設定 セクションにあります。
次の情報が必要です。
- クライアント ID
- ドメイン
これらの値は将来、変更する必要があるかもしれないので、ハードコードしないことをお勧めします。代わりに、値を定義するときは @string/com_auth0_domain のような文字列リソースを使いましょう。
res/values/strings.xml ファイルを次のように編集しましょう。
<resources>
    <string name="com_auth0_client_id">2qu4Cxt4h2x9In7Cj0s7Zg5FxhKpjooK</string>
    <string name="com_auth0_domain">bkrebs.auth0.com</string>
</resources>
これらの値はクライアントの 設定 セクションにある値と置換します。
Android ログイン
ログイン機能をアプリに実装するには、SDK が必要とするマニフェスト プレースホルダーを追加します。これらプレースホルダーは前に構成された認証コールバック URL をキャプチャする intent-filter を定義するために内部で使用します。
マニフェスト プレースホルダーを追加するには、次の行を追加しましょう。
apply plugin: 'com.android.application'
android {
    compileSdkVersion 25
    buildToolsVersion "25.0.3"
    defaultConfig {
        applicationId "com.auth0.samples"
        minSdkVersion 15
        targetSdkVersion 25
        //...

        //---> Add the next line
        manifestPlaceholders = [auth0Domain: "@string/com_auth0_domain", auth0Scheme: "demo"]
        //<---
    }
}
その後、Android Studio 内で Gradle ファイルでプロジェクトを同期する を実行するか、コマンドラインから ./gradlew clean assembleDebug を実行します。
認証プロセスを開始する
Auth0 ログインページ は認証をアプリケーションに設定する最も簡単な方法です。最高のエクスペリエンス、最高のセキュリティ、完全な機能配列を得るには Auth0 ログインページをご使用されることをお勧めします。
では、認証プロセスを始めるためにメッソドを実装します。このメソッド login を呼び出し、それを MainActivity クラスに追加しましょう。
private void login() {
    Auth0 auth0 = new Auth0(this);
    auth0.setOIDCConformant(true);
    WebAuthProvider.init(auth0)
                  .withScheme("demo")
                  .withAudience(String.format("https://%s/userinfo", getString(R.string.com_auth0_domain)))
                  .start(MainActivity.this, new AuthCallback() {
                      @Override
                      public void onFailure(@NonNull Dialog dialog) {
                        // エラー ダイアログをユーザーに表示します
                      }

                      @Override
                      public void onFailure(AuthenticationException exception) {
                        // エラーをユーザーに表示します
                      }

                      @Override
                      public void onSuccess(@NonNull Credentials credentials) {
                          // 資格情報を保存します
                          // メインアクティビティに移動します
                      }
                });
}
ご覧のように、ユーザーの資格情報を保留するために Auth0 クラスの新しいインスタンスを作成しました。次の文字列リソースを追加したら、Android Context を受信するコンストラクターを使用できます。
string.com_auth0_client_idstring.com_auth0_domain
リソースのハードコードを希望する場合は、両方の文字列を受信するコンストラクターを使用できます。それから、Auth0 ダッシュボード のクライアントで有効にした接続で認証する WebAuthProvider クラスを使用します。
WebAuthProvider#start 機能を呼び出したら、ブラウザーを起動して Auth0 ログインページを表示します。ユーザー認証が終了したら、コールバック URL が呼び出されます。コールバック URL には認証プロセスの最終結果が含まれています。
結果をキャプチャする
認証の後、ブラウザーは認証結果と共にユーザーをアプリケーションにリダイレクトします。SDK はその結果をキャプチャして、分析します。
Auth0 ドメインとスキーム値でマニフェスト プレースホルダーを定義しましたので、アクティビティに固有の intent-filter を宣言する必要はありません。
AndroidManifest.xml ファイルは次のように表示されます。
<manifest xmlns:android="http://schemas.android.com/apk/res/android"
    package="com.auth0.samples">
    <uses-permission android:name="android.permission.INTERNET" />
    <application
        android:allowBackup="true"
        android:icon="@mipmap/ic_launcher"
        android:label="@string/app_name"
        android:theme="@style/AppTheme">
        <activity android:name="com.auth0.samples.MainActivity">
          <intent-filter>
              <action android:name="android.intent.action.MAIN" />
              <category android:name="android.intent.category.LAUNCHER" />
          </intent-filter>
        </activity>
    </application>
</manifest>
これだけです。これで、Auth0 で Android アプリケーションをセキュアにしました。これら詳細については、公式ドキュメント を参照してください。ここで セッションの処理方法 や ユーザープロファイルのフェッチ などのトピックを学ぶことができます。
16. asides/LaravelBackend
Aside: Securing Laravel APIs with Auth0
Securing Laravel APIs with Auth0 is very easy and brings a lot of great features to the table. With Auth0, you only have to write a few lines of code to get:
- A solid identity management solution, including single sign-on
- User management
- Support for social identity providers (like Facebook, GitHub, Twitter, etc.)
- Enterprise identity providers (Active Directory, LDAP, SAML, etc.)
- Our own database of users
Sign Up for Auth0
You'll need an Auth0 account to manage authentication. You can sign up for a free account here. Next, set up an Auth0 API.
Set Up an API
Go to APIs in your Auth0 dashboard and click on the "Create API" button. Enter a name for the API. Set the Identifier to a URL(existent or non-existent URL). The Signing Algorithm should be RS256.
 Create API on Auth0 dashboard
You're now ready to implement Auth0 authentication in your Laravel API.
Dependencies and Setup
Install the laravel-auth0 package by entering the following in your terminal:
composer require auth0/login:"~5.0"Generate the laravel-auth0 package config file:
php artisan vendor:publishAfter the file is generated, it will be located at config/laravel-auth0.php. Double check your values match those found here.
Now you need to open your .env file to create and fill in those variables. Add the following anywhere in your .env file:
AUTH0_DOMAIN=kabiyesi.auth0.com
AUTH0_CLIENT_ID=xxxxxxxxxxxxxxxxxx
AUTH0_CLIENT_SECRET=xxxxxxxxxxxxxxxxx
AUTH0_AUDIENCE=http://mylaravelapi.com
AUTH0_CALLBACK_URL=null
Now replace all of those placeholders with the corresponding value from your Auth0 dashboard.
Activate Provider and Facade
The laravel-auth0 package comes with a provider called LoginServiceProvider. Add this to the list of application providers:
// config/app.php
'providers' => array(
    // ...
    \Auth0\Login\LoginServiceProvider::class,
);
If you would like to use the Auth0 Facade, add it to the list of aliases.
// config/app.php
'aliases' => array(
    // ...
    'Auth0' => \Auth0\Login\Facade\Auth0::class,
);
The user information can now be accessed with Auth0::getUser(). Finally, you need to bind a class that provides a user (your app model user) each time the user is logged in or an access_token is decoded. You can use the Auth0UserRepository provided by this package or you can build your own class.
To use Auth0UserRepository, add the following lines to your app's AppServiceProvider:
// app/Providers/AppServiceProvider.php
public function register()
{
    $this->app->bind(
      \Auth0\Login\Contract\Auth0UserRepository::class,
      \Auth0\Login\Repository\Auth0UserRepository::class
    );
}
Configure Authentication Driver
The laravel-auth0 package comes with an authentication driver called auth0. This driver defines a user structure that wraps the normalized user profile defined by Auth0. It doesn't persist the object but rather simply stores it in the session for future calls.
This is adequate for basic testing or if you don't need to persist the user. At any point you can call Auth::check() to determine if there is a user logged in and Auth::user() to retrieve the wrapper with the user information.
Configure the driver in config/auth.php to use auth0.
// app/config/auth.php
// ...
'providers' => [
    'users' => [
        'driver' => 'auth0'
    ],
],
Secure API Routes
Your API routes are defined in routes/api.php for Laravel 5.3+ apps.
// routes/api.php

<?php

use Illuminate\Http\Request;

/*
|--------------------------------------------------------------------------
| API Routes
|--------------------------------------------------------------------------
|
| Here is where you can register API routes for your application. These
| routes are loaded by the RouteServiceProvider within a group which
| is assigned the "api" middleware group. Enjoy building your API!
|
*/

Route::get('/public', function (Request $request) {
  return response()->json(["message" => "Hello from a public endpoint! You don't need any token to access this URL..Yaaaay!"]);
});

Route::get('/wakanda', function (Request $request) {
  return response()->json(["message" => "Access token is valid. Welcome to this private endpoint. You need elevated scopes to access Vibranium."]);
})->middleware('auth:api');
Now you can send a request to your protected endpoint with an access_token:
curl --request GET \
  --url http://localhost:8000/api/wakanda \
  --header 'authorization: Bearer <ACCESS TOKEN>'
Once a user hits the api/wakanda endpoint, a valid JWT access_token will be required before the resource can be released. With this in place, private routes can be secured.
More Resources
That's it! You have an authenticated Laravel API with protected routes. To learn more, check out the following resources:
17. asides/ExpressGateway
Aside: Configure Express Gateway to use Auth0 Identity Management
Express Gateway and Auth0 play very well together when it comes to security.
Let's now configure Auth0 to work as our user management system.
With Auth0, we only have to write a few lines of code to get solid identity management solution, single sign-on, support for social identity providers (like Facebook, GitHub, Twitter, etc.), and support for enterprise identity providers (Active Directory, LDAP, SAML, custom, etc.).
If you don't already have an Auth0 account, sign up for a free one now.
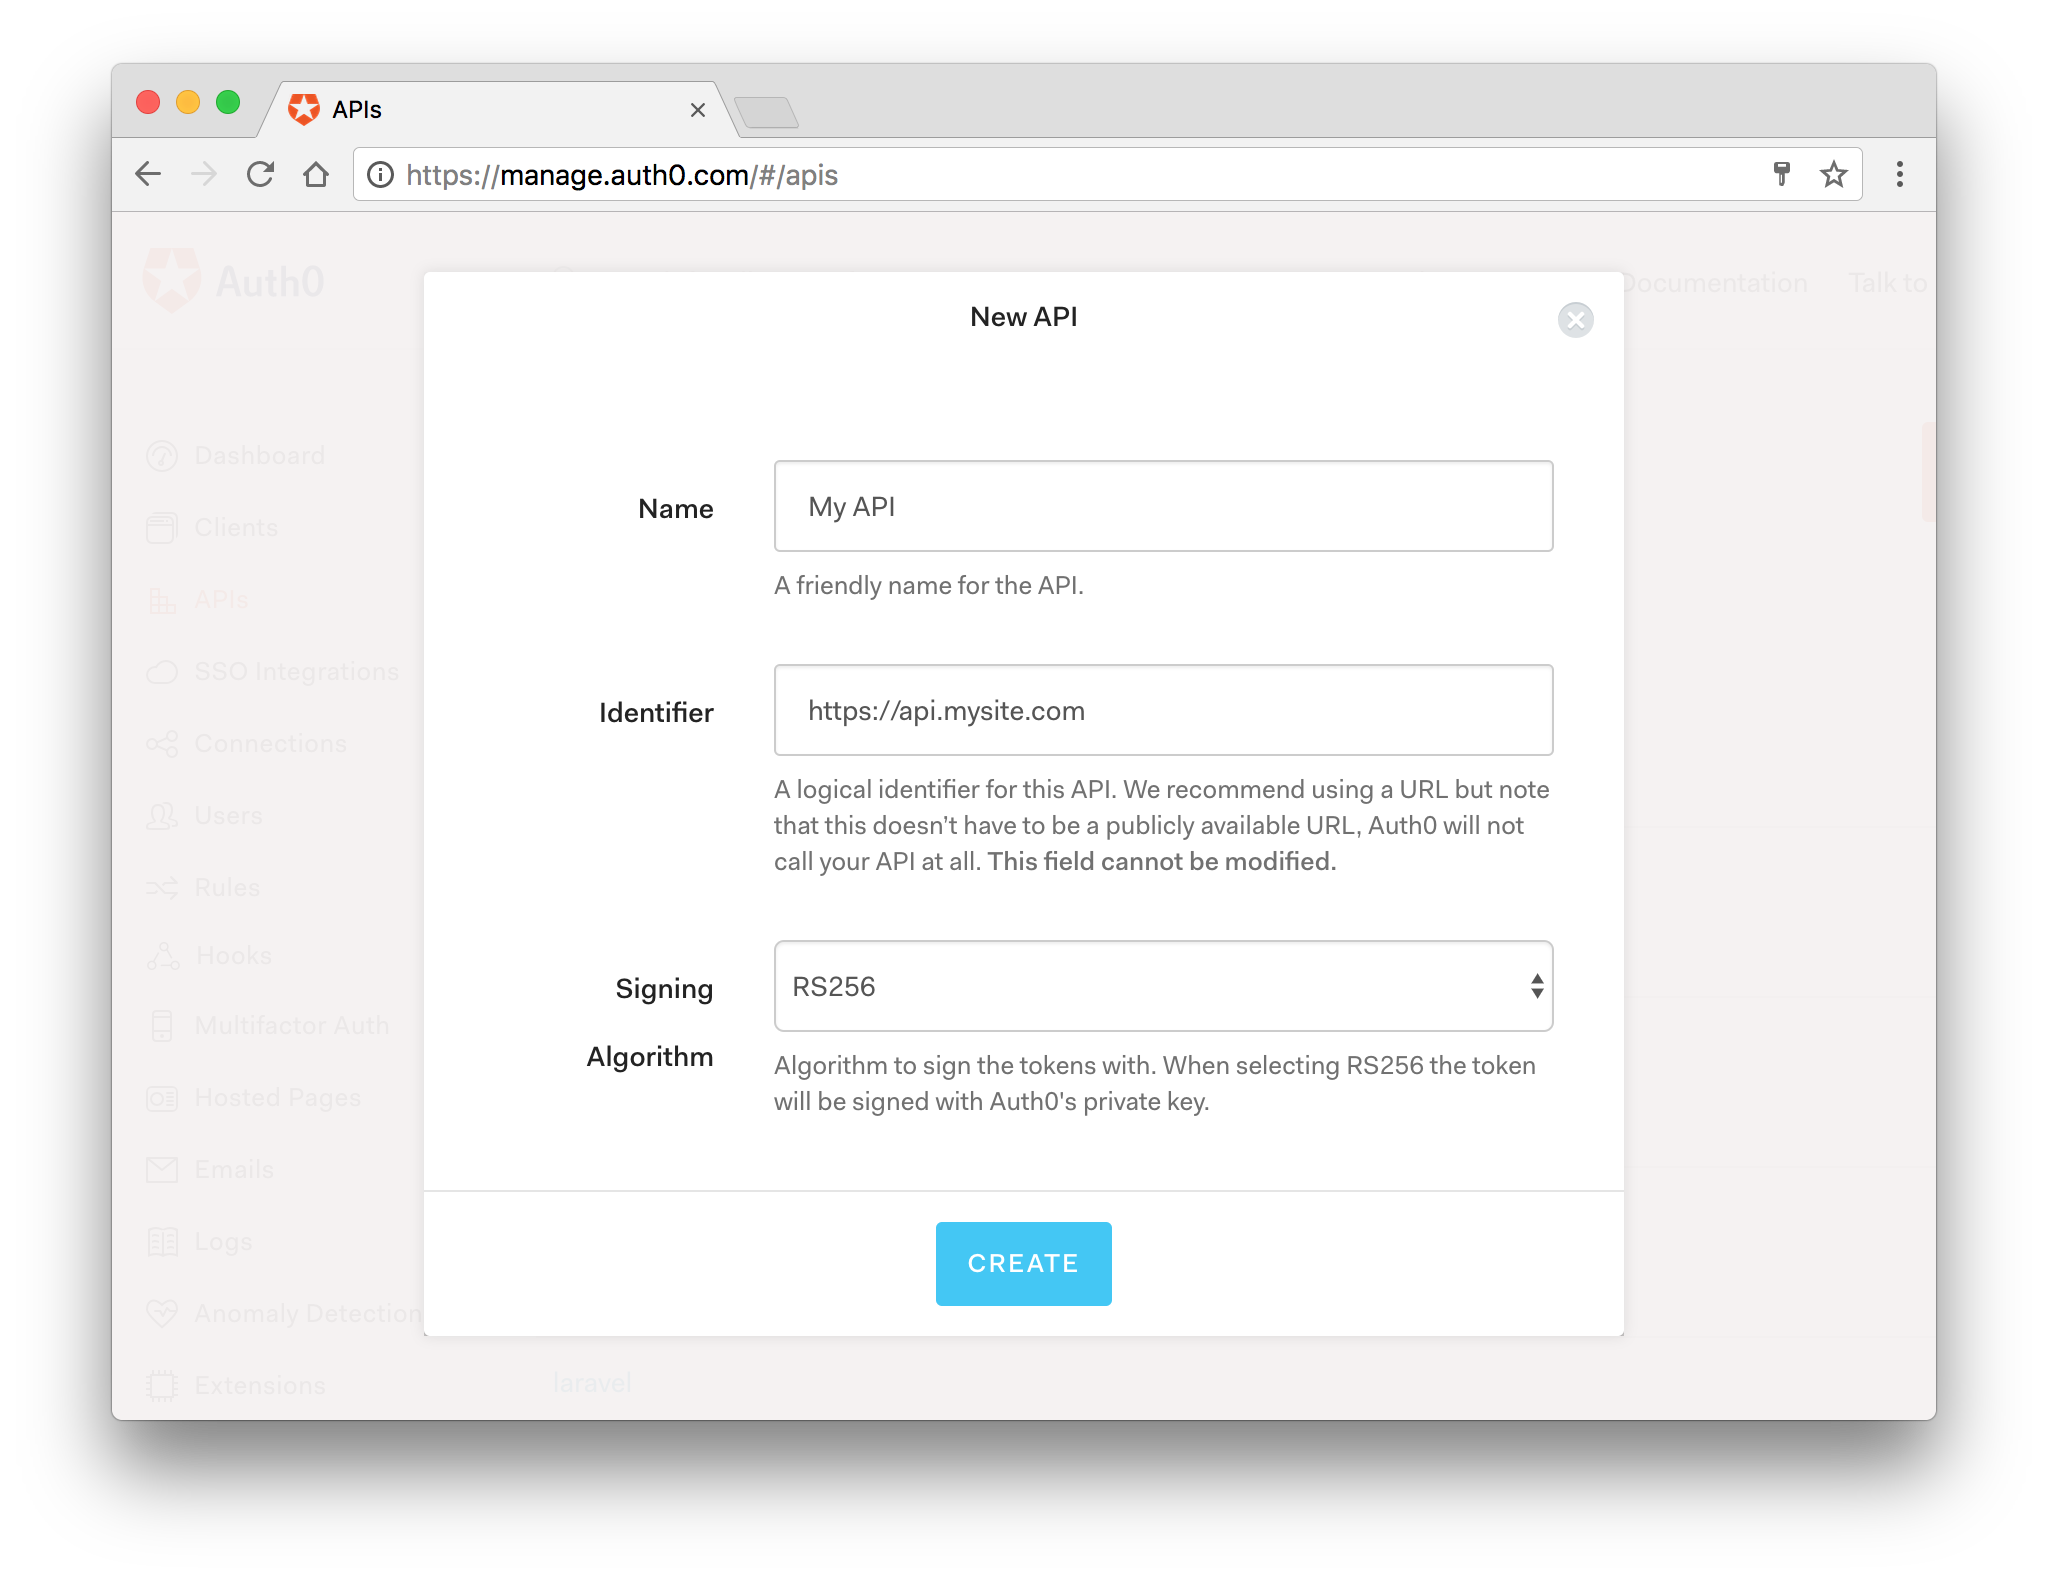
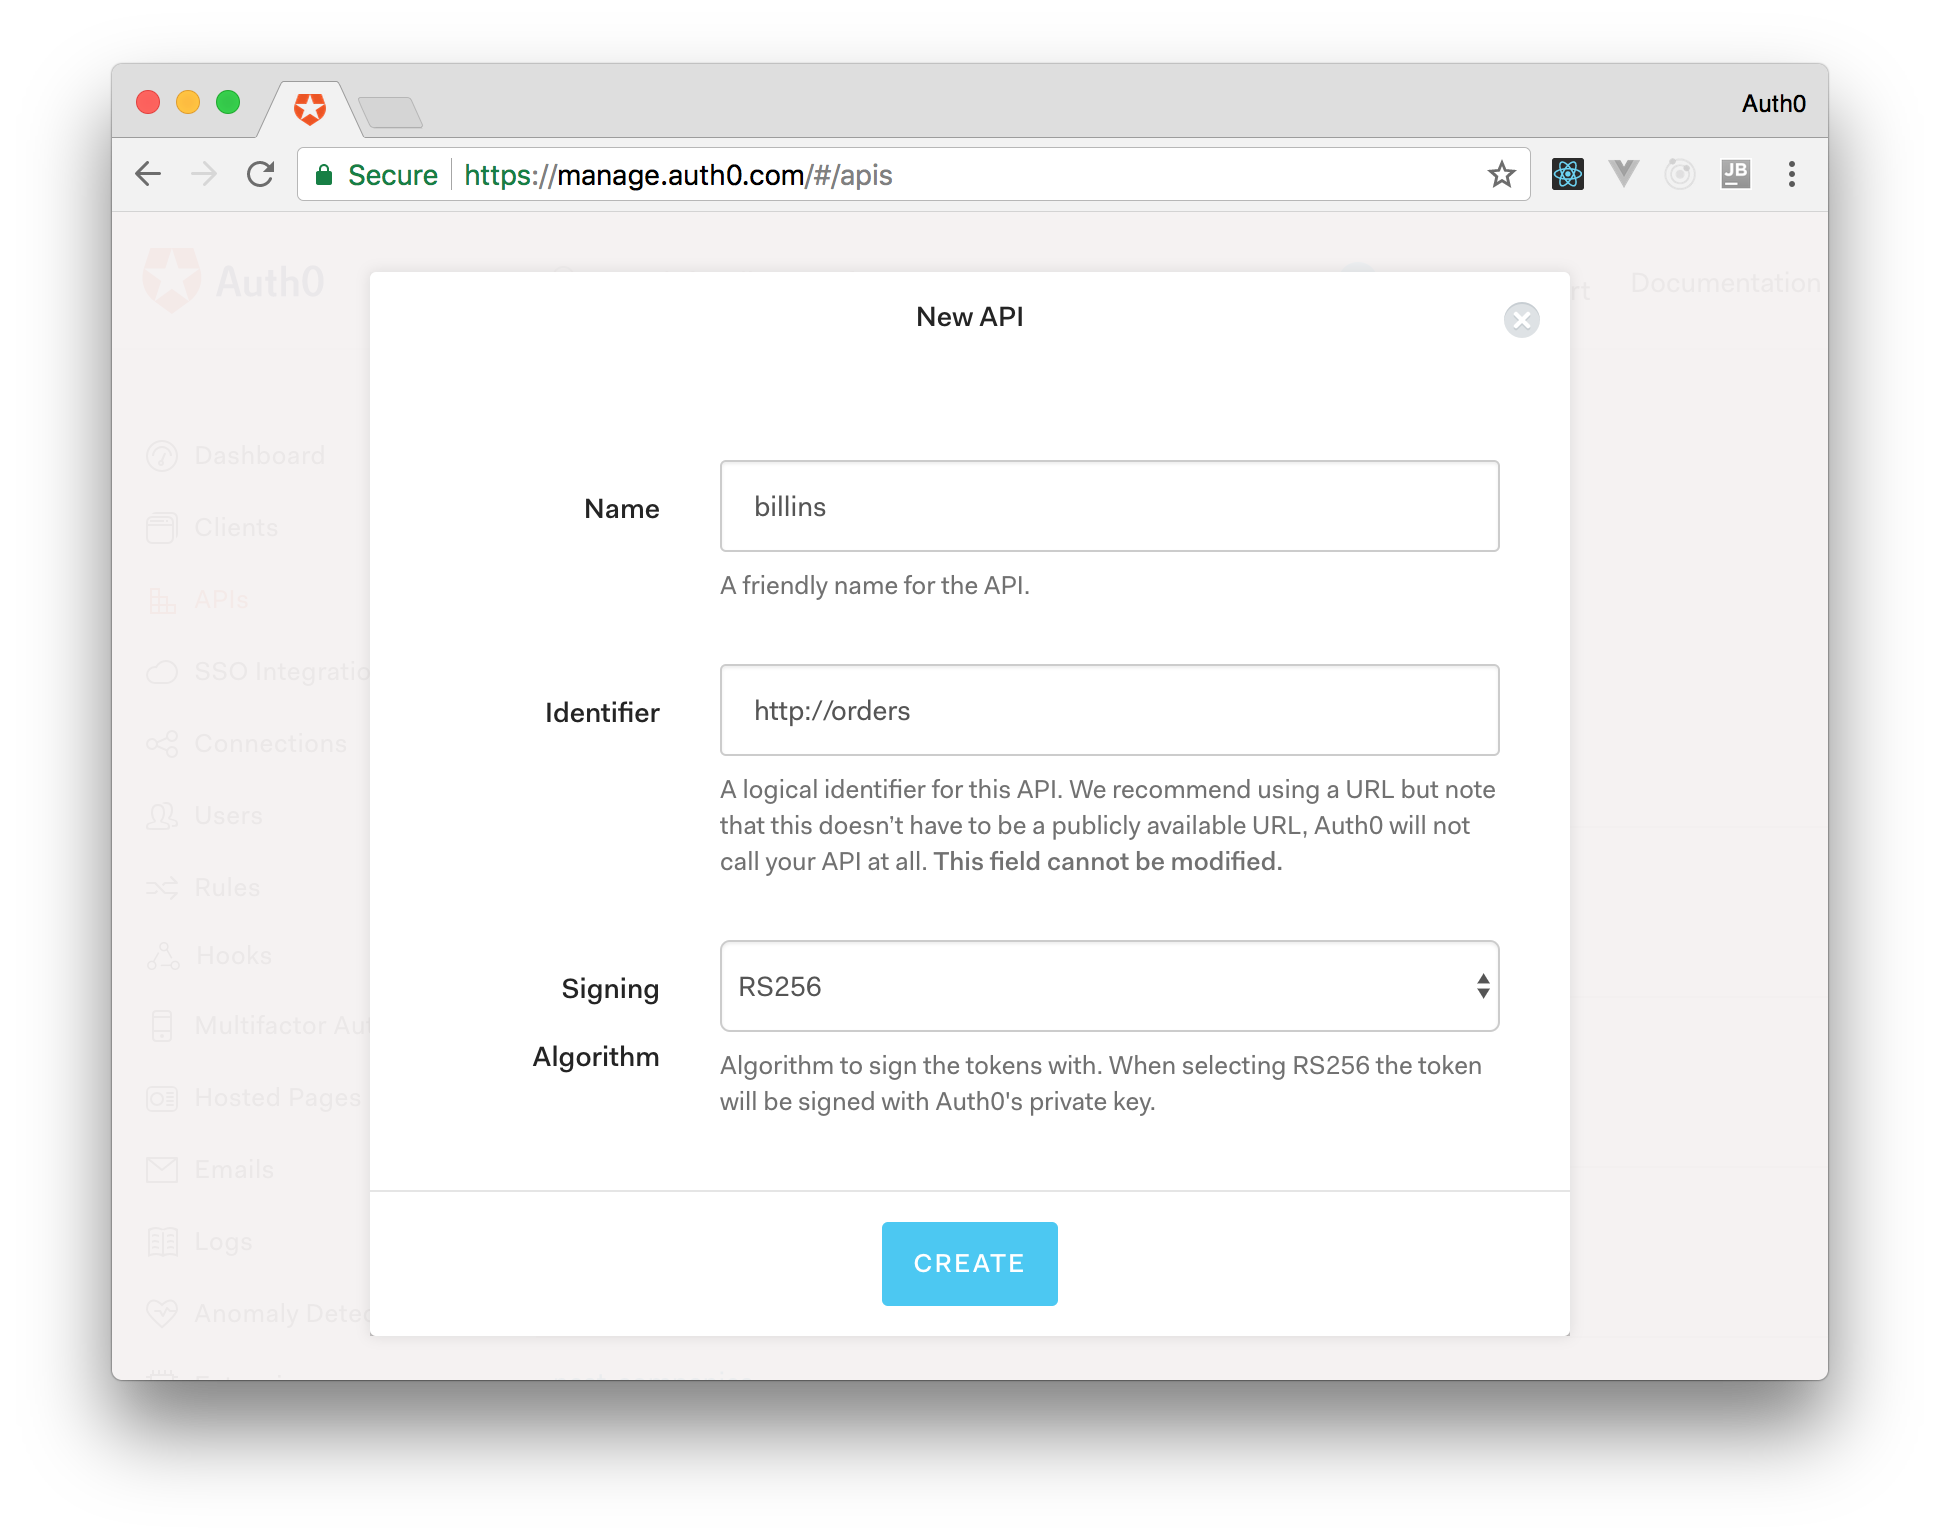
From the Auth0 management dashboard, click on the APIs menu item, and then on the Create API button. You will need to give your API a name and an identifier. The name can be anything you choose, so make it as descriptive as you want. The identifier will be used to identify your API, this field cannot be changed once set.
For our example, I'll name the API billings and identify it as http://orders. I'll also leave the signing algorithm as RS256 and click on the Create API button.
Now, point your browser to https://yourAPI.auth0.com/pem (where yourAPI is the Auth0 domain that you chose when creating your account) and download the public key file.
This is the key that we will use to verify that the JSON Web Tokens (JWTs) issued by Auth0 are valid. Save it as pubKey.pem and place it in the same directory specified in secretOrPublicKeyFile parameter of the jwt policy (that is, in a directory called key in the project root).
The API Gateway has now been configured correctly to handle the scenarios.
Enable JWT verification in Express Gateway
Express Gateway can be configured to validate tokens provided by Auth0 by installing the JWT policy in any of the pipelines.
policies:
  # Other policies
  - jwt:
      - action:
          secretOrPublicKeyFile: ./key/pubKey.pem
          checkCredentialExistence: false
Test Drive
Start the gateway using npm start in the project root. Once running, let's try to issue a couple of requests to it:
$ curl http://localhost:8080
$ Unauthorized
You can see that the first request has been denied with Unauthorized status. That's because we didn't provide any JWT with the request, so it didn't go through.
Now grab any HTTP client and let's configure it to start an OAuth 2.0 authorization process against Auth0. We can grab all the necessary parameters going on Applications -> Billings (Test Application) -> Settings
In my case, I am going to use curl, but you can use the client you prefer:
curl --request POST \
  --url https://{AUTH0_DOMAIN}.auth0.com/oauth/token \
  --header 'content-type: application/json' \
  --data '{
    "client_id":"{AUTH0_CLIENT_ID}",
    "client_secret":"{AUTH0_CLIENT_SECRET}",
    "audience":"http://orders",
    "grant_type":"client_credentials"
}'
Note: Make sure to replace all the placeholders with real values provided by Auth0.
Now, by simply copying the access_token attribute from the response, we will be able to communicate with the API through Express Gateway (you can verify the returned token by using JWT.io). This is the token to be used in order to access the protected resource. So, just try to issue requests making sure that the token is now sent as a Bearer Authorization to the endpoint. The response should hopefully be 200.
export JWT="ey...the-rest-of-the-token"
curl -H "Authorization: Bearer "$JWT http://localhost:8080
We made it! Now all the request that go in any pipelines using the JWT policy will be checked and verified.
18. asides/Vue
Aside: Authenticate a Vue App
Using Auth0, you can protect your applications so that only authenticated users can access them. Let's explore how to authenticate a Vue application.
If you would like to have a more in-depth explanation of protecting a Vue application, you can follow this fantastic article: Beginner Vue.js Tutorial with User Login.
Setting up Auth0
To begin, you will need an Auth0 account. You can sign up for a free Auth0 account here. Once you are logged in, follow these steps to set up an Auth0 application.
- Go to your Auth0 Dashboard and click the "+ CREATE APPLICATION" button.
- Name your new app and select "Single Page Web Applications". Hit "Create".
- In the Settings for your new Auth0 application, add
http://localhost:8080to the Allowed Callback URLs, Allowed Logout URLs, Allowed Web Origins. Hit "Save Changes" at the bottom of the page.
Vue application
You will need to install the Auth0 auth0-spa-js SDK. To do so, run the following command:
npm install @auth0/auth0-spa-jsNext, within your src/ folder, create an auth folder. Within the auth folder, create a file named index.js. You should now have a path that is src/auth/index.js.
Within that newly created file, paste in the following code:
// src/auth/index.js

import Vue from 'vue';
import createAuth0Client from '@auth0/auth0-spa-js';

/** Define a default action to perform after authentication */
const DEFAULT_REDIRECT_CALLBACK = () =>
  window.history.replaceState({}, document.title, window.location.pathname);

let instance;

/** Returns the current instance of the SDK */
export const getInstance = () => instance;

/** Creates an instance of the Auth0 SDK. If one has already been created, it returns that instance */
export const useAuth0 = ({
  onRedirectCallback = DEFAULT_REDIRECT_CALLBACK,
  redirectUri = window.location.origin,
  ...options
}) => {
  if (instance) return instance;

  // The 'instance' is simply a Vue object
  instance = new Vue({
    data() {
      return {
        loading: true,
        isAuthenticated: false,
        user: {},
        auth0Client: null,
        popupOpen: false,
        error: null,
      };
    },
    methods: {
      /** Authenticates the user using a popup window */
      async loginWithPopup(o) {
        this.popupOpen = true;

        try {
          await this.auth0Client.loginWithPopup(o);
        } catch (e) {
          // eslint-disable-next-line
          console.error(e);
        } finally {
          this.popupOpen = false;
        }

        this.user = await this.auth0Client.getUser();
        this.isAuthenticated = true;
      },
      /** Handles the callback when logging in using a redirect */
      async handleRedirectCallback() {
        this.loading = true;
        try {
          await this.auth0Client.handleRedirectCallback();
          this.user = await this.auth0Client.getUser();
          this.isAuthenticated = true;
        } catch (e) {
          this.error = e;
        } finally {
          this.loading = false;
        }
      },
      /** Authenticates the user using the redirect method */
      loginWithRedirect(o) {
        return this.auth0Client.loginWithRedirect(o);
      },
      /** Returns all the claims present in the ID token */
      getIdTokenClaims(o) {
        return this.auth0Client.getIdTokenClaims(o);
      },
      /** Returns the access token. If the token is invalid or missing, a new one is retrieved */
      getTokenSilently(o) {
        return this.auth0Client.getTokenSilently(o);
      },
      /** Gets the access token using a popup window */

      getTokenWithPopup(o) {
        return this.auth0Client.getTokenWithPopup(o);
      },
      /** Logs the user out and removes their session on the authorization server */
      logout(o) {
        return this.auth0Client.logout(o);
      },
    },
    /** Use this lifecycle method to instantiate the SDK client */
    async created() {
      // Create a new instance of the SDK client using members of the given options object
      this.auth0Client = await createAuth0Client({
        domain: options.domain,
        client_id: options.clientId,
        audience: options.audience,
        redirect_uri: redirectUri,
      });

      try {
        // If the user is returning to the app after authentication...
        if (
          window.location.search.includes('code=') &&
          window.location.search.includes('state=')
        ) {
          // handle the redirect and retrieve tokens
          const { appState } = await this.auth0Client.handleRedirectCallback();

          // Notify subscribers that the redirect callback has happened, passing the appState
          // (useful for retrieving any pre-authentication state)
          onRedirectCallback(appState);
        }
      } catch (e) {
        this.error = e;
      } finally {
        // Initialize our internal authentication state
        this.isAuthenticated = await this.auth0Client.isAuthenticated();
        this.user = await this.auth0Client.getUser();
        this.loading = false;
      }
    },
  });

  return instance;
};

// Create a simple Vue plugin to expose the wrapper object throughout the application
export const Auth0Plugin = {
  install(Vue, options) {
    Vue.prototype.$auth = useAuth0(options);
  },
};
The comments in this file go over what each section does. To find more details about this file, please visit this blog post section.
Connecting Auth0 and the Vue application
To connect your Auth0 app and your Vue app, you will need to bring over some data from your Auth0 app that you set up earlier. You will want those values protected. To do so, create a file named auth_config.json in the root of your Vue application. Then in the .gitignore, you will want to put that newly created file in there.
In that file, put the following values:
// auth_config.json

{
  "domain": "your-domain.auth0.com",
  "clientId": "yourclientid"
}
Back in your Auth0 dashboard, click on the Settings tab of your Auth0 application. You will find the values "Domain" and "Client ID". Copy and paste those values into this file.
Using authentication globally in Vue
To use this authentication globally within the Vue app, you need to update the src/main.js file. Delete everything in the file and replace with the following code:
// src/main.js

import Vue from 'vue';
import App from './App.vue';
import router from './router';

// Import the Auth0 configuration
import { domain, clientId } from '../auth_config.json';

// Import the plugin here
import { Auth0Plugin } from './auth';

// Install the authentication plugin here
Vue.use(Auth0Plugin, {
  domain,
  clientId,
  onRedirectCallback: (appState) => {
    router.push(
      appState && appState.targetUrl
        ? appState.targetUrl
        : window.location.pathname,
    );
  },
});

Vue.config.productionTip = false;

new Vue({
  router,
  render: (h) => h(App),
}).$mount('#app');
Log in and log out buttons
In order to use all this, you will want to add "Log In" and "Log Out" buttons. To do that, wherever you would like your buttons to be in your application, add this code within the <template> section of that file:
<div v-if="!$auth.loading">
  <!-- show login when not authenticated -->
  <a v-if="!$auth.isAuthenticated" @click="login">Log in</a>
  <!-- show logout when authenticated -->
  <a v-if="$auth.isAuthenticated" @click="logout">Log out</a>
</div>
In that same file within the <script> tag, add in these methods:
<script>
  export default {
    name: 'App',
    methods: {
      // Log the user in
      login() {
        this.$auth.loginWithRedirect();
      },
      // Log the user out
      logout() {
        this.$auth.logout({
          returnTo: window.location.origin,
        });
      },
    },
  };
</script>
You now have the necessary code to authenticate your Vue.js application!
More resources
19. asides/JpJavascriptAtAuth0
補足:JavaScript で Auth0 認証
Auth0 では顧客が パスワードのリセット、ユーザーの作成、プロビジョニング、ブロッキング、削除などユーザー ID を管理 するのに役立るためにフルスタックの JavaScript を大いに活用しました。Auth0 Extend と呼ばれるサーバーなしのプラットフォームも作り、顧客が任意の JavaScript 関数を確実に実行できるようにしました。ですから、JavaScript Web アプリで ID 管理プラットフォームを使用するのが簡単なのは全く驚くことではありません。
先進認証を始めるために Auth0 では無料レベルを提供しています。詳細をご確認いただくか、無料 Auth0 アカウントをこちらから登録して ください!
auth0-js や jwt-decode 次のようなノード モジュールをインストールするのと同じように簡単です。
npm install jwt-decode auth0-js --saveそれから次を JS アプリで実装してください。
const auth0 = new auth0.WebAuth({
  clientID: 'YOUR-AUTH0-CLIENT-ID', // E.g., you.auth0.com
  domain: 'YOUR-AUTH0-DOMAIN',
  scope: 'openid email profile YOUR-ADDITIONAL-SCOPES',
  audience: 'YOUR-API-AUDIENCES', // See https://auth0.com/docs/api-auth
  responseType: 'token id_token',
  redirectUri: 'http://localhost:9000', //YOUR-REDIRECT-URL
});

function logout() {
  localStorage.removeItem('id_token');
  localStorage.removeItem('access_token');
  window.location.href = '/';
}

function showProfileInfo(profile) {
  var btnLogin = document.getElementById('btn-login');
  var btnLogout = document.getElementById('btn-logout');
  var avatar = document.getElementById('avatar');
  document.getElementById('nickname').textContent = profile.nickname;
  btnLogin.style.display = 'none';
  avatar.src = profile.picture;
  avatar.style.display = 'block';
  btnLogout.style.display = 'block';
}

function retrieveProfile() {
  var idToken = localStorage.getItem('id_token');
  if (idToken) {
    try {
      const profile = jwt_decode(idToken);
      showProfileInfo(profile);
    } catch (err) {
      alert('There was an error getting the profile: ' + err.message);
    }
  }
}

auth0.parseHash(window.location.hash, (err, result) => {
  if (err || !result) {
    // Handle error
    return;
  }

  // You can use the ID token to get user information in the frontend.
  localStorage.setItem('id_token', result.idToken);
  // You can use this token to interact with server-side APIs.
  localStorage.setItem('access_token', result.accessToken);
  retrieveProfile();
});

function afterLoad() {
  // buttons
  var btnLogin = document.getElementById('btn-login');
  var btnLogout = document.getElementById('btn-logout');

  btnLogin.addEventListener('click', function () {
    auth0.authorize();
  });

  btnLogout.addEventListener('click', function () {
    logout();
  });

  retrieveProfile();
}

window.addEventListener('load', afterLoad);
このコードを使った完全な例 を取得してください。
クイック スタート チュートリアル で、アプリで異なる言語やフレームワークを使用して認証の実装の仕方を学びましょう。
20. asides/Angularjs
Aside: Authenticate an AngularJS App with Auth0
We can protect our applications and APIs so that only authenticated users can access them. Let's explore how to do this with an Angular application using Auth0. You can clone this sample app from the repo on GitHub.

Sign Up for Auth0
You'll need an Auth0 account to manage authentication. You can sign up for a free account here. Next, set up an Auth0 application and API so Auth0 can interface with an Angular app and Node API.
Set Up an Auth0 Application
- Go to your Auth0 Dashboard and click the "create a new application" button.
- Name your new app and select "Single Page Web Applications".
- In the Settings for your new Auth0 app, add
http://localhost:3000/callbackto the Allowed Callback URLs. Click the "Save Changes" button. - If you'd like, you can set up some social connections. You can then enable them for your app in the Application options under the Connections tab. The example shown in the screenshot above utilizes username/password database, Facebook, Google, and Twitter. For production, make sure you set up your own social keys and do not leave social connections set to use Auth0 dev keys.
Note: Under the OAuth tab of Advanced Settings (at the bottom of the Settings section) you should see that the JsonWebToken Signature Algorithm is set to
RS256. This is the default for new applications. If it is set toHS256, please change it toRS256. You can read more about RS256 vs. HS256 JWT signing algorithms here.
Dependencies and Setup
Once you've cloned the project, install the dependencies for both the AngularJS app and the Node server by running the following commands in the root of your project folder:
$ npm installStart the app via the express server with:
$ npm startFind the auth0-variables.js.example file and remove the .example extension from the filename. Then open the file:
var AUTH0_CLIENT_ID = '{CLIENT_ID}';
var AUTH0_DOMAIN = '{DOMAIN}';
var AUTH0_CALLBACK_URL = 'http://localhost:3000/callback';
Change the AUTH0_DOMAIN identifier to your Auth0 application domain.
Note: To learn more about RS256 and JSON Web Key Set, read Navigating RS256 and JWKS.
Change the AUTH0_CLIENT_ID to your Auth0 information.
let's take a look at how authentication is implemented.
Authentication Service
Authentication logic on the front end is handled with an AuthService authentication service: src/app/auth/auth.service.js file.
(function () {
  'use strict';

  angular.module('app').service('authService', authService);

  authService.$inject = ['$state', 'angularAuth0', '$timeout'];

  function authService($state, angularAuth0, $timeout) {
    function login() {
      angularAuth0.authorize();
    }

    function handleAuthentication() {
      angularAuth0.parseHash(function (err, authResult) {
        if (authResult && authResult.accessToken && authResult.idToken) {
          setSession(authResult);
          $state.go('home');
        } else if (err) {
          $timeout(function () {
            $state.go('home');
          });
          console.log(err);
          alert(
            'Error: ' + err.error + '. Check the console for further details.',
          );
        }
      });
    }

    function setSession(authResult) {
      // Set the time that the access token will expire at
      let expiresAt = JSON.stringify(
        authResult.expiresIn * 1000 + new Date().getTime(),
      );
      localStorage.setItem('access_token', authResult.accessToken);
      localStorage.setItem('id_token', authResult.idToken);
      localStorage.setItem('expires_at', expiresAt);
    }

    function logout() {
      // Remove tokens and expiry time from localStorage
      localStorage.removeItem('access_token');
      localStorage.removeItem('id_token');
      localStorage.removeItem('expires_at');
      $state.go('home');
    }

    function isAuthenticated() {
      // Check whether the current time is past the
      // access token's expiry time
      let expiresAt = JSON.parse(localStorage.getItem('expires_at'));
      return new Date().getTime() < expiresAt;
    }

    return {
      login: login,
      handleAuthentication: handleAuthentication,
      logout: logout,
      isAuthenticated: isAuthenticated,
    };
  }
})();
The login() method authorizes the authentication request with Auth0 using your config variables. A login page will be shown to the user and they can then log in.
- handleAuthentication: looks for the result of authentication in the URL hash. Then, the result is processed with the parseHash method from auth0.js
- setSession: sets the user's Access Token and ID Token, and the Access Token's expiry time
- logout: removes the user's tokens and expiry time from browser storage
- isAuthenticated: checks whether the expiry time for the user's Access Token has passed
Note: If it's the user's first visit to our app and our callback is on
localhost, they'll also be presented with a consent screen where they can grant access to our API. A first party client on a non-localhost domain would be highly trusted, so the consent dialog would not be presented in this case. You can modify this by editing your Auth0 Dashboard API Settings. Look for the "Allow Skipping User Consent" toggle.
Login Control
Provide a component with controls for the user to log in and log out.
app/navbar/navbar.html
<nav class="navbar navbar-default">
  <div class="container-fluid">
    <div class="navbar-header">
      <a class="navbar-brand" href="#">Auth0 - AngularJS</a>
      <button class="btn btn-primary btn-margin" ui-sref="home">Home</button>
      <button
        class="btn btn-primary btn-margin"
        ng-if="!vm.auth.isAuthenticated()"
        ng-click="vm.auth.login()"
      >
        Log In
      </button>
      <button
        class="btn btn-primary btn-margin"
        ng-if="vm.auth.isAuthenticated()"
        ng-click="vm.auth.logout()"
      >
        Log Out
      </button>
    </div>
  </div>
</nav>
Directive
// app/navbar/navbar.directive.js

(function () {
  'use strict';

  angular.module('app').directive('navbar', navbar);

  function navbar() {
    return {
      templateUrl: 'app/navbar/navbar.html',
      controller: navbarController,
      controllerAs: 'vm',
    };
  }

  navbarController.$inject = ['authService'];

  function navbarController(authService) {
    var vm = this;
    vm.auth = authService;
  }
})();
Depending on whether the user is authenticated or not, they see the Log Out or Log In button. The ng-click events on the buttons make calls to the authService service to let the user log in or out. When the user clicks Log In, they are redirected to the login page.
Callback Component
The callback component is where the app is redirected after authentication. This component simply shows a loading message until the login process is completed. After the session is set up, the users are redirected to the /home route.
// app/callback/callback.controller.js

(function () {
  'use strict';

  angular.module('app').controller('CallbackController', callbackController);

  function callbackController() {}
})();
app/callback/callback.html
<div class="loading">
  <img src="assets/loading.svg" alt="loading" />
</div>
Process Authentication Result
When a user authenticates at the login page, they are redirected to your application. Their URL contains a hash fragment with their authentication information. The handleAuthentication method in the authService service processes the hash.
Call the handleAuthentication method in your app's run block. The method processess the authentication hash while your app loads.
// app/app.run.js

(function () {
  'use strict';

  angular.module('app').run(run);

  run.$inject = ['authService'];

  function run(authService) {
    // Handle the authentication
    // result in the hash
    authService.handleAuthentication();
  }
})();
More Resources
That's it! We have an authenticated AngularJS application with login, logout, and protected routes. To learn more, check out the following resources:
21. ebook-ads/UserMigrationYourWay
User Migration Your Way
Download the eBook
22. Book
Sh*t My Dad Says
by Justin Halpern

Because the work week is too hectic to only read serious stuff on Saturday.
— Dave Wilner, Chief Revenue Officer (Bellevue, Wash., USA)
23. asides/JpNode
補足:Node.js アプリケーションを Auth0 でセキュアする
Node.js アプリケーションを Auth0 でセキュアにすることは簡単で、たくさんの素晴らしい機能を提供します。Auth0 を使うと、数行のコード行を書くだけで、強固なID __管理ソリューション、シングル サインオン、ソーシャル ID プロバイダー(Facebook、GitHub、Twitter など)のサポート、および_エンタープライズ ID プロバイダー(Active Directory、LDAP、SAML、カスタムなど)のサポートを得ることができます。
以下のセクションでは、Express で書かれた Node.js API をセキュアにする Auth0 を使用する方法を学んでいきます。
Express API を作る
Node.js API を定義することから始めましょう。Express および Node.js を使って、2 つのシンプルなステップでこれが可能になります。1 つめのステップでは NPM を使って 3 つの依存関係のnpm i express body-parser cors をインストールします。
注:ゼロから始めるのであれば、まず、NPM プロジェクトのnpm init -y を初期化しなければなりません。.これによって NPM が現在のディレクトリ内に新しいプロジェクトを作成します。そのようなものとして、このコマンドを実行する前に、新しいプロジェクト要に新しいディレクトリを作成し、それに移動しなければなりません。
ふたつめは、次のコードで(これを index.js を呼びます) Node.js スクリプトを作成します。
// 依存関係をインポートします
const express = require('express');
const bodyParser = require('body-parser');
const cors = require('cors');

// Express を構成します
const app = express();
app.use(bodyParser.json());
app.use(cors());

// Contact 配列を定義します
const contacts = [
  { name: 'Bruno Krebs', phone: '+555133334444' },
  { name: 'John Doe', phone: '+191843243223' },
];

// Contacts 配列を操作するエンドポイントを定義します
app.get('/contacts', (req, res) => res.send(contacts));
app.post('/contacts', (req, res) => {
  contacts.push(req.body);
  res.send();
});

// Express を始めます
app.listen(3000, () => console.log('Example app listening on port 3000!'));
上記のコードは Express アプリケーションを作成し、次の 2 つのミドルウェアの JSON リクエストを分析する body-parser、とアプリがいずれの発生元からリクエストを受け入れるというシグナルを出す cors を追加します。アプリは 2 つのエンドポイントを Express に登録し、POST リクエストと GET リクエストを処理します。両方のエンドポイントはある種のメモリ内データベースとして contacts 配列を使います。
ここで、Node index をプロジェクトルートに発行してアプリケーションを実行し、リクエストをそれに送信してテストできます。例えば、cURL を使うと、 curl localhost:3000/contacts を発行して GET リクエストを送信できます。このコマンドはアイテムを contacts 配列に出力します。
API を Auth0 で登録する
このアプリケーションを作成した後、それを安全にすることに中心に実行していけます。このアプリを表す API を Auth0 に登録することから始めましょう。これをするには、管理ダッシュボードの API セクション(必要であれば無料アカウントを作ることができます)に移動し、「API の作成」をクリックします。表示されたダイアログ上で、この API を 「Contacts API」 と名付け(名前はあまり重要ではありません)、https://contacts.blog-samples.com/ (後ほど、この値を使用します)としてそれを識別します。
Express を Auth0 でセキュアする
ここまでで、API を Auth0 アカウントに登録したので、Express API を Auth0 でセキュアしましょう。3 つの依存関係をnpm i express-jwt jwks-rsa の NPM でインストールすることから始めましょう。それから、auth0.js と呼ばれるファイルを作り、これらの依存関係を使用しましょう。
const jwt = require('express-jwt');
const jwksRsa = require('jwks-rsa');
module.exports = jwt({
  // ヘッダーの KID をベースにして、署名するキーおよび
  // JWKS エンドポイントによって提供された署名するキーをフェッチします。
  secret: jwksRsa.expressJwtSecret({
    cache: true,
    rateLimit: true,
    jwksUri: `https://${process.env.AUTH0_DOMAIN}/.well-known/jwks.json`,
  }),

  // 対象ユーザーと発行元を検証します。
  audience: process.env.AUTH0_AUDIENCE,
  issuer: `https://${process.env.AUTH0_DOMAIN}/`,
  algorithms: ['RS256'],
});
このスクリプトの目標は、リクエストが、信頼に値するパーティ、この場合は Auth0 が発行した access_token があることを保証する Express \_ミドルウェア_ をエクスポートすることです。このスクリプトは次の 2 つの環境変数を検索することが予測されます。
AUTH0_AUDIENCE: API の識別子(https://contacts.mycompany.com/)AUTH0_DOMAIN: Auth0 でのドメイン(この場合bk-samples.auth0.com)
これらの変数は後ほど、設定しますが、ドメイン変数が、ミドルウェアがどのようにして署名するキーを検索するかを定義することを理解することが重要です。
このミドルウェアを作成した後で、index.js ファイルを更新してインポートし、以下のようにそれを使用します。
// ... その他はステートメントが必要です ...
const auth0 = require('./auth0');

// ... アプリの定義と Contact 配列 ...

// 両方のエンドポイントを定義します
app.get('/contacts', auth0(), (req, res) => res.send(contacts));
app.post('/contacts', auth0(), (req, res) => {
  contacts.push(req.body);
  res.send();
});

// ... app.listen ...
この場合では、前のエンドポイントの定義は、有効なアクセストークンを送信するリクエストを適用する新規ミドルウエアを使用するために置き換えられました。
ここで、アプリケーションの実行は以下のような環境変数を設定する必要があるので、多少異なります。
export AUTH0_DOMAIN=blog-samples.auth0.com
export AUTH0_AUDIENCE="https://contacts.blog-samples.com/"
node index
API を実行した後、適切に保護されているかを見るためにそれをテストできます。では、端末を開き、次のコマンドを発行しましょう。
curl localhost:3000/contactsすべてが設定されると、サーバーから「認証トークンが見つかりません」という返答を受けます。
ここで、再度、エンドポイントと対話するために、Auth0 からアクセストークンを取得しなければなりません。これをするには複数の方法があり、使用する戦略は開発するクライアントアプリケーションのタイプによって異なります。たとえば、シングルページ アプリケーション(SPA)を開発するのであれば、Implicit Grant**(インプリシットグラント) と呼ばれるものを使用します。モバイル アプリケーションを開発するのであれば、PKCE を使用する Authorization Code Grant Flow**(認証コードグラントフロー) を使用します。Auth0 で利用可能なフローは他にもありますが、.今回のようなシンプルなテストには、Auth0 ダッシュボードを使って取得しますので、
Auth0 ダッシュボードの API セクション に戻り、前に作成した API をクリックし、この API のテストセクションをクリックします。そこに、トークンのコピーと呼ばれるボタンがあります。このボタンをクリックして、ダッシュボードからアクセストークンをコピーしましょう。

このトークンをコピーしたら、端子を開き、次のコマンドを発行します。
# トークンで変数を作成します
ACCESS_TOKEN=<OUR_ACCESS_TOKEN>

# この変数を使って Contacts をフェッチします
curl -H 'Authorization: Bearer '$ACCESS_TOKEN` http://localhost:3000/contacts/
注:
<OUR_ACCESS_TOKEN>をダッシュボードからコピーしたトークンに置き換える必要があります。
API に送信するリクエストのアクセストークンを使用しているので、再度、Contact のリストを取得します。
このようにして Node.js バックエンド API を安全にします。簡単ですよね?
24. ebook-ads/Oauth2OidcGuide
Want to get up to speed with OAuth2 and OpenID Connect?
Download the free ebook
25. Tweet
26. ProfileCard

27. ClickImg
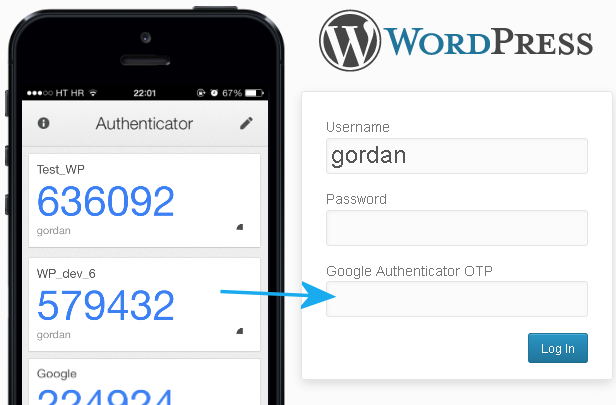
28. asides/JpAboutAuth0
Auth0 について
Auth0 は、アプリケーションビルダーのためにつくられた最初のアイデンティティ管理プラットフォームであり、カスタムビルドアプリケーションに必要とされる唯一のアイデンティティソリューションです。世界中のアイデンティティを守り、イノベーターがイノベーションを起こせるようにするというミッションのもと、Auth0 はシンプルで、拡張性のある、スケーラブルなプラットフォームを提供し、あらゆるオーディエンスのために、あらゆるアプリケーションのアイデンティティを守ります。Auth0 は毎日 1 億回以上のログインを保護し、法人企業が信頼されるエレガントなデジタルエクスペリエンスを世界中の顧客に提供できるようにします。
より詳しい情報に関して、https://auth0.com/jp/もしくは@auth0_jp on Twitterをご覧ください。
29. asides/DotNetCore
Aside: Securing ASP.NET Core with Auth0
Securing ASP.NET Core applications with Auth0 is easy and brings a lot of great features to the table. With Auth0, you only have to write a few lines of code to get a solid identity management solution, single sign-on, support for social identity providers (like Facebook, GitHub, Twitter, etc.), and support for enterprise identity providers (like Active Directory, LDAP, SAML, custom, etc.).
On ASP.NET Core, you need to create an API in your Auth0 Management Dashboard and change a few things on your code. To create an API, you need to sign up for a free Auth0 account. After that, you need to go to the API section of the dashboard and click on "Create API". On the dialog shown, you can set the Name of your API as "Books", the Identifier as "http://books.mycompany.com", and leave the Signing Algorithm as "RS256".
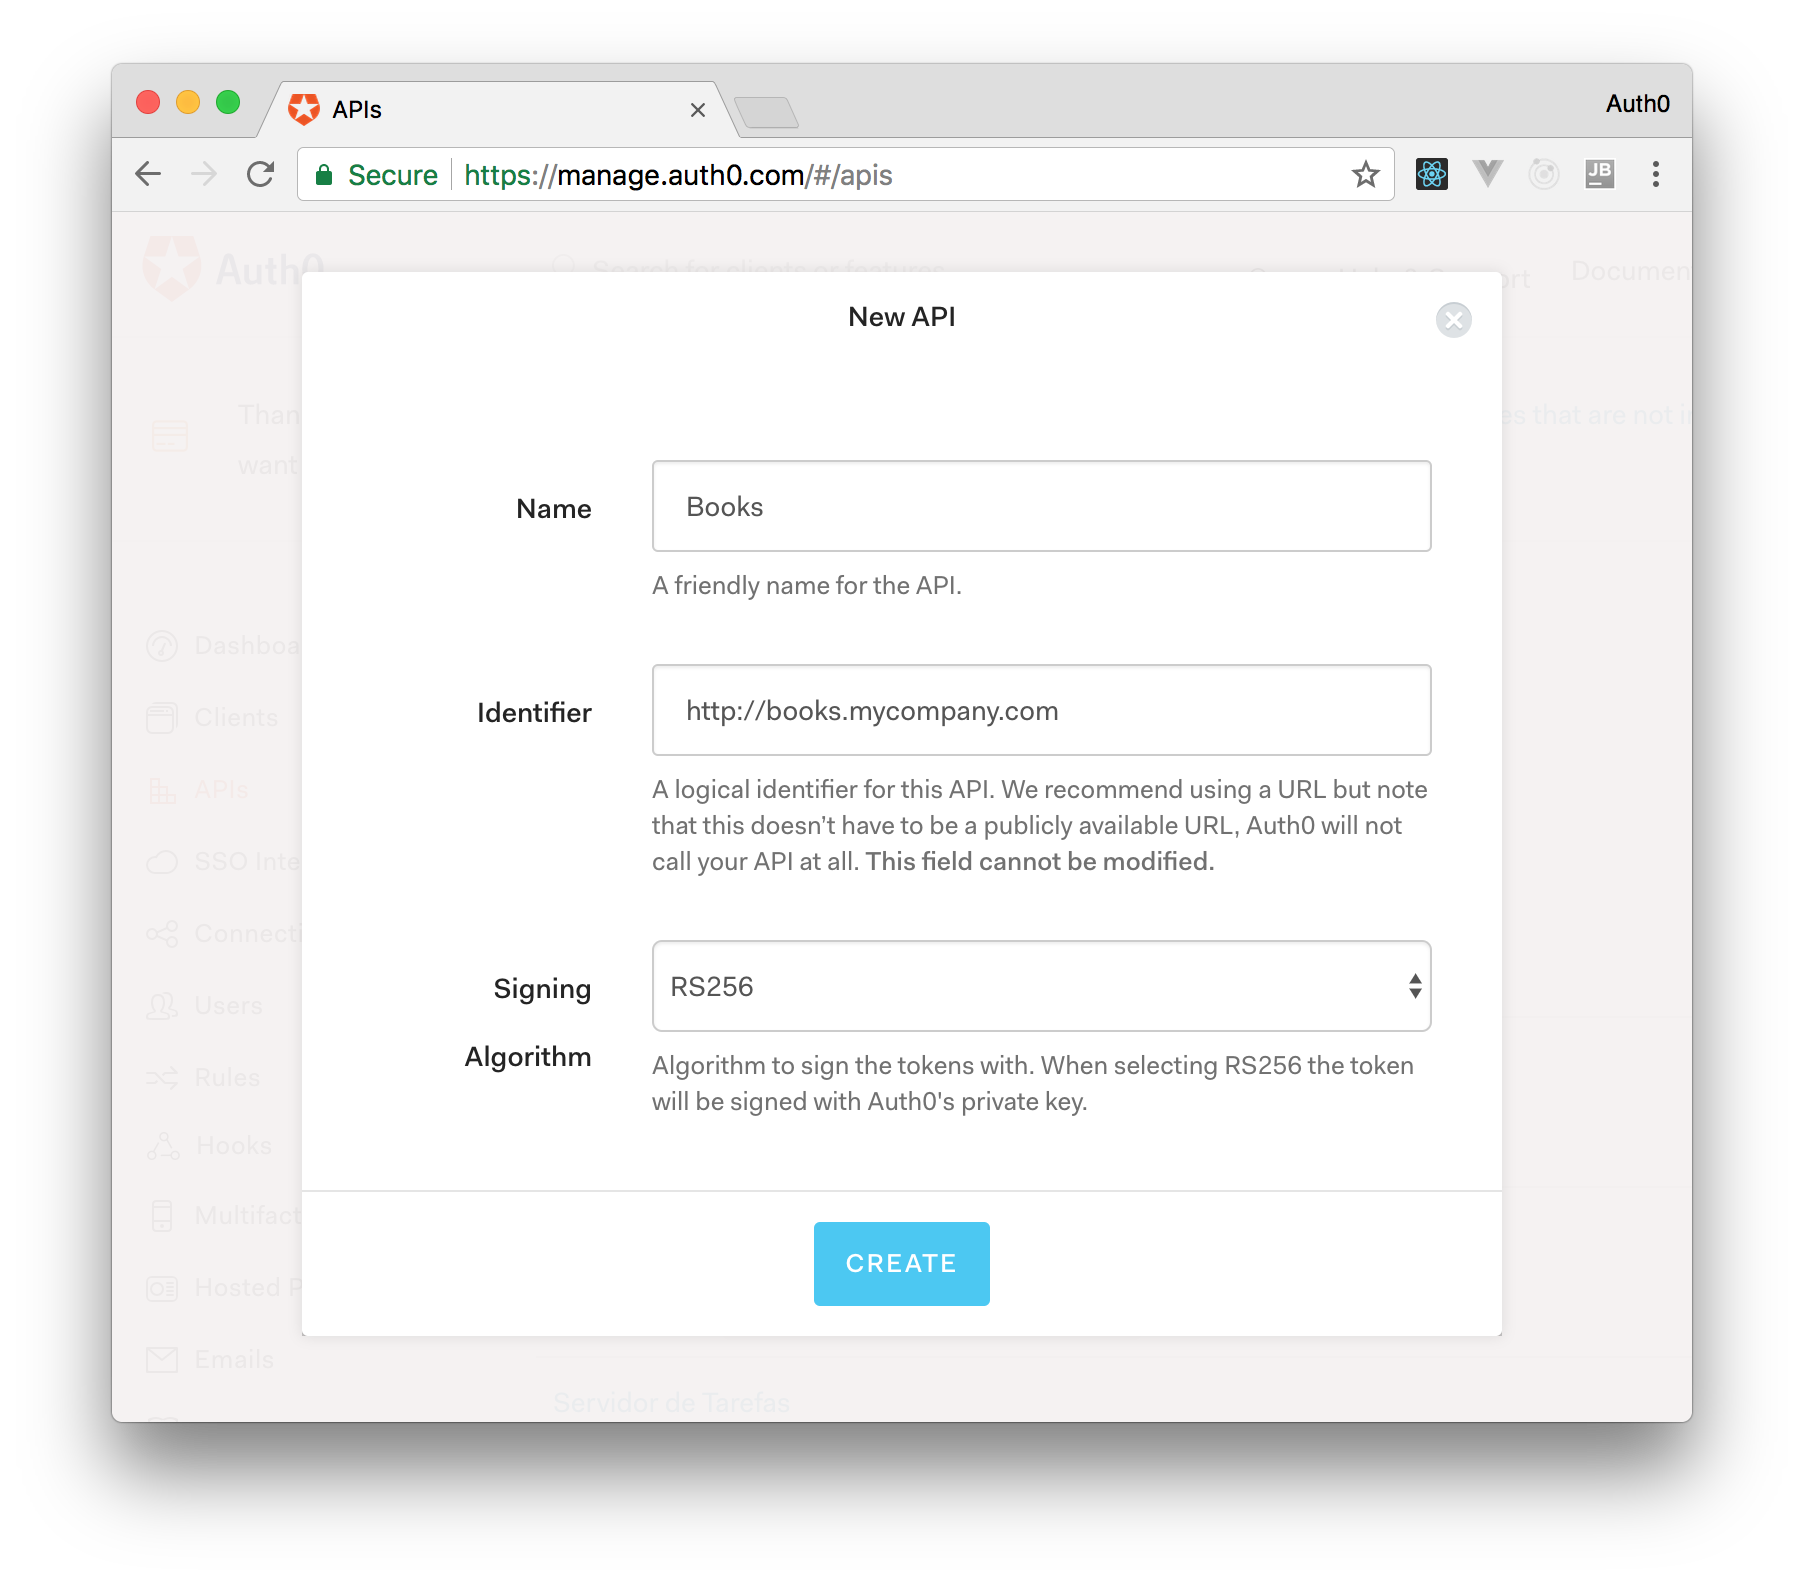
After that, you have to add the call to services.AddAuthentication() in the ConfigureServices() method of the Startup class as follows:
string authority = $"https://{Configuration["Auth0:Domain"]}/";
string audience = Configuration["Auth0:Audience"];

services.AddAuthentication(options =>
{
  options.DefaultAuthenticateScheme = JwtBearerDefaults.AuthenticationScheme;
  options.DefaultChallengeScheme = JwtBearerDefaults.AuthenticationScheme;
}).AddJwtBearer(options =>
{
  options.Authority = authority;
  options.Audience = audience;
});
In the body of the Configure() method of the Startup class, you also need to add an invocation to app.UseAuthentication() and app.UseAuthorization() as shown below:
app.UseRouting();
app.UseAuthentication();
app.UseAuthorization();
app.UseEndpoints(endpoints =>
{
    endpoints.MapControllers();
});
Make sure you invoke these methods in the order shown above. It is essential so that everything works properly.
Finally, add the following element to the appsettings.json configuration file:
{
  "Logging": {
    // ...
  },
  "Auth0": {
    "Domain": "YOUR_DOMAIN",
    "Audience": "YOUR_AUDIENCE"
  }
}Note: Replace the placeholders
YOUR_DOMAINandYOUR_AUDIENCEwith the actual values for the domain that you specified when creating your Auth0 account and the Identifier you assigned to your API.
30. Tutorial/NextButton
31. Tutorial/IssueButton
32. asides/AboutAuth0De
Über Auth0
Auth0, eine Produkteinheit von Okta, verfolgt einen modernen Ansatz zum Thema Identitätsmanagement und ermöglicht es Organisationen, jedem Benutzer sicheren Zugang zu jeder Anwendung zu gewähren. Die Auth0-Plattform ist eine hochgradig anpassbare Plattform, die so einfach zu bedienen ist, wie Entwicklungsteams es sich wünschen und so flexibel, wie sie es benötigen. Auth0 sichert jeden Monat Milliarden von Login-Transaktionen und bietet Komfort, Datenschutz und Sicherheit, damit sich Kunden auf Innovationen konzentrieren können. Weitere Informationen finden Sie unter https://auth0.com.
33. QuizAnswer
See answer...
34. QuoteCard
35. Tutorial/FeedbackButton
I have feedback or ran into an issue
36. asides/AboutAuth0Fr
À propos d’Auth0
Auth0, un pôle de produits au sein d'Okta, adopte une approche moderne de l'identité et permet aux organisations de fournir un accès sécurisé à n'importe quelle application, pour n'importe quel utilisateur. La plateforme d'identité Auth0 est hautement personnalisable, et répond aux besoins des équipes de développement en termes de simplicité d'utilisation et d'adaptabilité. En protégeant des milliards de transactions de connexion chaque mois, Auth0 offre confort, confidentialité, et sécurité, pour permettre aux clients de se concentrer sur l'innovation.
Pour plus d'information, rendez-vous sur https://auth0.com/fr.
37. asides/AboutAuth0Jp
Auth0(オースゼロ)について
Auth0 の認証プラットフォームは、Okta の独立した製品ユニットであり、認証に対して最新のアプローチをとり、組織があらゆるユーザーに対してあらゆるアプリケーションへの安全なアクセスを提供することを可能にします。Auth0 認証プラットフォームは高度にカスタマイズ可能なプラットフォームで、開発チームが望むだけのシンプルさと、必要に応じた柔軟性を兼ね備えています。毎月何十億ものログイントランザクションを保護する Auth0 は、利便性、プライバシー、セキュリティを提供することで、お客様がイノベーションに集中できるようにします。詳細はhttps://auth0.com/jp/をご確認ください。
38. ebook-ads/JwtHandbookJp
効率的に JWT について理解を深めたいですか?
無料で ebook をダウンロードする
39. asides/JpJwt
補足:専門家に JWT 実装を委任する
JWT は OAuth2 フレームワーク上に存在するアイデンティティレイヤーであり、OpenID Connect スタンダード には不可欠な要素です。Auth0 は OpenID Connect に認定されたアイデンティティプラットフォームです。これはもしあなたが Auth0 を選んだ場合、同様に仕様に準拠したサードパーティシステムと 100% 相互運用可能であることを意味します。
OpenID Connect の仕様は、ID トークンに JWT フォーマットを使用すること求めています。ID トークンには、クレーム形式で表されるユーザーネームやパスワードのようなユーザープロファイル情報が含まれます。これらのクレームはユーザーに関するステートメントであり、トークン保持者が署名を検証できる場合、信用があるものとして扱われます。
OAuth2 の仕様では、ユーザーの代理でアプリケーションに API へのアクセスを許可するために使用されるアクセストークンのフォーマットは指定されていません。業界はアクセストークンに対する JWT の使用も広く受け入れています。
開発者として、サービス内で認証関連の JWT の直接検証や解読を心配すべきではありません。Auth0 が提供しているモダンな SDKs を使用することで、JWT の適切な実装と使用を行うことができます。JWT は最新のベストプラクティスに従っており、既知のセキュリティリスクに対処するために定期的に更新されています。
例えば、シングルページアプリケーションの Auth0 SDK は、 ID トークンからユーザー情報を抽出する方法 auth0.getUser を提供しています。
Auth0 プラットフォームを試してみたい場合は、フリーアカウントにサインアップして早速始めてみましょう!フリーアカウントでは、以下の機能をお使いいただけます:
JTW 、その内部構造、JWT で使用可能なアルゴリズムの種類、その他一般的な使い方などに関してより詳細を知りたい場合は、 JWT ハンドブックをご覧ください。
40. ebook-ads/OidcHandbookJp
現代の認証に対応するためのデファクトスタンダードを学びましょう
無料で EBOOK をダウンロードする
41. AmpWarning
42. PartnerCard

43. ebook-ads/BrokenAuthChecklist
Is your identity secure?
Download the checklist
44. ebook-ads/DigitalTransformationBook
Real companies are using identity to drive digital transformation
Download the Whitepaper
45. asides/AboutAuth0Es
Acerca de Auth0
Auth0, una unidad de producto dentro de Okta, adopta un enfoque moderno de la identidad y permite a las organizaciones proporcionar acceso seguro a cualquier aplicación, por parte de cualquier usuario. La plataforma de identidad de Auth0 es altamente personalizable y es tan simple como los equipos de desarrollo quieren y tan flexible como necesitan. Dado que protege miles de millones de transacciones de inicio de sesión cada mes, Auth0 ofrece conveniencia, privacidad y seguridad para que los clientes puedan concentrarse en la innovación. Para obtener más información, visite https://auth0.com.
46. ebook-ads/IamWhitepaper
For further information, we invite you to learn more about IAM with our free whitepaper.
Download the whitepaper
47. ebook-ads/CredentialStuffingAttacksWhitepaper
Want to learn more about Credential Stuffing Attacks?
Download the whitepaper
48. asides/IdentityUnlocked
Identity, Unlocked
Identity, Unlocked is the podcast that discusses identity specs and trends from a developer perspective. Identity, Unlocked is powered by Auth0. Vittorio Bertocci is Principal Architect at Auth0 and applies his vast knowledge of the identity industry to Auth0 in all aspects of the company, including internal and external education, product innovation, and customer integration.
49. AvocadoLabsPromo

Avocado Labs Livestream
Join us on Monday, October 5th, 2020 at 9 am PT as we talk about our strategy behind building the Auth0 Marketplace and the opportunity it delivers.
50. ebook-ads/ConsentManagement
Make consent a competitive advantage
Download the Whitepaper
51. BigQuote
"By enabling native social authentication, our quoteAuthor="
—
52. ebook-ads/PostMergerIntegration
Manage identity to streamline integrations
Download the Whitepaper
53. ebook-ads/EvolutionCiam
How do you choose the best CIAM solution for your needs?
Download the Guide
54. Whatabyte/BuildWhatYouBuild
What You Will Build
You'll learn how to create and secure a feature-complete Express API through hands-on practice. You'll test your API locally using terminal commands. Additionally, you'll use a live client application, the "WHATABYTE Dashboard", as a testing harness to simulate production conditions and live user interactions.
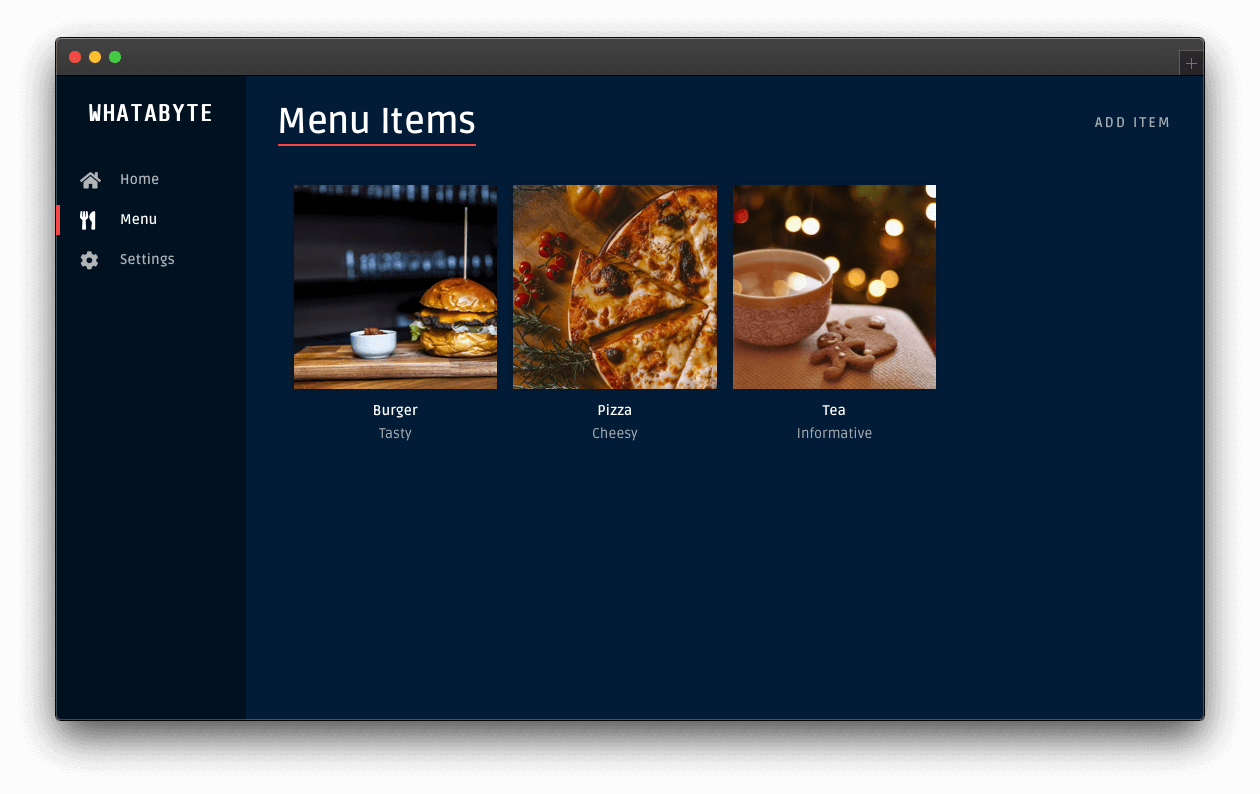
The sleek web player from Spotify inspired the design of the live demo application.
For simplicity, you'll store data in-memory and not in an external database.
For security, you'll limit API access by following these business rules:
Anyone can read data.
Only authenticated users with a
menu-adminrole can create, update, or delete menu items. Themenu-adminrole will bundle the necessary permissions to execute these write operations.
55. Whatabyte/BuildMenuItemModel
Before creating any controllers and services, define the structure of the data you want to manage. A menu item has the following properties:
id: (number) Unique identifier for the item record.name: (string) Name of the item.price: (number) Price of the item in cents.description: (string) Description of the item.image: (string) URL pointing to the item's image.
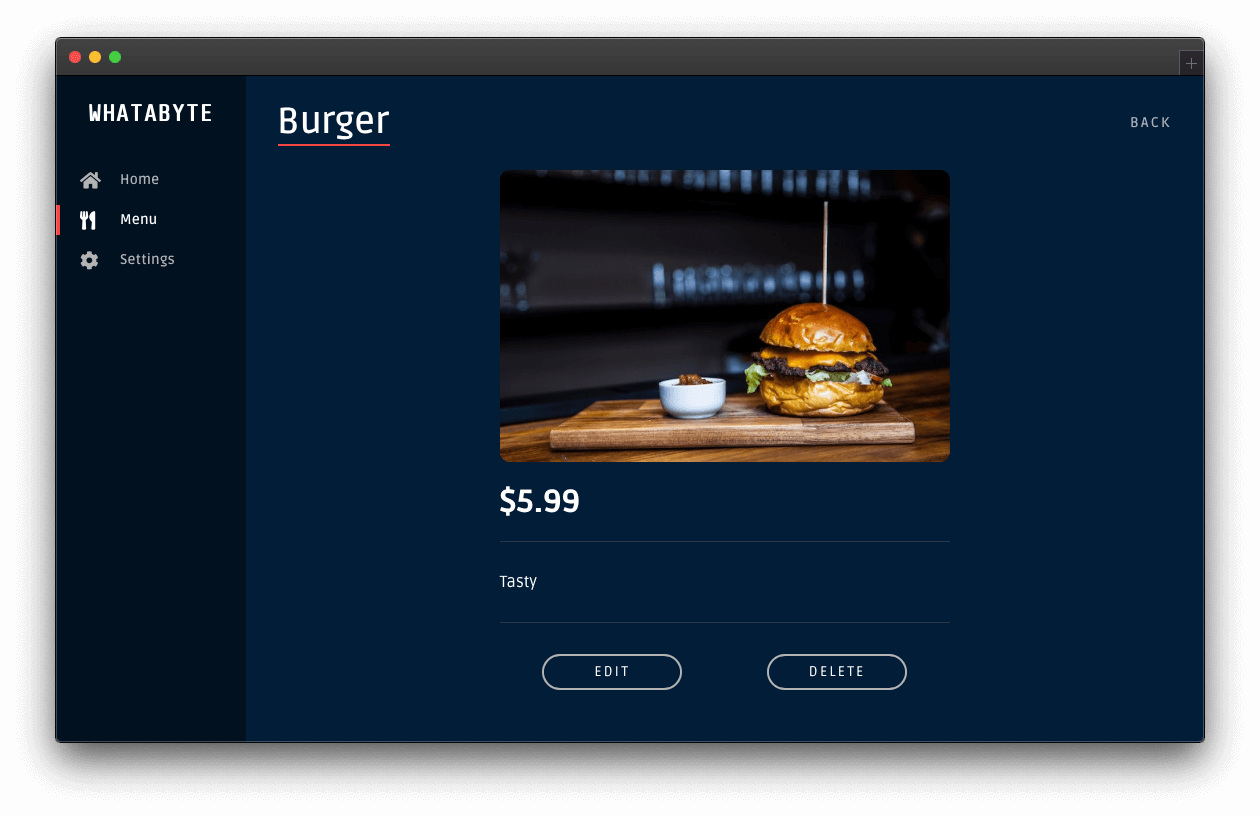
Why are you using cents to represent the item's price?
It's better to use integer values to store the item's price and perform arithmetic operations. Developers should never use floating-point numbers to represent monetary values. Floating-point numbers cannot precisely represent all real numbers. As such, floating-point operations cannot precisely represent true arithmetic operations, leading to many surprising situations.
For example, let's say you plan to sell a cup of tea for 1 dollar and 10 cents, $1.10. You have a customer who orders 162 cups. For what amount should you invoice the customer?
1.10 * 162 = 178.20000000000002You need to apply a rounding function to 178.20000000000002 to get an appropriate invoice amount.
Now, what if you represent the price of a cup of tea in cents? It would be 110 cents, which makes finding the invoice amount much more accurate:
110 * 162 = 17820All that you have to do now is to divide that number by 100 to display or print the dollar amount:
17820 / 100 = 178.2Invoice amount: $178.20.
Remember: Store in cents. Display in dollars.
56. Whatabyte/BuildTestEndpoints
Test the Express API Endpoints
With the controllers all set up, it's time to test them out. To make this process simple, you can use cUrl from your terminal, which should work across operating systems.
Are you developing on Windows? Learn more about Windows PowerShell Commands for Web Developers.
- Get all items:
curl http://localhost:7000/api/menu/items -iThe
-iflag includes protocol headers in the output.
You should get a 200 OK response with an array that includes three menu items.
- Get an item:
curl http://localhost:7000/api/menu/items/2 -iYou should get a 200 OK response with a JSON object describing a pizza.
- Add an item:
curl -X POST -H 'Content-Type: application/json' -d '{
  "name": "Salad",
  "price": 499,
  "description": "Fresh",
  "image": "https://images.ctfassets.net/23aumh6u8s0i/5pnNAeu0kev0P5Neh9W0jj/5b62440be149d0c1a9cb84a255662205/whatabyte_salad-sm.png"
}' http://localhost:7000/api/menu/items -i
You should get an 201 Created response with a JSON object describing a salad.
- Verify that you added the "Salad" menu item:
curl http://localhost:7000/api/menu/items/ -iThe last item in the JSON object response should describe a salad and match the data from the POST request you sent previously.
- Update an item:
curl -X PUT -H 'Content-Type: application/json' -d '{
  "name": "Spicy Pizza",
  "price": 599,
  "description": "Blazing Good",
  "image": "https://images.ctfassets.net/23aumh6u8s0i/2x1D2KeepKoZlsUq0SEsOu/bee61947ed648848e99c71ce22563849/whatabyte_pizza-sm.png"
}' http://localhost:7000/api/menu/items/2 -i
You should get a 200 OK response with a JSON object describing the updated menu item.
- Verify that your API updated the item:
curl http://localhost:7000/api/menu/items/2 -iYou should get a 200 OK response with the updated menu item.
- Delete an item:
curl -X DELETE http://localhost:7000/api/menu/items/2 -iYou should get an 204 No Content response from the server.
- Verify that you deleted the item:
curl http://localhost:7000/api/menu/items/ -iYou should get a 200 OK response with a JSON object that includes three menu items. None of the items is a pizza.
57. Whatabyte/BuildUseDemoClient
Test the API with the Demo Client
You can use a demo application, the WHATABYTE Dashboard, to interact with your Menu API like any user would. The demo application lets you enable and disable its authentication features.
Since you have not yet implemented authorization in your API to protect your endpoints, you'll use the demo client without any authentication features, which allows you to perform read and write operations on your Menu API as an anonymous user.
Set up the demo client application
Head to https://dashboard.whatabyte.app to open the demo client. If this is your first time using this client application, the Auth0 Demo Settings view will open up.
Under the "Auth0 Demo Settings" view, ensure that the Enable Authentication Features option is off:

You should have a form with one field labeled API Server Base URL under its API Configuration section. The value of this field corresponds to your Express server base URL, in this case, http://localhost:7000.
If you are using any other base URL for your server, change the value of the form field.
Now, click the Save button to load the demo client application:
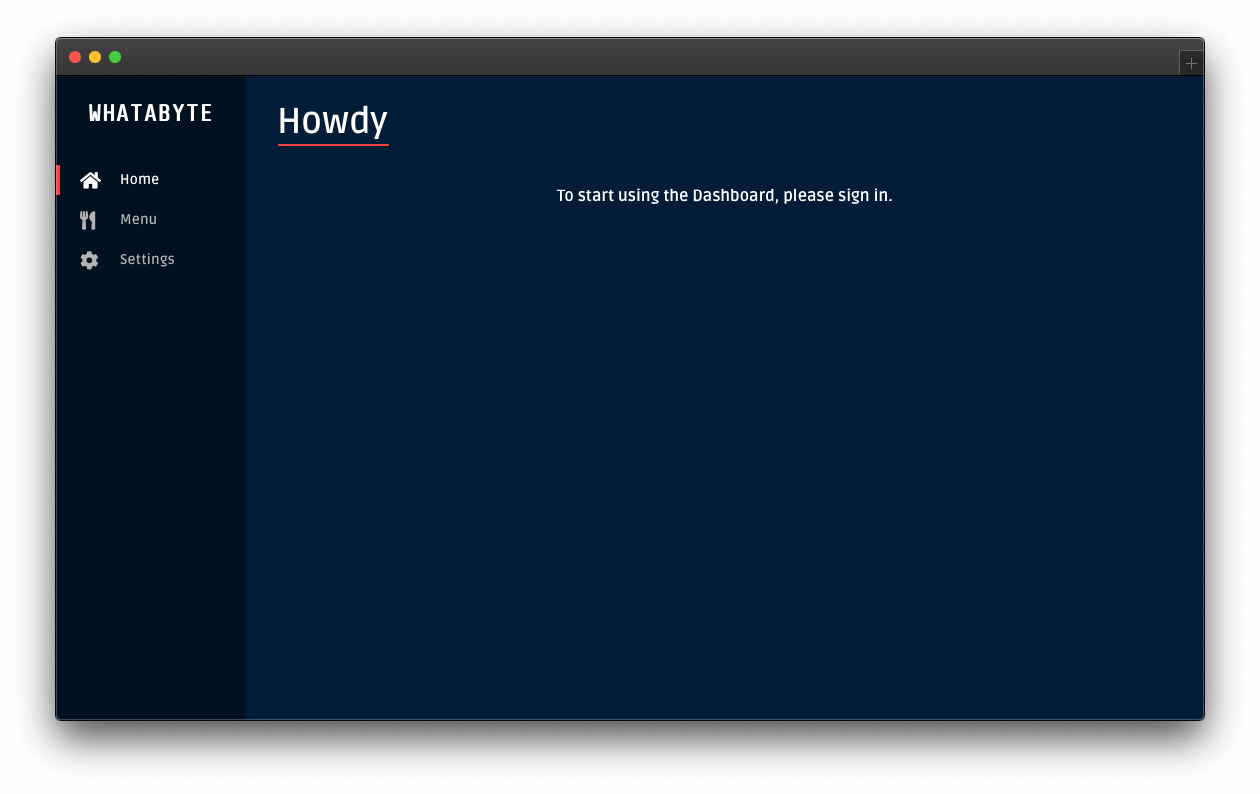
Locate the navigation bar on the left side of the page. Then, click on the Menu tab. Three menu items from your server's store should load up:

Create an item
On the "Menu Items" page, click on the Add Item button on the top-right corner. The "Add Menu Item" page should load up with a pre-populated form:

Click on the Save button to add a "Spring Salad" item to your menu.
Once the request-response cycle is complete between the client and the server, the client application loads the "Menu Items" page again. The menu grid now features four items, which includes the "Spring Salad":
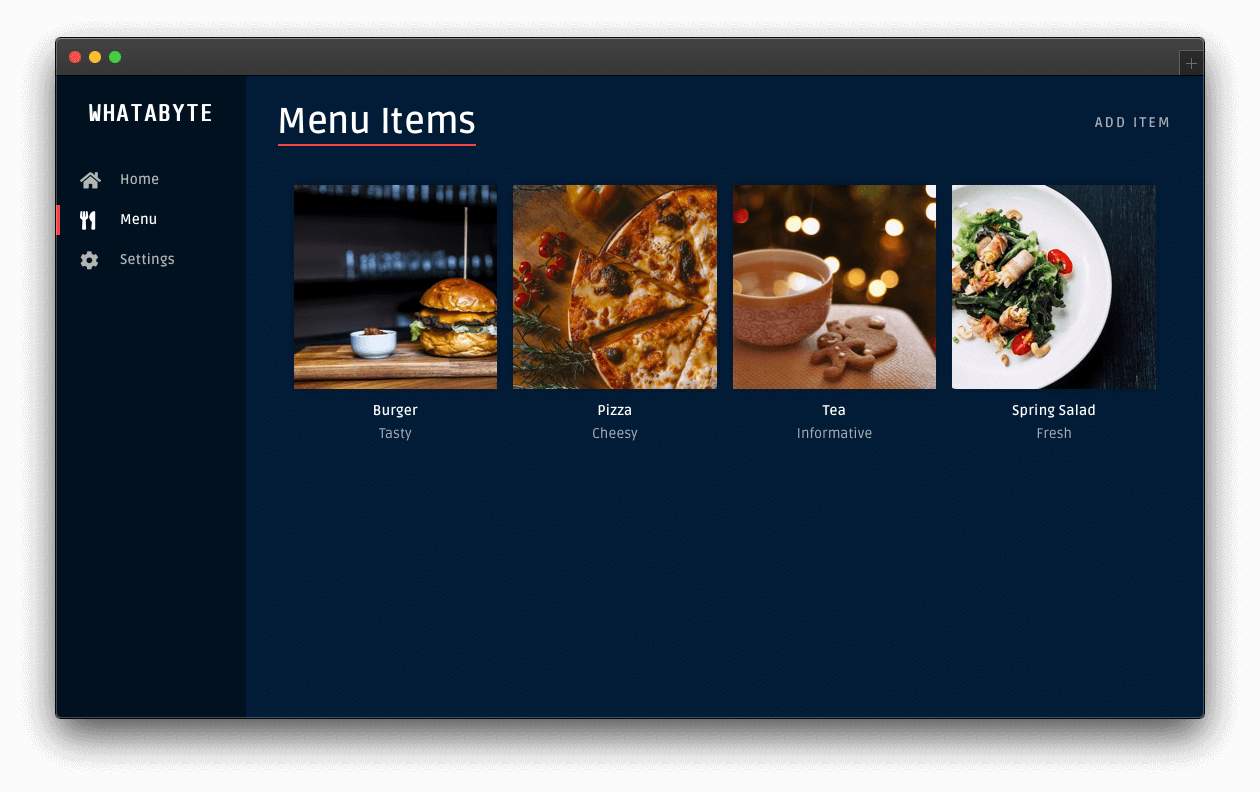
Update an item
Now, try updating the property of an item. Click on the "Tea" item to load its item page:
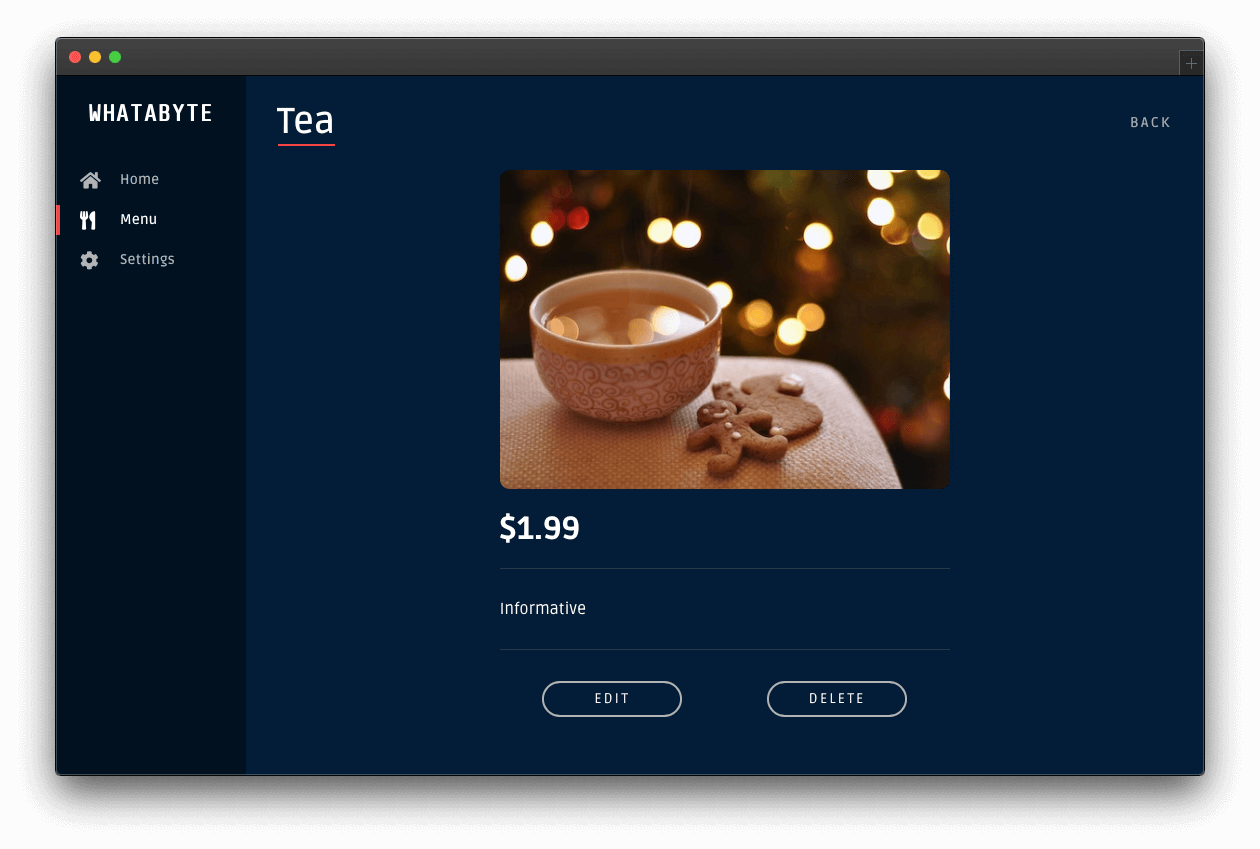
You'll notice two buttons at the bottom: Edit and Delete.
Click the Edit button and modify the form that loads up:
- Change the Name value from "Tea" to "Ginger Tea".
- Change the Description value from "Informative" to "Energizing".
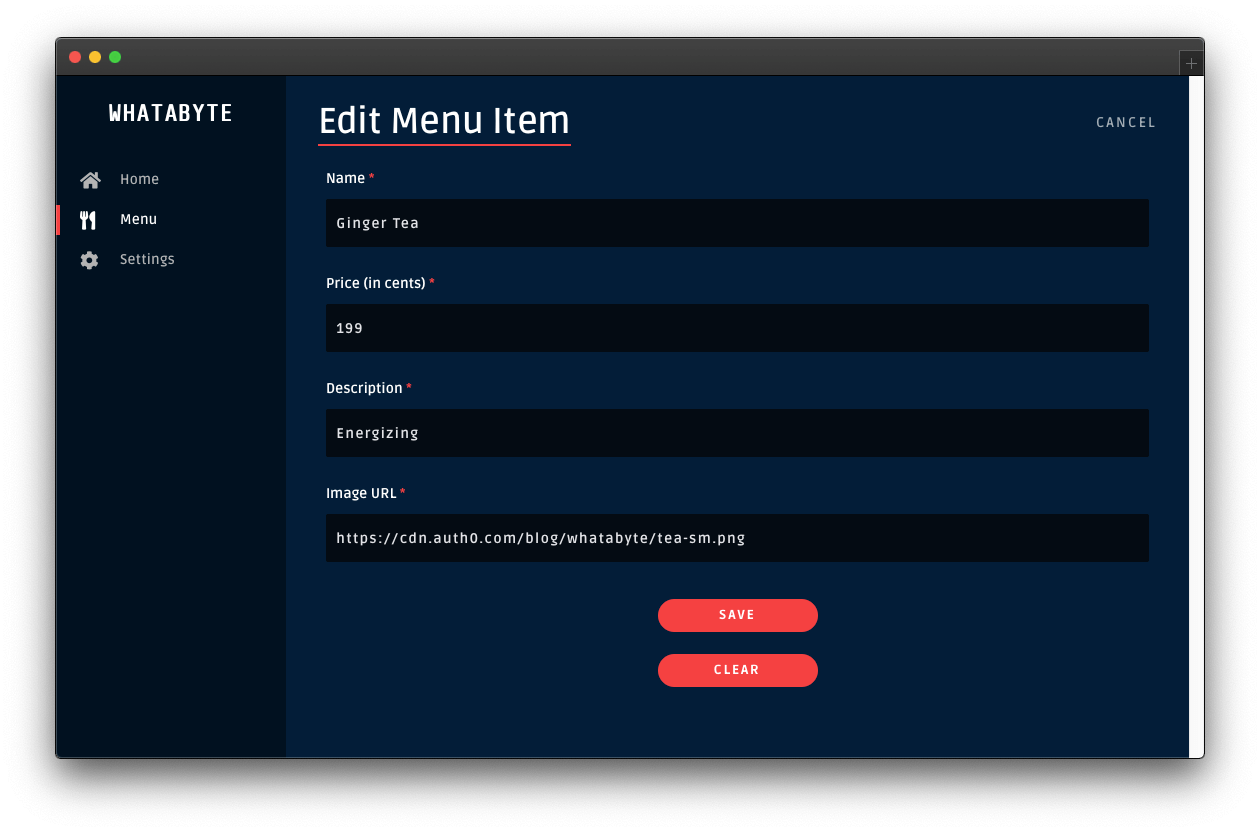
Then, click the Save button. Once the request-response cycle completes again, you'll see four items in the menu grid. However, the "Tea" item will show its new name and description:
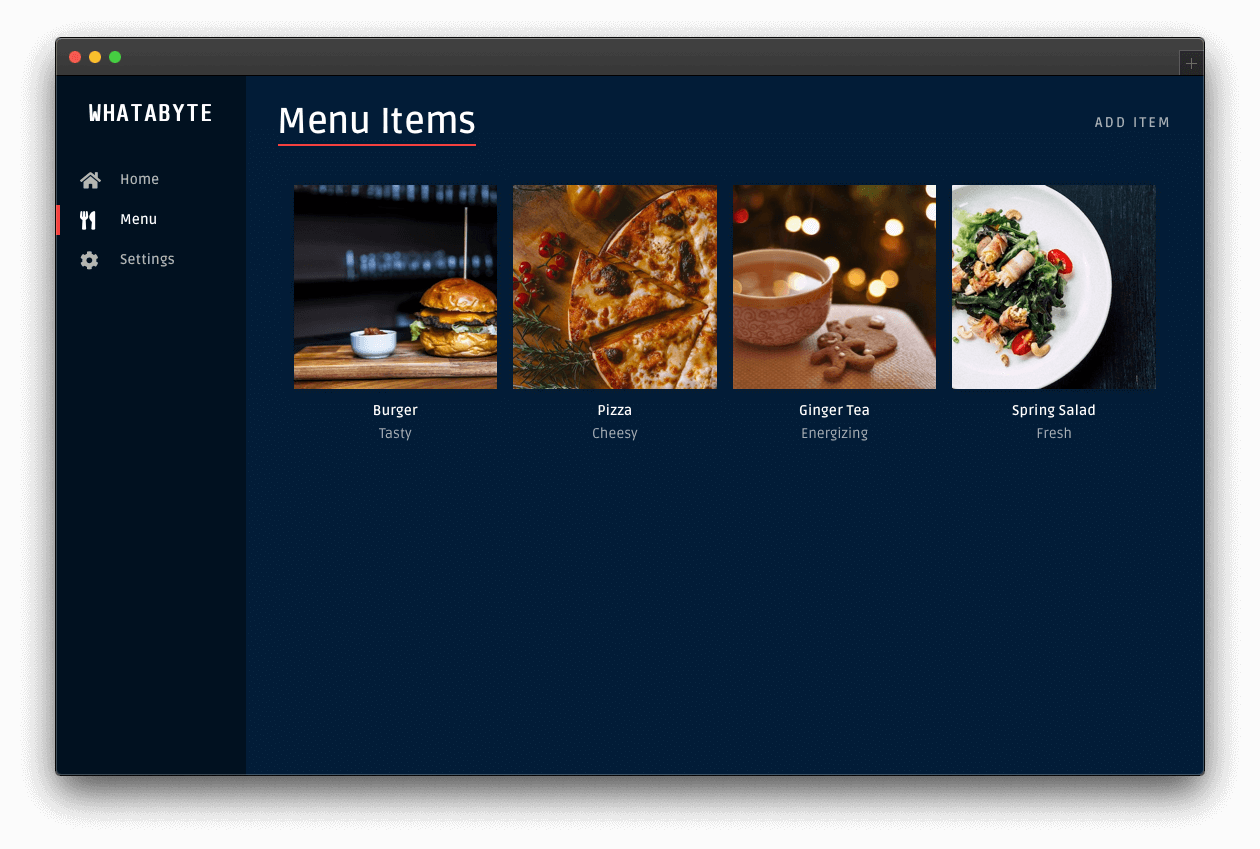
Delete an item
Click on any item on the menu grid, such as the "Spring Salad". On the item page, click its Delete button. You'll load up the "Delete Menu Item" page, asking you to confirm if you what to delete the item:

Click the Delete button to confirm the operation. After the request-response cycle completes, the menu grid loads up without that particular item:
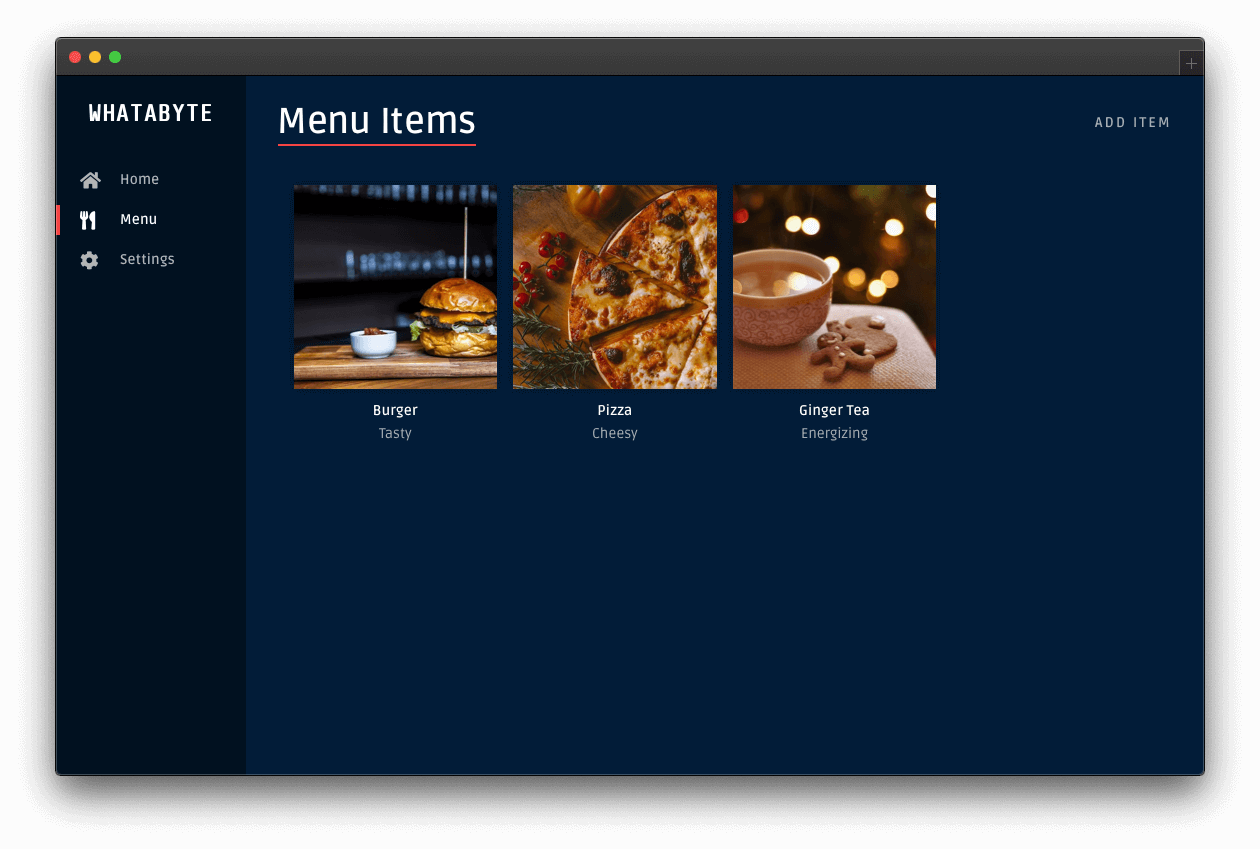
58. Whatabyte/BuildSecurityConsiderations
Security Considerations
Now that you have a working API with error handling to read and write data, it's time for you to learn how to protect it against unauthorized access by using Auth0.
Auth0 is a flexible, drop-in solution to add authentication and authorization services to your applications. Your team and organization can avoid the cost, time, and risk that comes with building your solution to authenticate and authorize users. Auth0 offers tons of guidance and SDKs for you to get started and integrate Auth0 in your stack easily.
As it is, anyone could use the client application to perform write operations. Someone could delete all the menu items:

To prevent such a data catastrophe from happening, you need to secure your write endpoints by implementing authorization on the API layer. Once your Menu API has authorization in place, you can enable the authentication features of the demo client to improve the UX of the end-users.
In the next part of this tutorial, you'll require users to log in to perform write operations on the API. Additionally, you'll further increase your API's security by requiring users to have a set of permissions (defined through a role) to perform any write operation.
59. Whatabyte/SecureSetUpAuth0Api
Set Up an Authorization Service
With Auth0, you can manage the authorization requirements of an application stack easily. To start, you need to create a free Auth0 account if you don't have one yet.
Auth0 is a flexible, drop-in solution to add authentication and authorization services to your applications. Your team and organization can avoid the cost, time, and risk that comes with building your own solution to authenticate and authorize users. We offer tons of guidance and SDKs for you to get started and integrate Auth0 in your stack easily.
After you create your account, you'll create an Auth0 Tenant, which is a container that Auth0 uses to store your identity service configuration and your users in isolation — no other Auth0 customer can peek into or access your tenant. It's similar to you being a tenant in an apartment building. Auth0 looks after the building while the apartment is all yours to live in and customize. However, each apartment is fully isolated (no windows, soundproof walls, etc.) so that neighbors can't intrude on your privacy.
After creating your tenant, you need to create an API register with Auth0, which is an API that you define within your Auth0 tenant and that you can consume from your applications to process authentication and authorization requests.
After creating your account, head to the APIs section in the Auth0 Dashboard and hit the Create API button.
Then, in the form that Auth0 shows:
Add a Name to your API:
Menu API.Set its Identifier to
https://menu-api.example.com.Leave the signing algorithm as
RS256as it's the best option from a security standpoint.
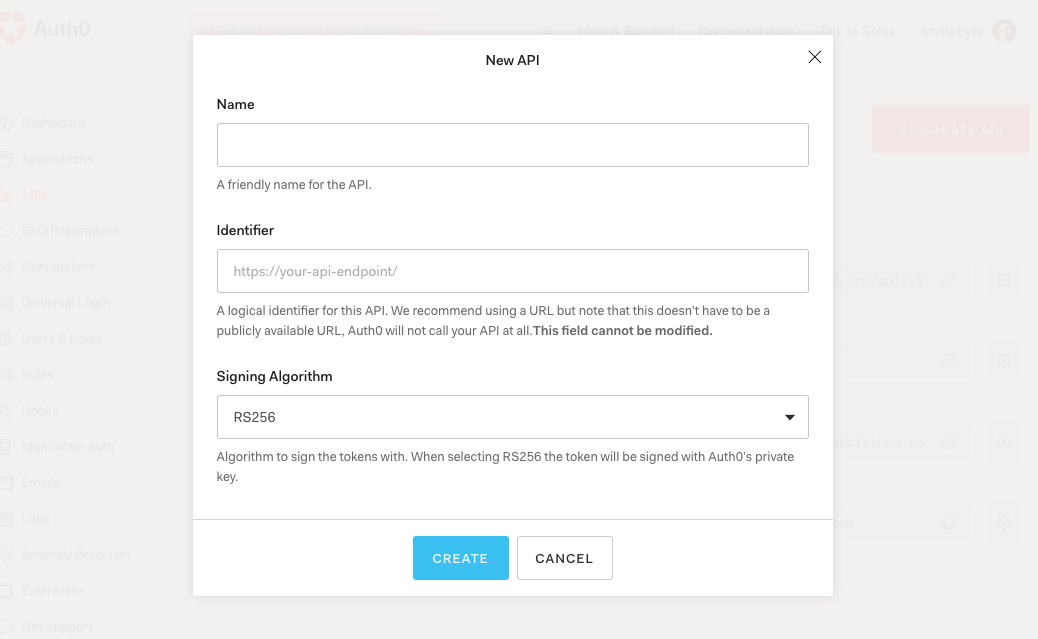
Identifiers are unique strings that help Auth0 differentiate between your different APIs. We recommend using URLs as they facilitate predictably creating unique identifiers; however, Auth0 never calls these URLs.
With these values in place, hit the Create button.
Your API needs some configuration variables to identity itself with Auth0: an Audience and a Domain value. The best place to store these values is within the .env file of your project.
Open .env and add the following keys to it:
PORT=7000
AUTH0_AUDIENCE=
AUTH0_DOMAIN=
Head back to your Auth0 API page, and follow these steps to get the Auth0 Audience:
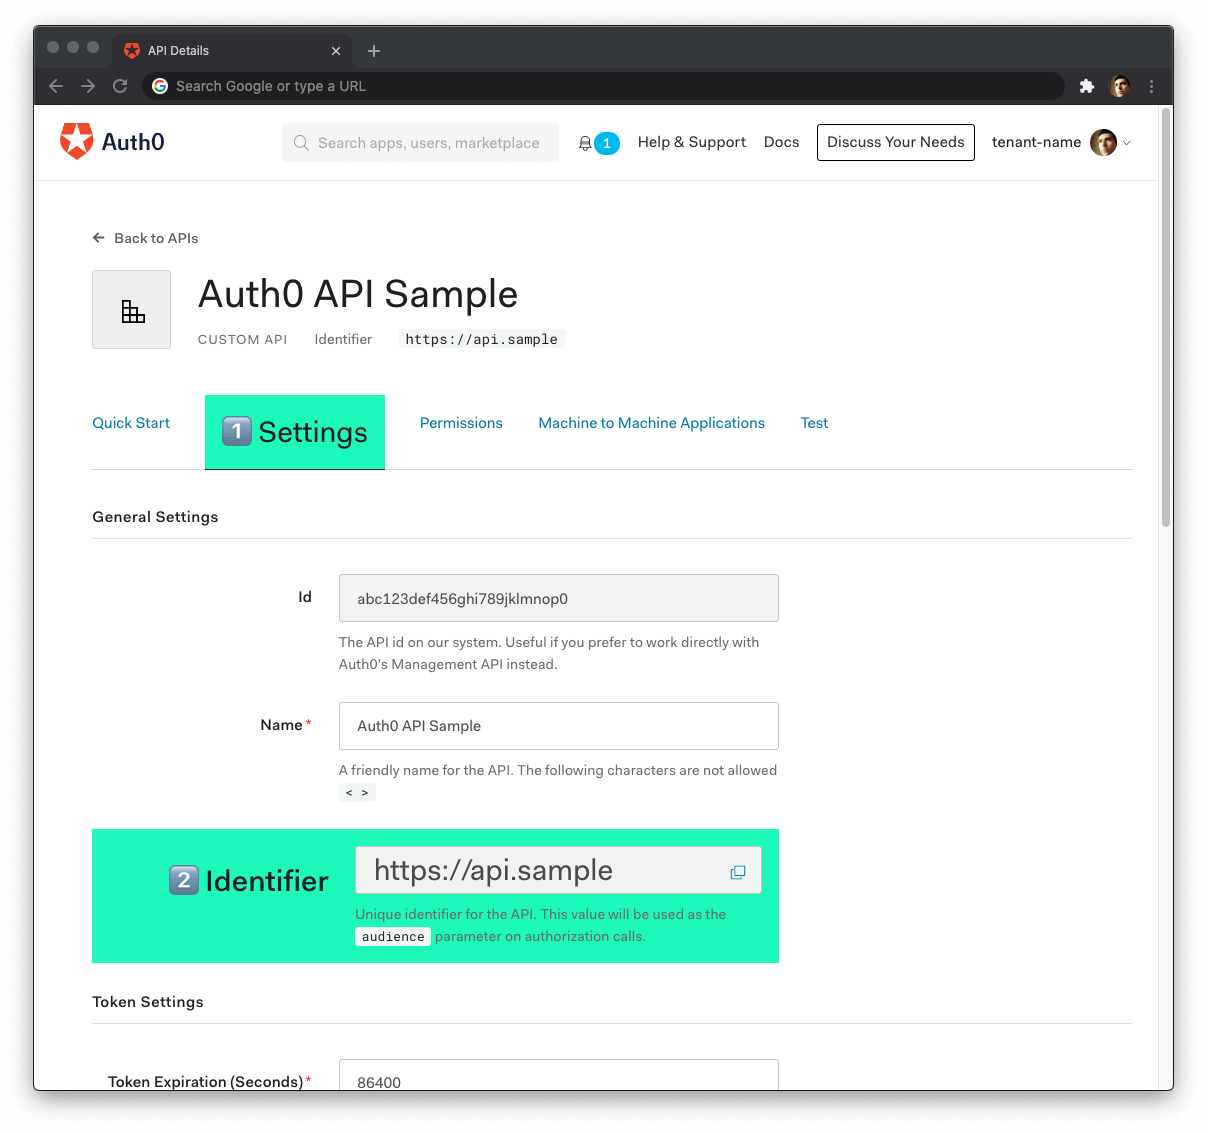
Click on the "Settings" tab.
Locate the "Identifier" field and copy its value.
Paste the "Identifier" value as the value of
AUTH0_AUDIENCEin.env.
Now, follow these steps to get the Auth0 Domain value:
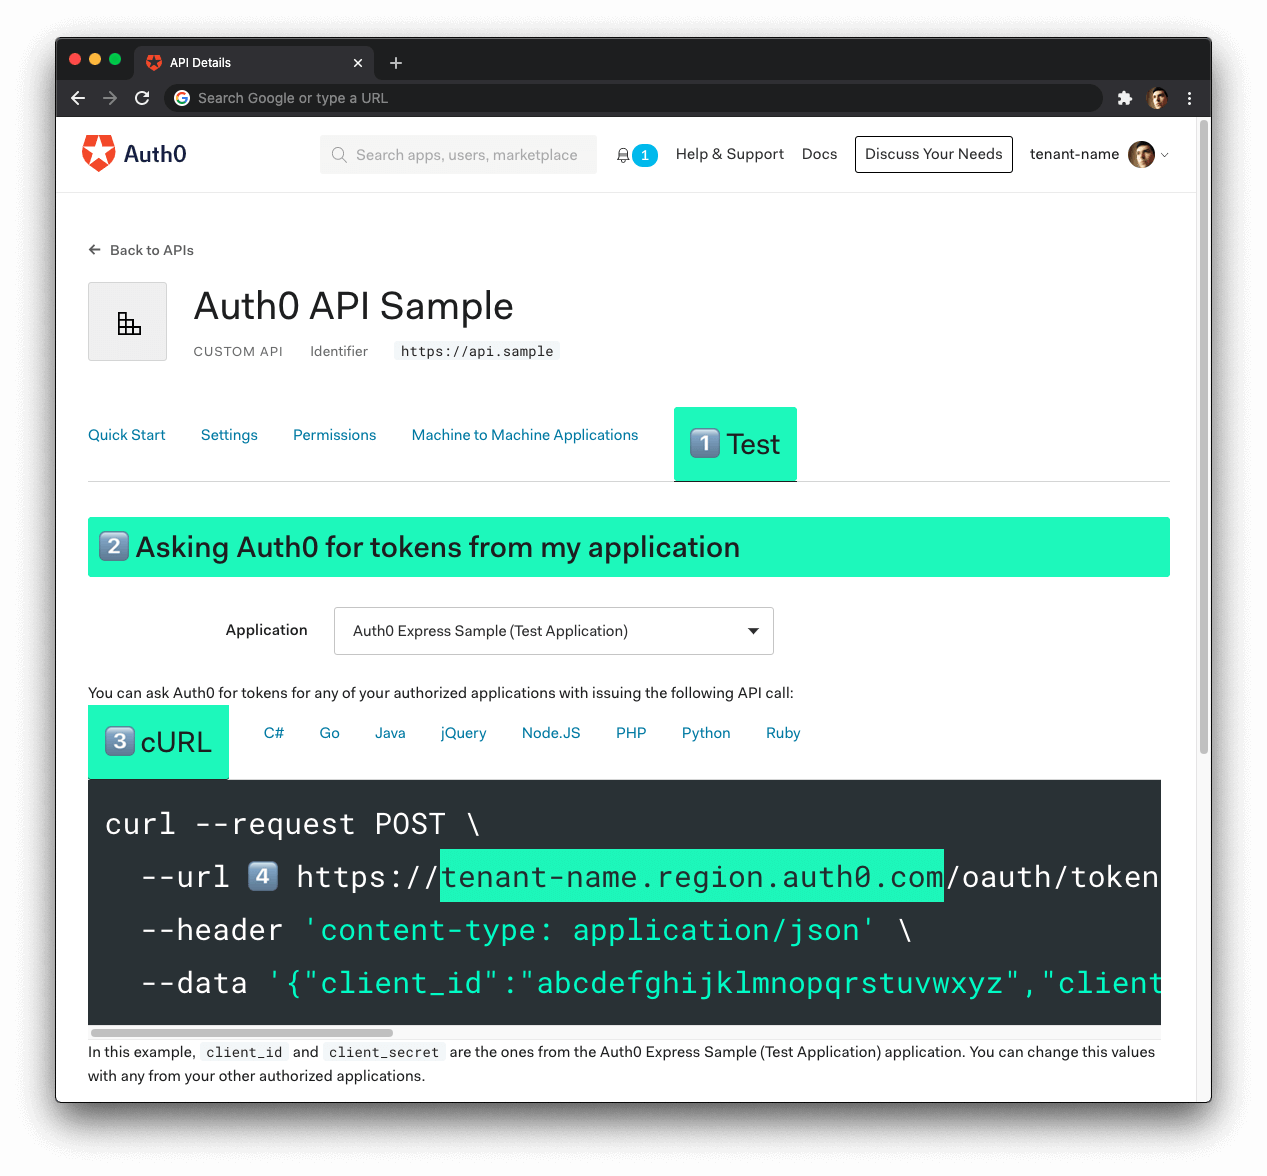
- Click on the "Test" tab.
- Locate the section called "Asking Auth0 for tokens from my application".
- Click on the cURL tab to show a mock
POSTrequest. - Copy your Auth0 domain, which is part of the
--urlparameter value:tenant-name.region.auth0.com. - Paste the Auth0 domain value as the value of
AUTH0_DOMAINin.env.
Tips to get the Auth0 Domain
The Auth0 Domain is the substring between the protocol,
https://and the path/oauth/token.The Auth0 Domain follows this pattern:
tenant-name.region.auth0.com.The
regionsubdomain (au,us, oreu) is optional. Some Auth0 Domains don't have it.Click on the image above, please, if you have any doubt on how to get the Auth0 Domain value.
Restart the server so that Express can recognize the changes you just made to .env. Stop the running process and execute npm run dev once again.
60. Whatabyte/SecureRegisterClientApp
Register a Client Application with Auth0
You need a client application to simulate an end-user interaction with your API and see its security in action. To make that simulation more fun and engaging, you'll use the WHATABYTE Dashboard, a demo client application that lets you manage items for a restaurant menu. You'll create a user with Auth0, log in, and access pages that make requests to your API endpoints under the hood.
For that end-user interaction to happen, you'll need to create a Single-Page Application register with Auth0. This register will provide you with the configuration values that you need to connect the demo client application with Auth0, namely the Auth0 Domain and Auth0 Client ID. Once configured, the client application can communicate with the Auth0 authentication server and get access tokens for your logged-in users.
The process of creating an Auth0 Single-Page Application register is straightforward:
Open the Auth0 Applications section of the Auth0 Dashboard.
Click on the Create Application button.
Provide a Name value such as WHATABYTE Demo Client.
Choose Single Page Web Applications as the application type.
Click on the Create button.
A new page loads with details about your Auth0 application register. Click on its Settings tab to access its configuration values.
Next, visit https://dashboard.whatabyte.app/ to open the WHATABYTE Dashboard demo client application.
If you are not on the Auth0 Demo Settings page, click on the "Settings" tab from the left-hand navigation bar and then click the "Modify" button.
Enable the authentication features of the demo application. Then, use the configuration values present in your Auth0 application "Settings" page to fill the values of Auth0 Domain and Auth0 Client ID in the demo settings form:
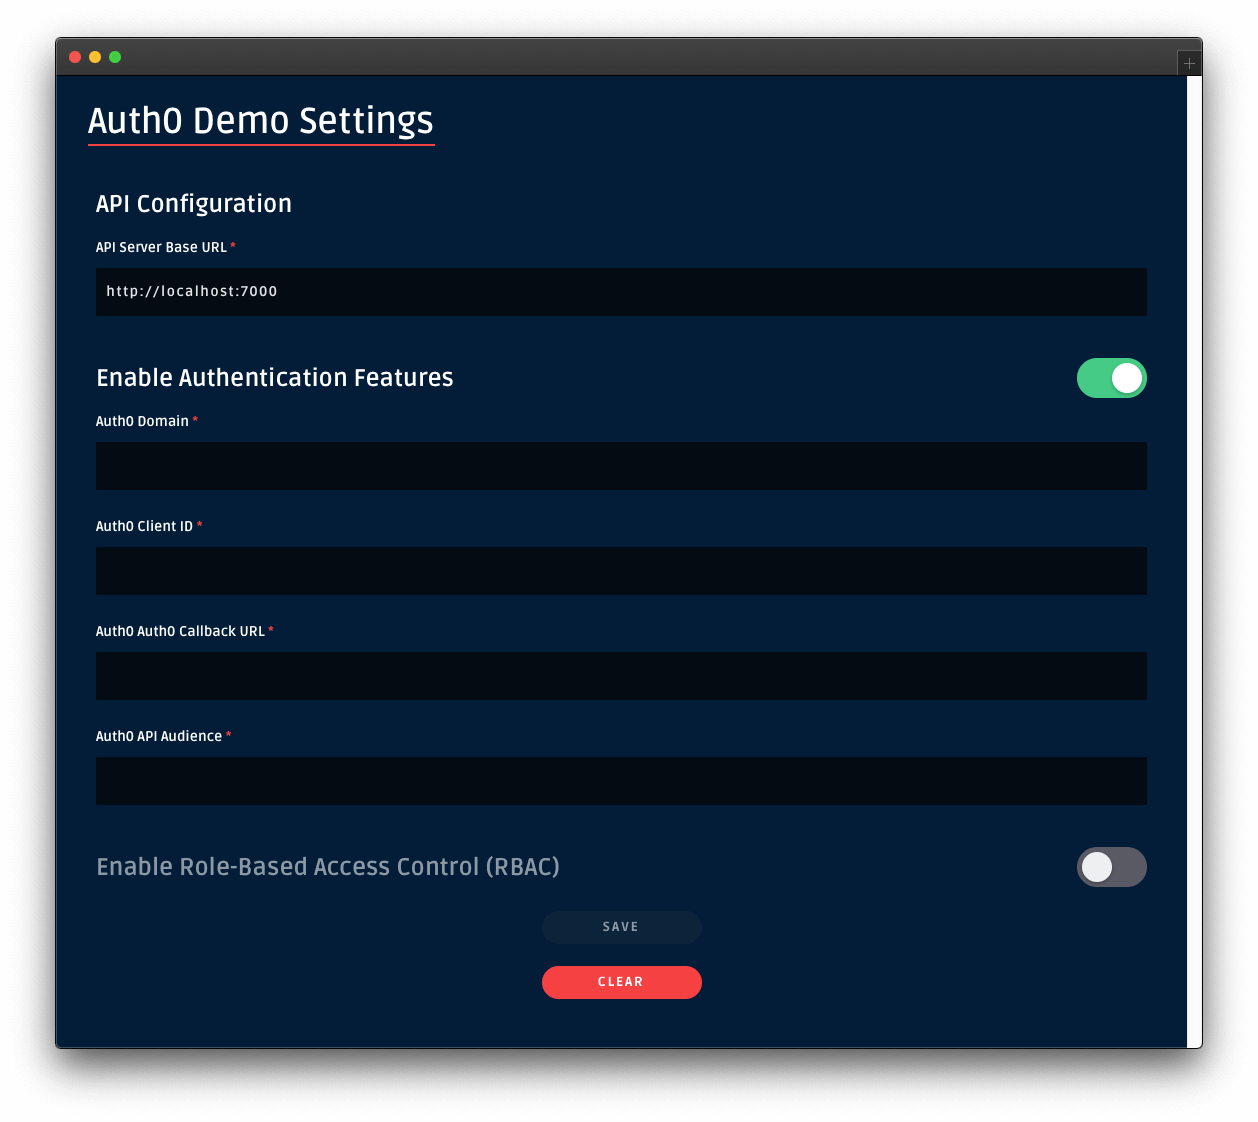
For the value of Auth0 API Audience use https://menu-api.example.com, which is the Identifier of the MENU API you registered with Auth0 earlier in the tutorial.
For the value of Auth0 Callback URL use https://dashboard.whatabyte.app/home. You'll learn what how Auth0 uses this callback value in the next section.
Click the Save button below the form. The WHATABYTE Dashboard is a client to your API server. To test this connection, click on the Menu tab and observe how it populates with the menu items you defined in your API store.
Connect a client application with Auth0
Head back to the Settings tab of your Auth0 application register page and update the following fields:
Allowed Callback URLs
Use the value of Auth0 Callback URL from the Auth0 Demo Settings form, https://dashboard.whatabyte.app/home.
After a user authenticates, Auth0 only calls back any of the URLs listed in this field. You can specify multiple valid URLs by comma-separating them (typically to handle different environments like QA or testing). Make sure to specify the protocol, http:// or https://; otherwise, the callback may fail in some cases.
Allowed Web Origins
Use https://dashboard.whatabyte.app.
A client application will make requests under the hood to an Auth0 URL to handle authentication requests. As such, you need to add your the application's origin URL to avoid Cross-Origin Resource Sharing (CORS) issues.
Allowed Logout URLs
Use https://dashboard.whatabyte.app/home.
This field holds a set of URLs that Auth0 can redirect to after a user logs out of your application. The default configuration of the demo client uses the provided value for redirecting users.
With these values in place, you can scroll to the bottom of the "Settings" page and click on the Save Changes button.
61. Whatabyte/SecureSignIn
Sign In
In the demo client, click on the Sign In button. The client will redirect you to the Auth0 Universal Login page to log in or sign up. Since this may be the first user you are adding to Auth0, go ahead and click on the Sign Up link at the bottom of the form. Then, provide an email and password to register a new user.
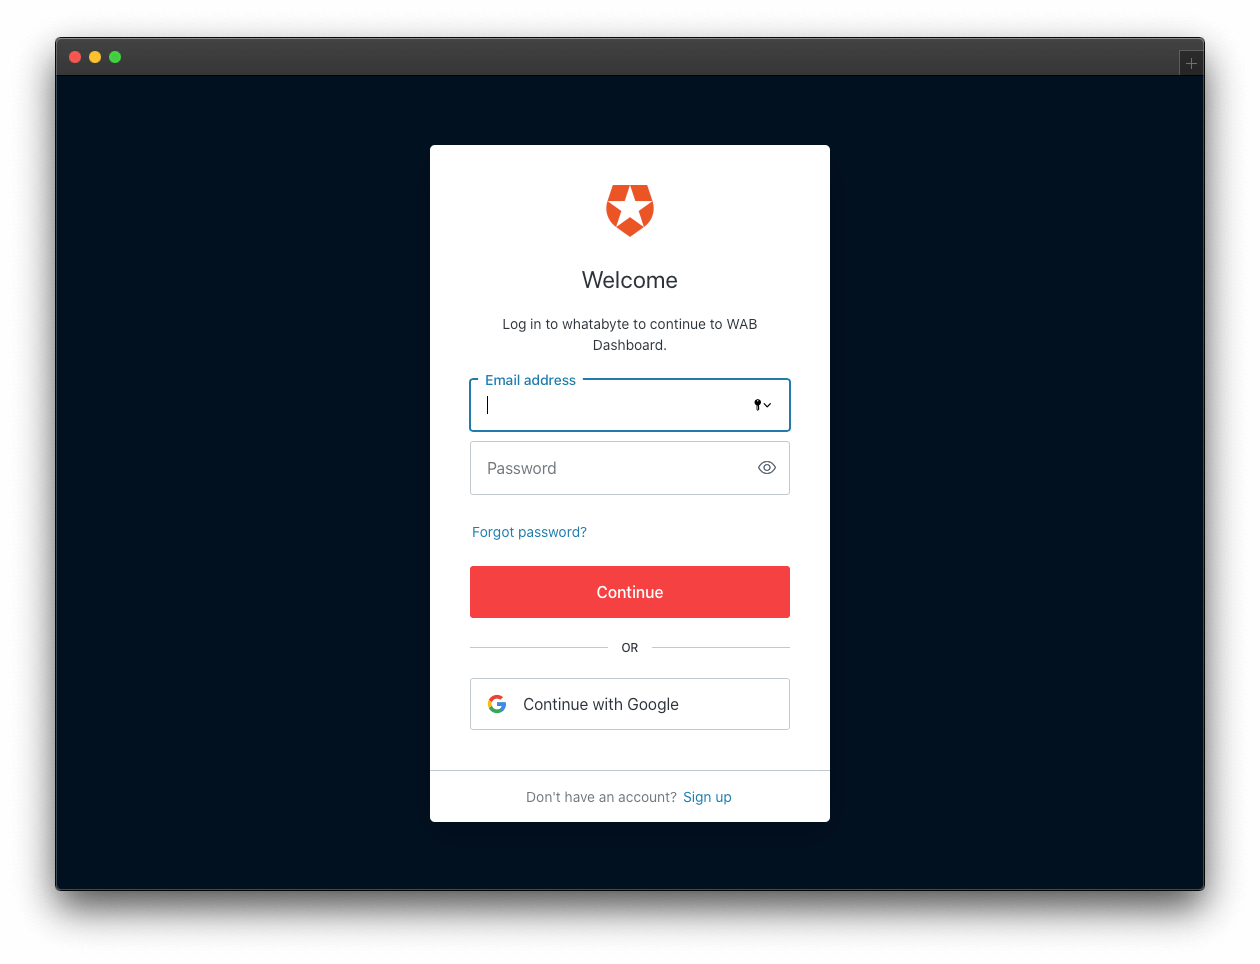
Once you sign in, the user interface of the demo client changes:
The Sign In button becomes a Sign Out button.
You can find a user tab below the Sign Out button.
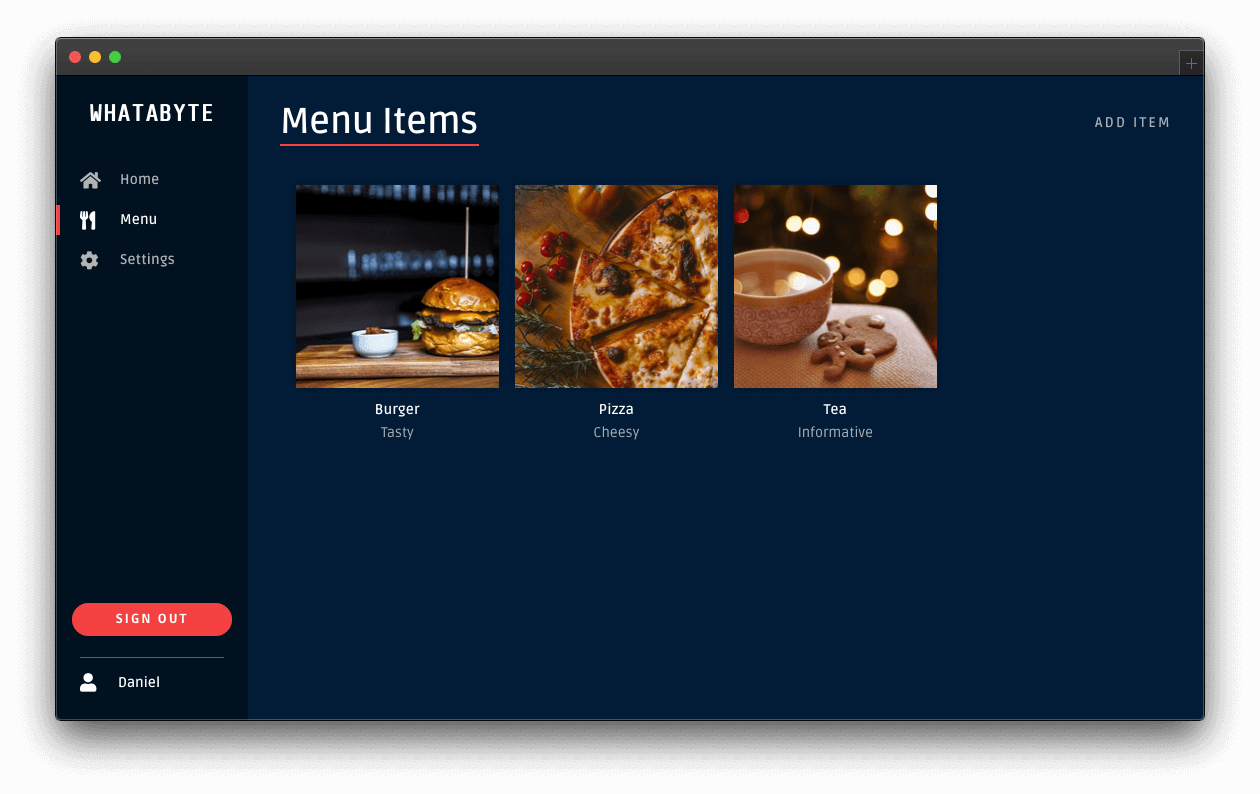
Click on the user tab to see a profile page with your name or email as the title and your profile picture — if you signed in with Google:
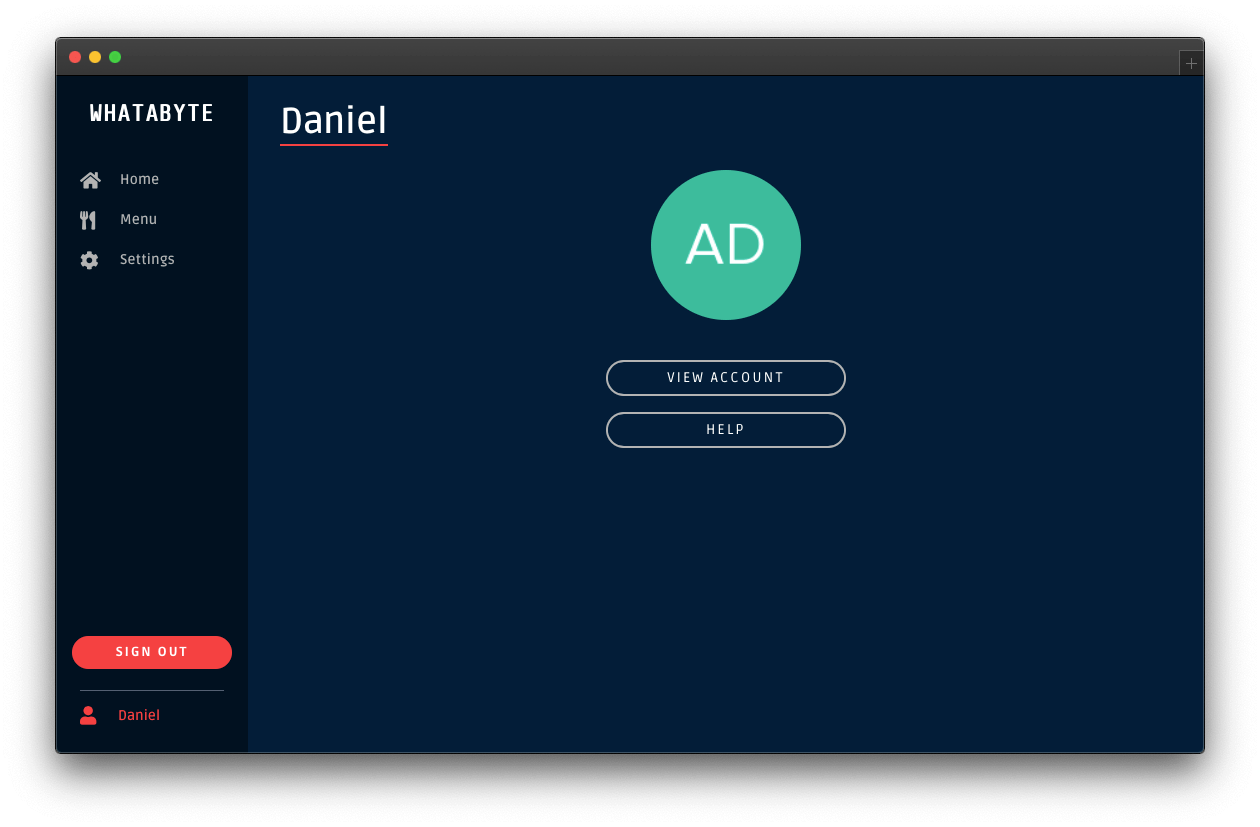
The demo client caters to three types of users:
Unauthenticated visitors: any visitor who has not logged in — some literature may refer to this type of user as "guest" or "anonymous".
Authenticated users: any visitor who successfully logs in.
Admin users: any authenticated user with the
menu-adminrole.
The end-goal of this tutorial is to use the menu-admin role and its associated permissions as access control artifacts. The plan is to only allow admin users to create, update, and delete menu items in the WHATABYTE Dashboard. In the Role-Based Access Control (RBAC) section of this tutorial, you'll create the menu-admin role, associate permissions with it, and assign it to a new user that you'll create through the Auth0 Dashboard.
However, you'll start with protecting your API write endpoints against unauthenticated visitors.
Experiment with the demo client:
Add items by clicking on the Add Item button located at the top-right corner of the "Menu" page.
Click on items and try to edit them or delete them.
You can do any read or write operations right now.
Security Exercise: Test your endpoint protection
Log out from the demo application.
Click on the Settings tab on the left-hand navigation bar of the demo client. Then, click on the Modify button.
The "Auth0 Demo Settings" page loads up. Disable the authentication features:
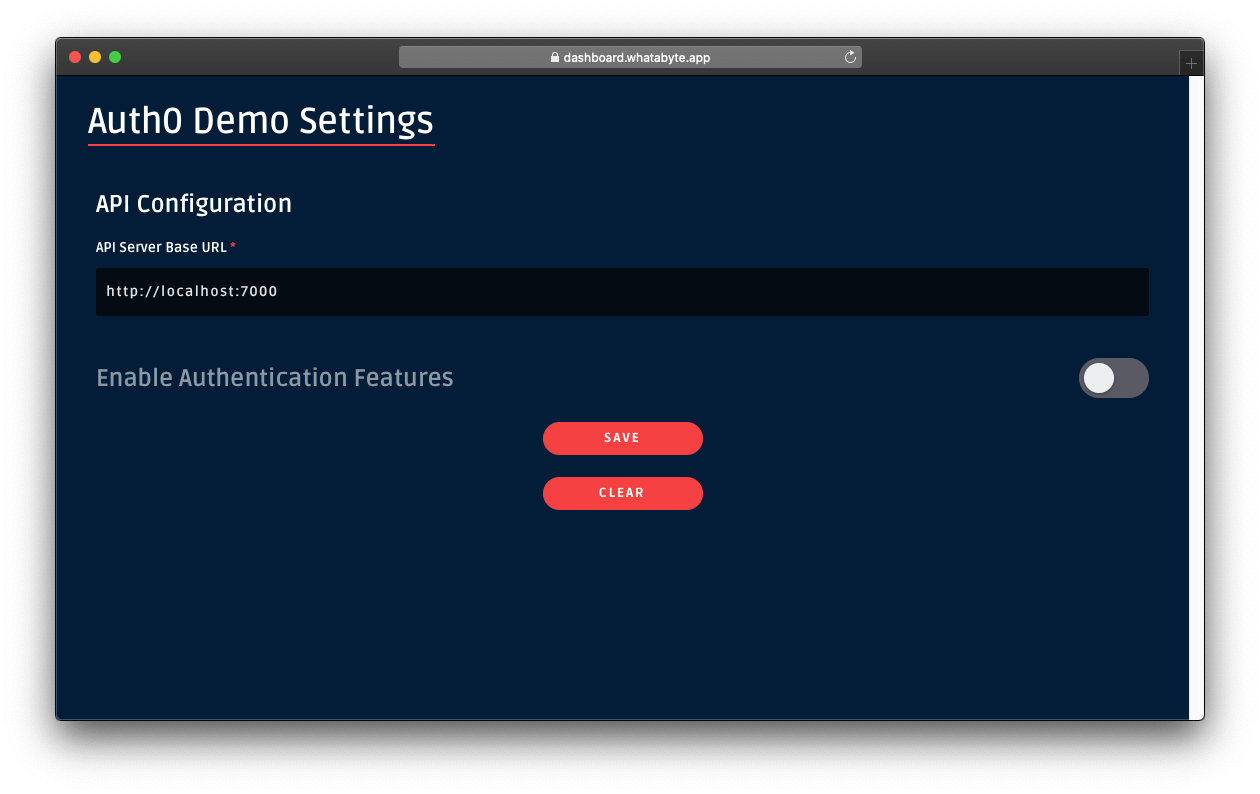
Click on the Save button.
Once the demo application loads again, click on the Menu tab. You'll notice that the Add Item button is now visible. In this mode, the demo client lets you access UI elements that make requests to your API write endpoints as an unauthenticated visitor. As such, those requests won't include an access token. If your API security is working correctly, it should reject those requests.
Click on the Add Item button to open a pre-populated form and click on the Save button. You'll get an error, No authorization token was found:

Click on the Cancel button in the "Add Menu Item" page. The "Menu Items" loads again. Click on the "Burger" item and try to edit it or delete it.
Those two actions will also fail:
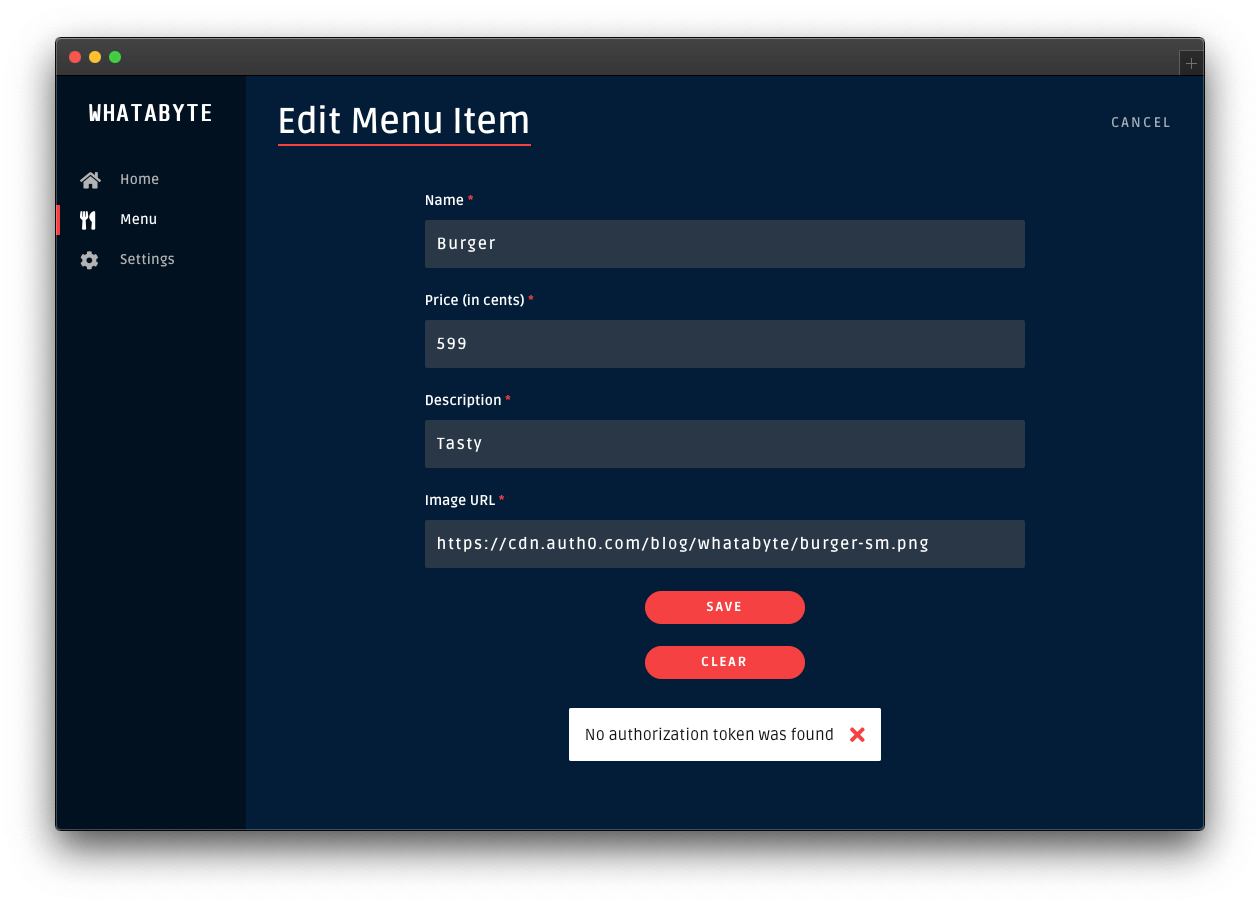
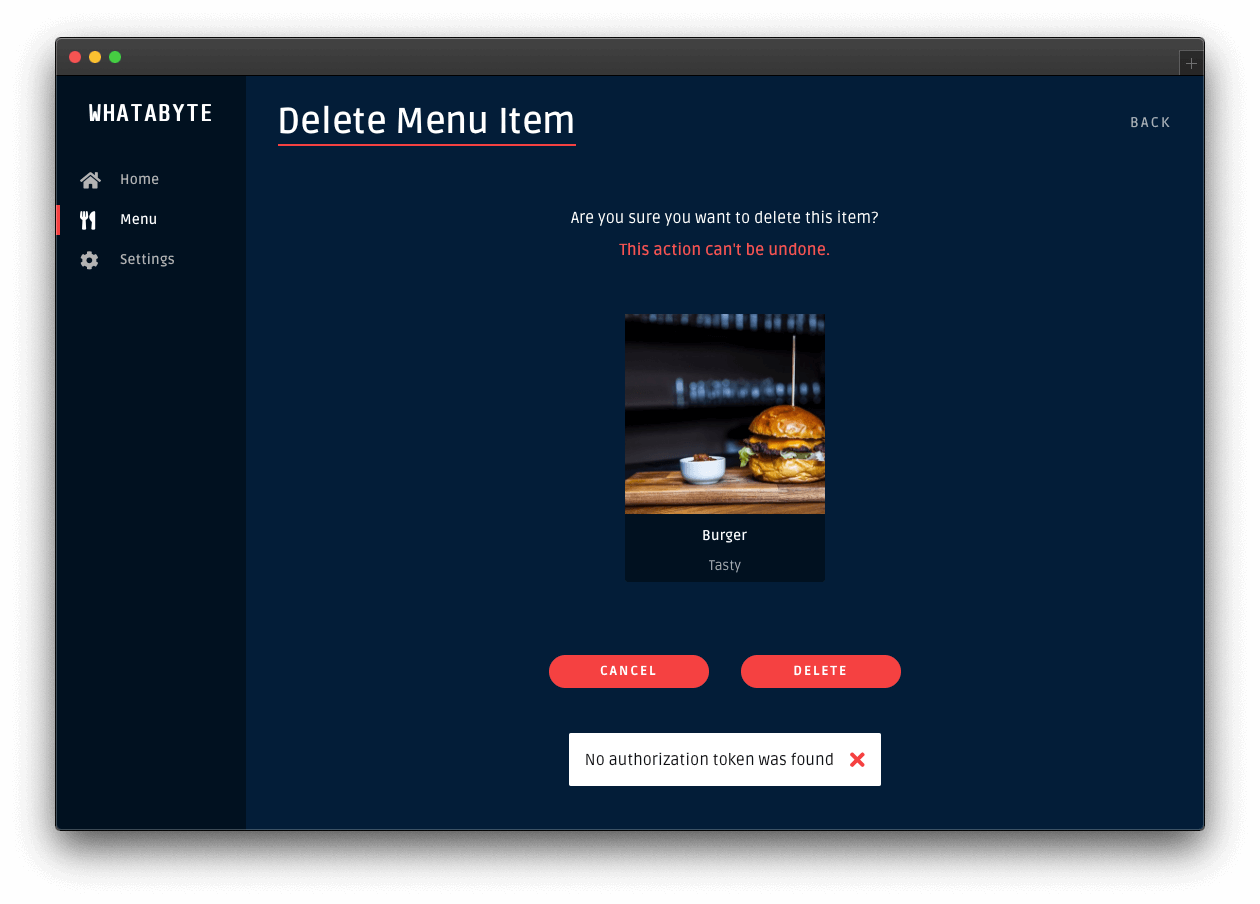
To continue with the rest of this tutorial, re-enable the demo client authentication features. Click on the Settings tab and click on the Modify button. The "Auth0 Demo Settings" page loads up. Enable the authentication features, fill out the necessary value, and click on the Save button.
62. Whatabyte/SecureConfigureRbacSteps
Define permissions for the API
Open the APIs page from the Auth0 Dashboard and select the Menu API that you created earlier.
In the Menu API page, click on the Permissions tab and create three permissions by filling each row as follows (the + Add button adds a new row):
create:items: Create menu itemsupdate:items: Update menu itemsdelete:items: Delete menu items
Next, you need to configure Auth0 to enforce role-based access control (RBAC) authorization for the Menu API. Click on the Settings tab and scroll down until you see the RBAC Settings section. Use the toggle button next to Enable RBAC to turn it on, which enforces Auth0 to evaluate RBAC authorization policies during the login transaction of a user.
Next, enable Add Permissions in the Access Token to add a permissions property to the access token created by Auth0 when a user logs in. The permissions property is a key-value pair known as a token claim. The presence of this claim is critical for the implementation of RBAC in your API server.
Once you enable these options, make sure to click on the Save button.
Create roles
Open the Roles page from the Auth0 Dashboard and click on the Create Role button. Fill out the pop-up form as follows:
Name:
menu-adminDescription: Create, update, and delete menu items.
Once done, click the Create button to complete the creation of the role.
Now, you need to associate the permissions you've created with this role, mapping it to your API's resources. Click on the Permissions tab of the role page. Once there, click on the Add Permissions button.
In the dialog that comes up, choose the Menu API from the dropdown box and select all the boxes in the Scopes section. Once that's done, click on the Add permissions button. You are back to the menu-admin role page, which now lists all its associated permissions.
A scope is a term used by the OAuth 2.0 protocol to define limitations on the amount of access that you can grant to an access token. In essence, permissions define the scope of an access token.
Get user roles
Auth0 attaches the menu-admin role permissions as a claim to the access token, but not the role itself. The demo client application needs this information as it renders its UI conditionally based on the user role. To include the user role as a claim in the tokens that Auth0 sends to the client, you can use Auth0 Rules.
When a user logs in successfully to your application, the Auth0 authorization server sends two tokens to the client:
Access token
After a user successfully authenticates and authorizes access, the client application receives an access token from the Auth0 authentication server. The client passes the access token as a credential whenever it calls a protected endpoint of the target API. This token informs the server that the client is authorized to access the API. Through its permissions claim, the access token tells the server which actions the client can perform on which resources.
ID token
The ID Token is a JSON Web Token (JWT) that contains claims representing user profile attributes like name or email, which are values that clients typically use to customize the UI.
Using Auth0 Rules, you can add to each of these tokens a new claim, representing the roles assigned to a user.
What are Auth0 Rules?
Auth0 Rules are JavaScript functions that execute when a user logs in to your application. They run once the authentication process is complete, and you can use them to customize and extend Auth0's capabilities. For security, your Rules code executes in a sandbox, isolated from the code of other Auth0 tenants.
You can create Auth0 Rules easily using the Auth0 Dashboard. Follow these steps to create a rule that adds user roles to tokens:
Open the Rules page from the Auth0 Dashboard.
Click on the Create Rule button.
Click on the Empty Rule option.
Provide a Name to your rule, such as "Add user roles to tokens".
Next, replace the content of the Script section with the following function:
function(user, context, callback) {
  const namespace = 'https://menu-api.example.com';

  if (context.authorization && context.authorization.roles) {
    const assignedRoles = context.authorization.roles;

    if (context.idToken) {
      const idTokenClaims = context.idToken;
      idTokenClaims[`${namespace}/roles`] = assignedRoles;
      context.idToken = idTokenClaims;
    }

    if (context.accessToken) {
      const accessTokenClaims = context.accessToken;
      accessTokenClaims[`${namespace}/roles`] = assignedRoles;
      context.accessToken = accessTokenClaims;
    }
  }

  callback(null, user, context);
}- Click the Save Changes button.
What's this rule doing?
When the user successfully authenticates, this rule function executes, receiving three parameters:
user: an object returned by the identity provider (such as Auth0 or Google) that represents the logged-in user.context: an object that stores contextual information about the current authentication transaction, such as the user's IP address or location.callback: a function to send modified tokens or an error back to Auth0. You must call this function to prevent script timeouts.
function(user, context, callback) {
  // ...
}
To keep your custom claims from colliding with any reserved or external claims, you must give them a globally unique name using a namespaced format. By default, Auth0 always enforces namespacing and silently excludes from the tokens any custom claims with non-namespaced identifiers.
Namespaces are arbitrary identifiers, so technically, you can call your namespace anything you want. For convenience, the namespace value is the API audience value set in the WHATABYTE Dashboard Demo Settings.
function(user, context, callback) {
  const namespace = 'https://menu-api.example.com';

  //...
}
You then check if the context object has an authorization property and, in turn, if that property has a roles property:
function(user, context, callback) {
  const namespace = 'https://menu-api.example.com';

  if (context.authorization && context.authorization.roles) {
   // ...
  }

  // ...
}context.authorization is an object containing information related to the authorization transaction, such as roles.
context.authorization.roles is an array of strings containing the names of the roles assigned to a user.
Next, you assign the roles array to the assignedRoles constant and check if there is an ID token or access token present in the context object:
function(user, context, callback) {
  const namespace = 'https://menu-api.example.com';

  if (context.authorization && context.authorization.roles) {
    const assignedRoles = context.authorization.roles;

    if (context.idToken) {
      // ...
    }

    if (context.accessToken) {
      // ...
    }
  }

  // ...
}
If any of these tokens are present, you add to the token object a <namespace>/roles property with the roles array, assignedRoles, as its value, effectively creating a custom claim on the token that represents the user roles:
function(user, context, callback) {
  const namespace = 'https://menu-api.example.com';

  if (context.authorization && context.authorization.roles) {
    const assignedRoles = context.authorization.roles;

    if (context.idToken) {
      const idTokenClaims = context.idToken;
      idTokenClaims[`${namespace}/roles`] = assignedRoles;
      context.idToken = idTokenClaims;
    }

    if (context.accessToken) {
      const accessTokenClaims = context.accessToken;
      accessTokenClaims[`${namespace}/roles`] = assignedRoles;
      context.accessToken = accessTokenClaims;
    }
  }

  // ...
}
Finally, you invoke the callback function to send the potentially modified tokens back to Auth0, which in turn sends them to the client:
function(user, context, callback) {
  // ...

  callback(null, user, context);
}
That's all you need to create an Auth0 rule that adds user roles to tokens. What's left to do is for you to create a user that has the menu-admin role.
Before you do that, verify how the user interface restricts access to certain user interface elements and views when a user doesn't have the menu-admin role.
Head back to the demo client.
Next, click on the "Settings" tab from the left-hand navigation bar and click the "Modify" button to change the demo settings.
The "Auth0 Demo Settings" view loads up. Enable Role-Based Access Control (RBAC), which reveals the User Role field. Populate that field with the following value: menu-admin.
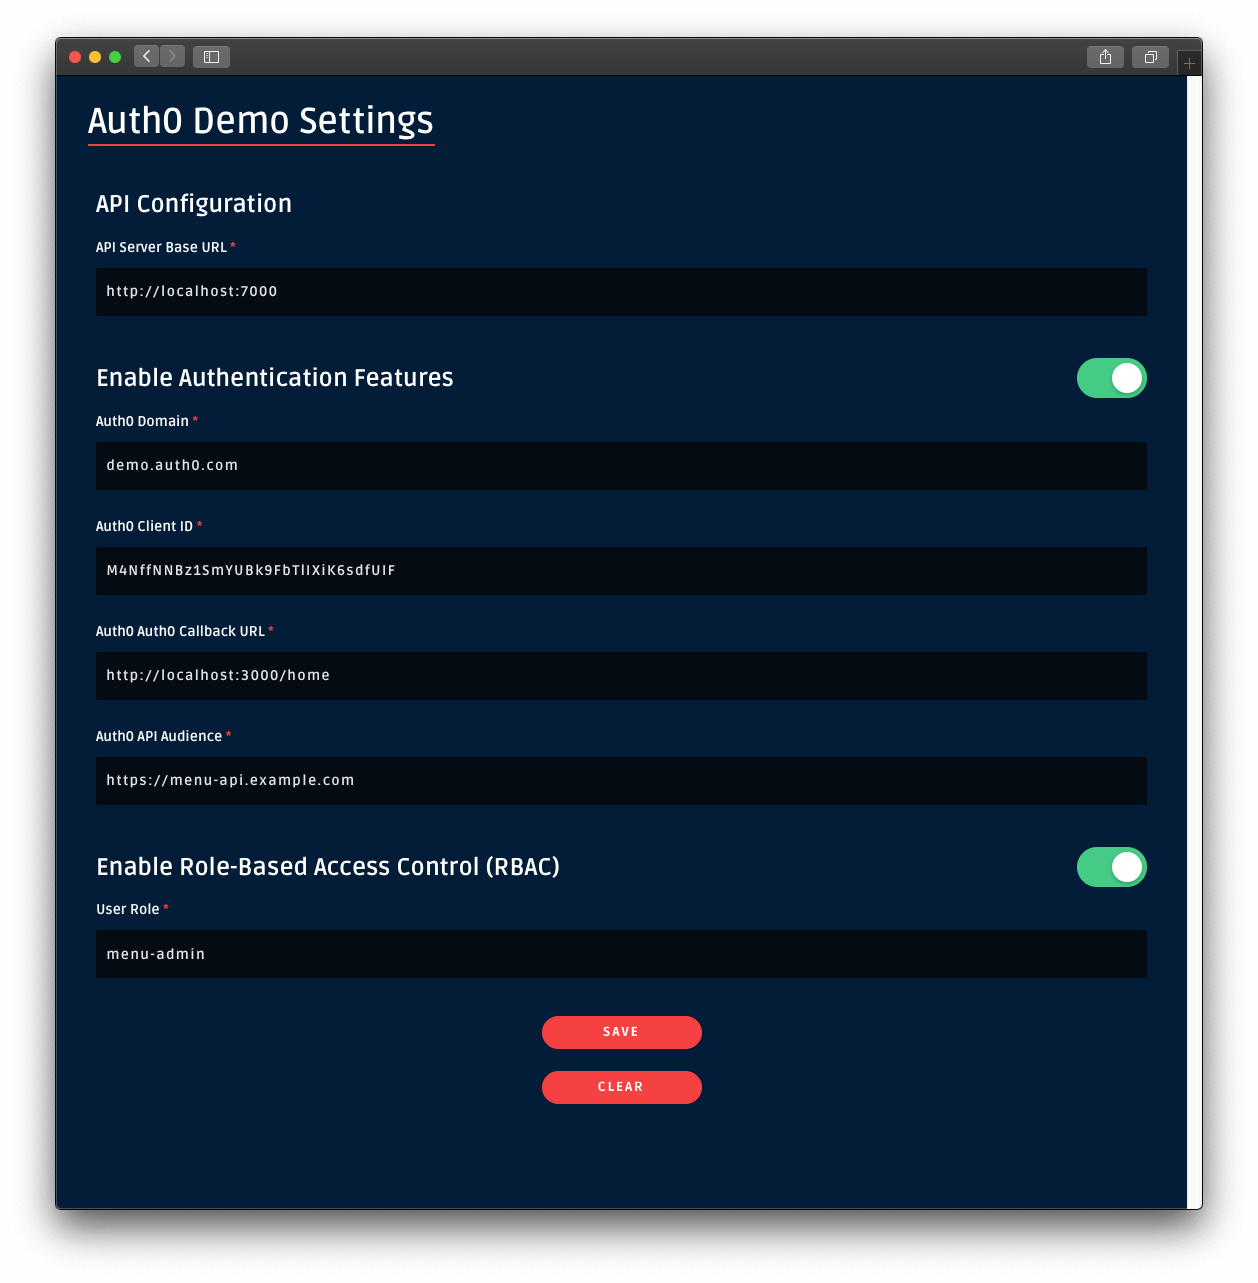
Once you set that value, leave every other field as it is. Then, click on the Save button.
Once you are back to the application, sign in. Notice how the Add Item button is no longer visible in the "Menu Items" page. If you click on a menu item, you won't see the Edit or Delete buttons either.
You need to grant yourself or any other user you create admin access!
Create an admin user
Open the Users page from the Auth0 Dashboard and click on Create User. Fill the form that pops up with the following:
Email:
admin@example.comPassword and Repeat Password: Any password of your choice
Connection:
Username-Password-Authentication
Click on the Create button. The page of the admin@example.com user loads up. On this page, click on the "Roles" tab and then click on the Assign Roles button.
From the dropdown, select the menu-admin role that you created earlier and click on the Assign button. Verify that the user has the permissions by clicking on the "Permissions" tab. If so, your admin user is all set up and ready to use.
As an alternative, you may assign the menu-admin role to the existing user you have been using to access the demo application.
63. Whatabyte/SecureSignAsAdmin
Sign In as Admin
Head back to the demo client and sign out.
Click on the Sign In button again and, this time, login in as the admin@example.com user or as any user that you have granted the menu-admin role.
This time around, the UI unlocks admin features. Open the "Menu" page and notice the "Add Item" button is back at the top-right corner. Click on a menu item and notice how you can now edit or delete the item.
However, at this moment, non-admin users could circumvent the client-side route protections to unlock the admin features of the UI. Additionally, they could extract the access token sent by Auth0 using the browser's developer tools and make requests directly to the server write endpoints using the terminal, for example.
Your server needs to implement role-based access control to mitigate these attack vectors.
64. Whatabyte/SecureTestRbac
Sign out and sign back in as the admin user in the demo client. Try to add a new item. The "Add Item" page has a form pre-loaded with some data to make this process easier for you. If you already created the salad item, try to create a coffee item with this data:
name: Coffee
price: 299
description: Woke
image: https://images.ctfassets.net/23aumh6u8s0i/6HS0xLG6bx52KJrqyqfznk/50f9350a7791fa86003024af4762f4ca/whatabyte_coffee-sm.png
Click on that newly created item and notice that you can either edit or delete it. Try both operations.
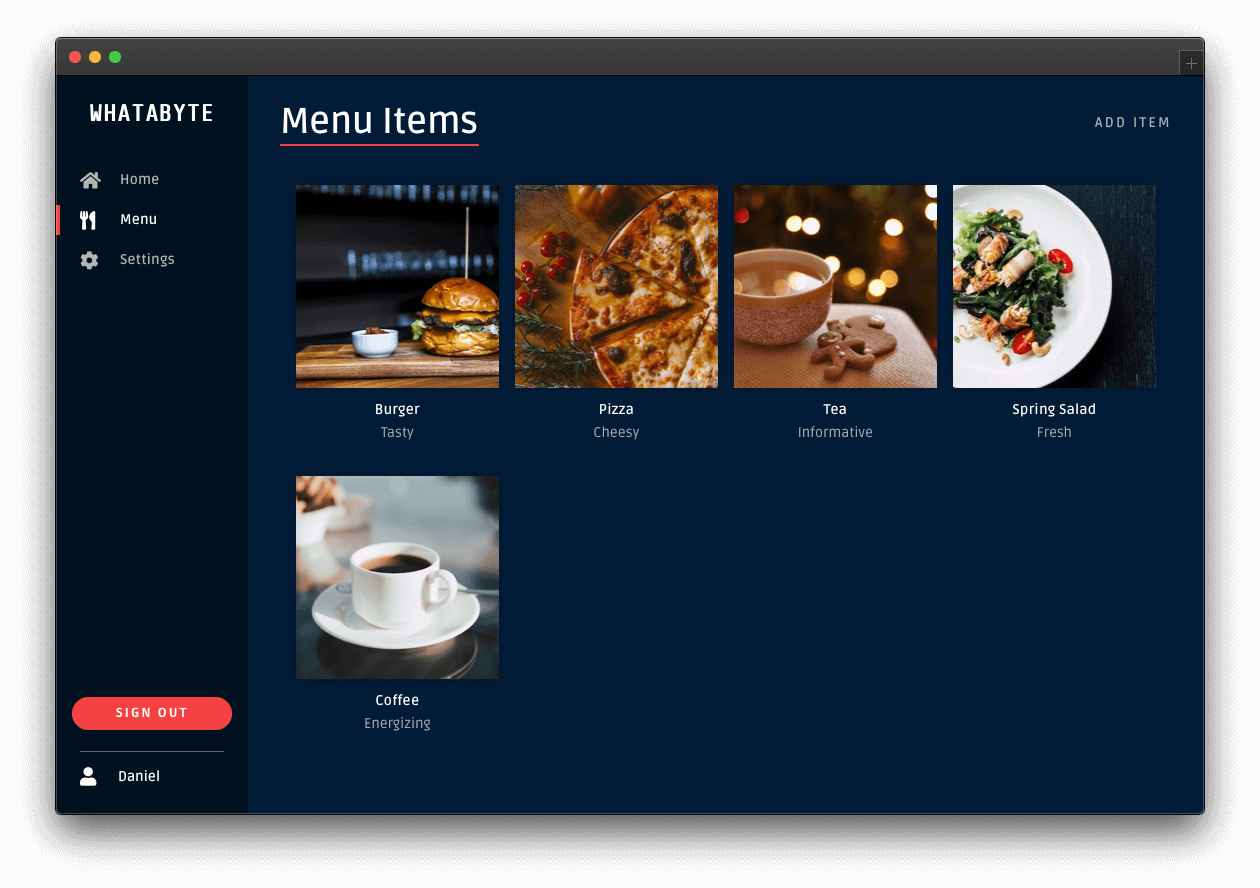
Security Exercise: Remove the Admin Role
Log out from the demo application.
Click on the Settings tab on the left-hand navigation bar of the demo client. Then, click on the Modify button.
The "Auth0 Demo Settings" page loads up. Delete the value of User Role, leave it blank, then click the Save button.
Now, either:
(a) sign in as a non-admin user, or
(b) remove the menu-admin role from your current user in the Auth0 Dashboard and sign in as that user.
You'll have access to the admin UI elements. Click on the "Tea" item and try to delete it. You'll get an error message, Insufficient scope:
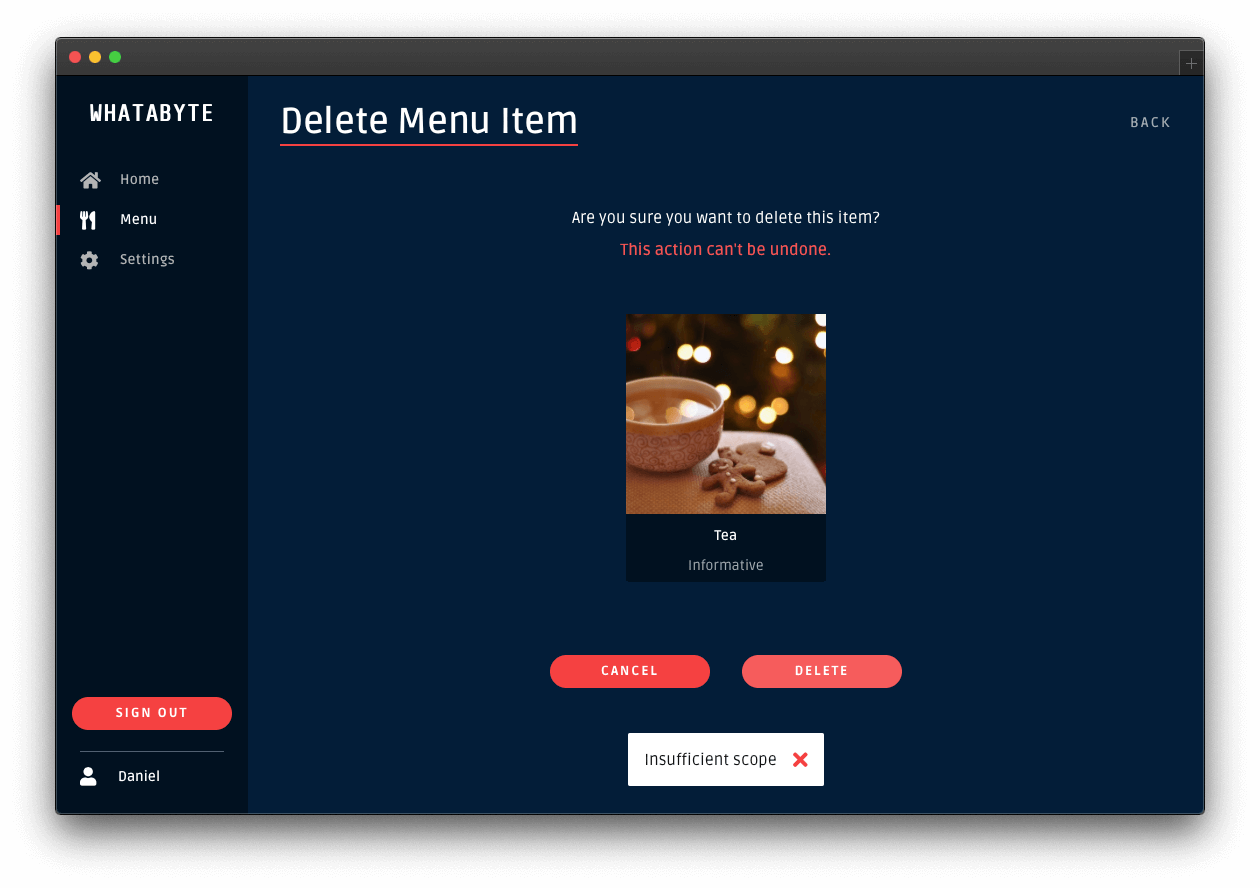
This error message is telling you that you don't have enough permissions to perform that action. If you inspect the "Network" or "Console" tab of your browser's developer tools, you'll notice that your Express API server replied with a 403 (Forbidden) error.
You'll get the same type of error if you try to add or edit an item. You have confirmed that your Express API server is effectively guarding your write endpoints from unauthenticated users and from authenticated users who lack the permissions to access them.
Click on the Settings tab on the left-hand navigation and click on the Modify button. Restore the value of User Role back to menu-admin and save your changes. If you removed the menu-admin role from a user, head back to the Auth0 Dashboard and give back the role to the user.


