
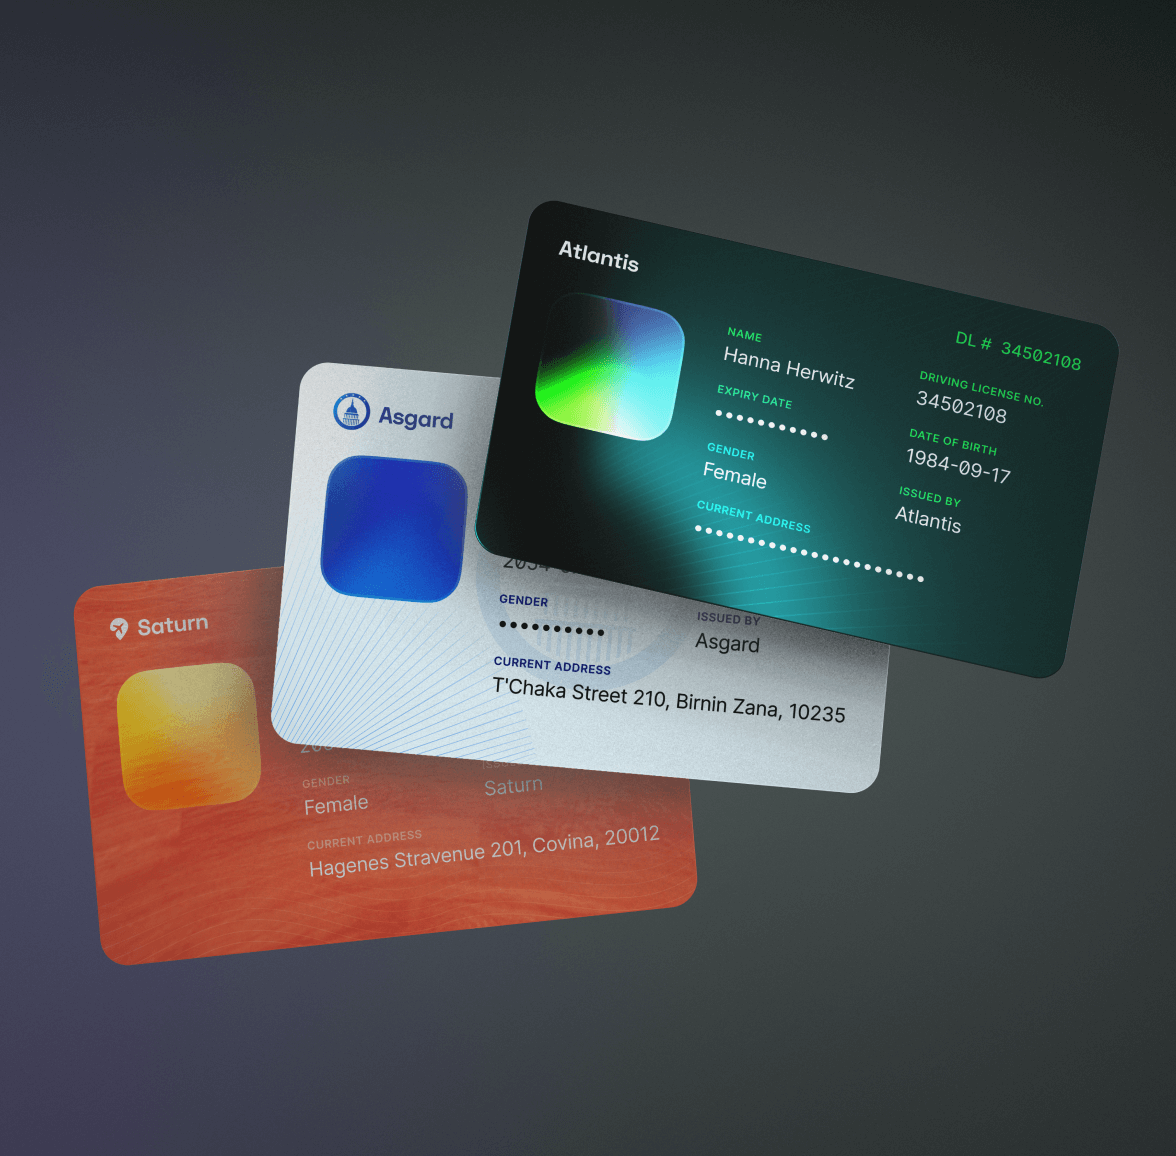

A driver's license is a document that gives legal authorization for people to drive certain types of vehicles, and they're often made of plastic and have the size of a credit card, so you usually store it in your wallet. Some countries, like Australia, the UK, and the US, use driver's licenses to prove their citizens' identity.
As driver's licenses continue to play a crucial role in verifying your identity, it makes sense that they evolve alongside our increasingly digital world. That's where Mobile Driver's Licenses come in. In this blog post, you'll learn more about them and how to use them.
What is a Mobile Driver's License (mDL)?
Let's start from the beginning. A Mobile Driver's License (mDL) is a driving license that resides on a mobile device instead of physically in your wallet. The beauty behind an mDL is that they are cryptographically verifiable, meaning you can use cryptography to verify their information and authorship.
An mDL is a type of Verifiable Credential (VC) and they're an ISO Standard. As a VC, mobile driver's licenses also have an issuing authority, which is the authorized organization issuing the driver's license; for example, in the US, that'd be the DMV. There is an mDL holder, and it's the person to whom the mDL is issued. Finally, there is an mDL verifier, which is the entity that can verify the authorship of the mDL.
mDL Step by Step
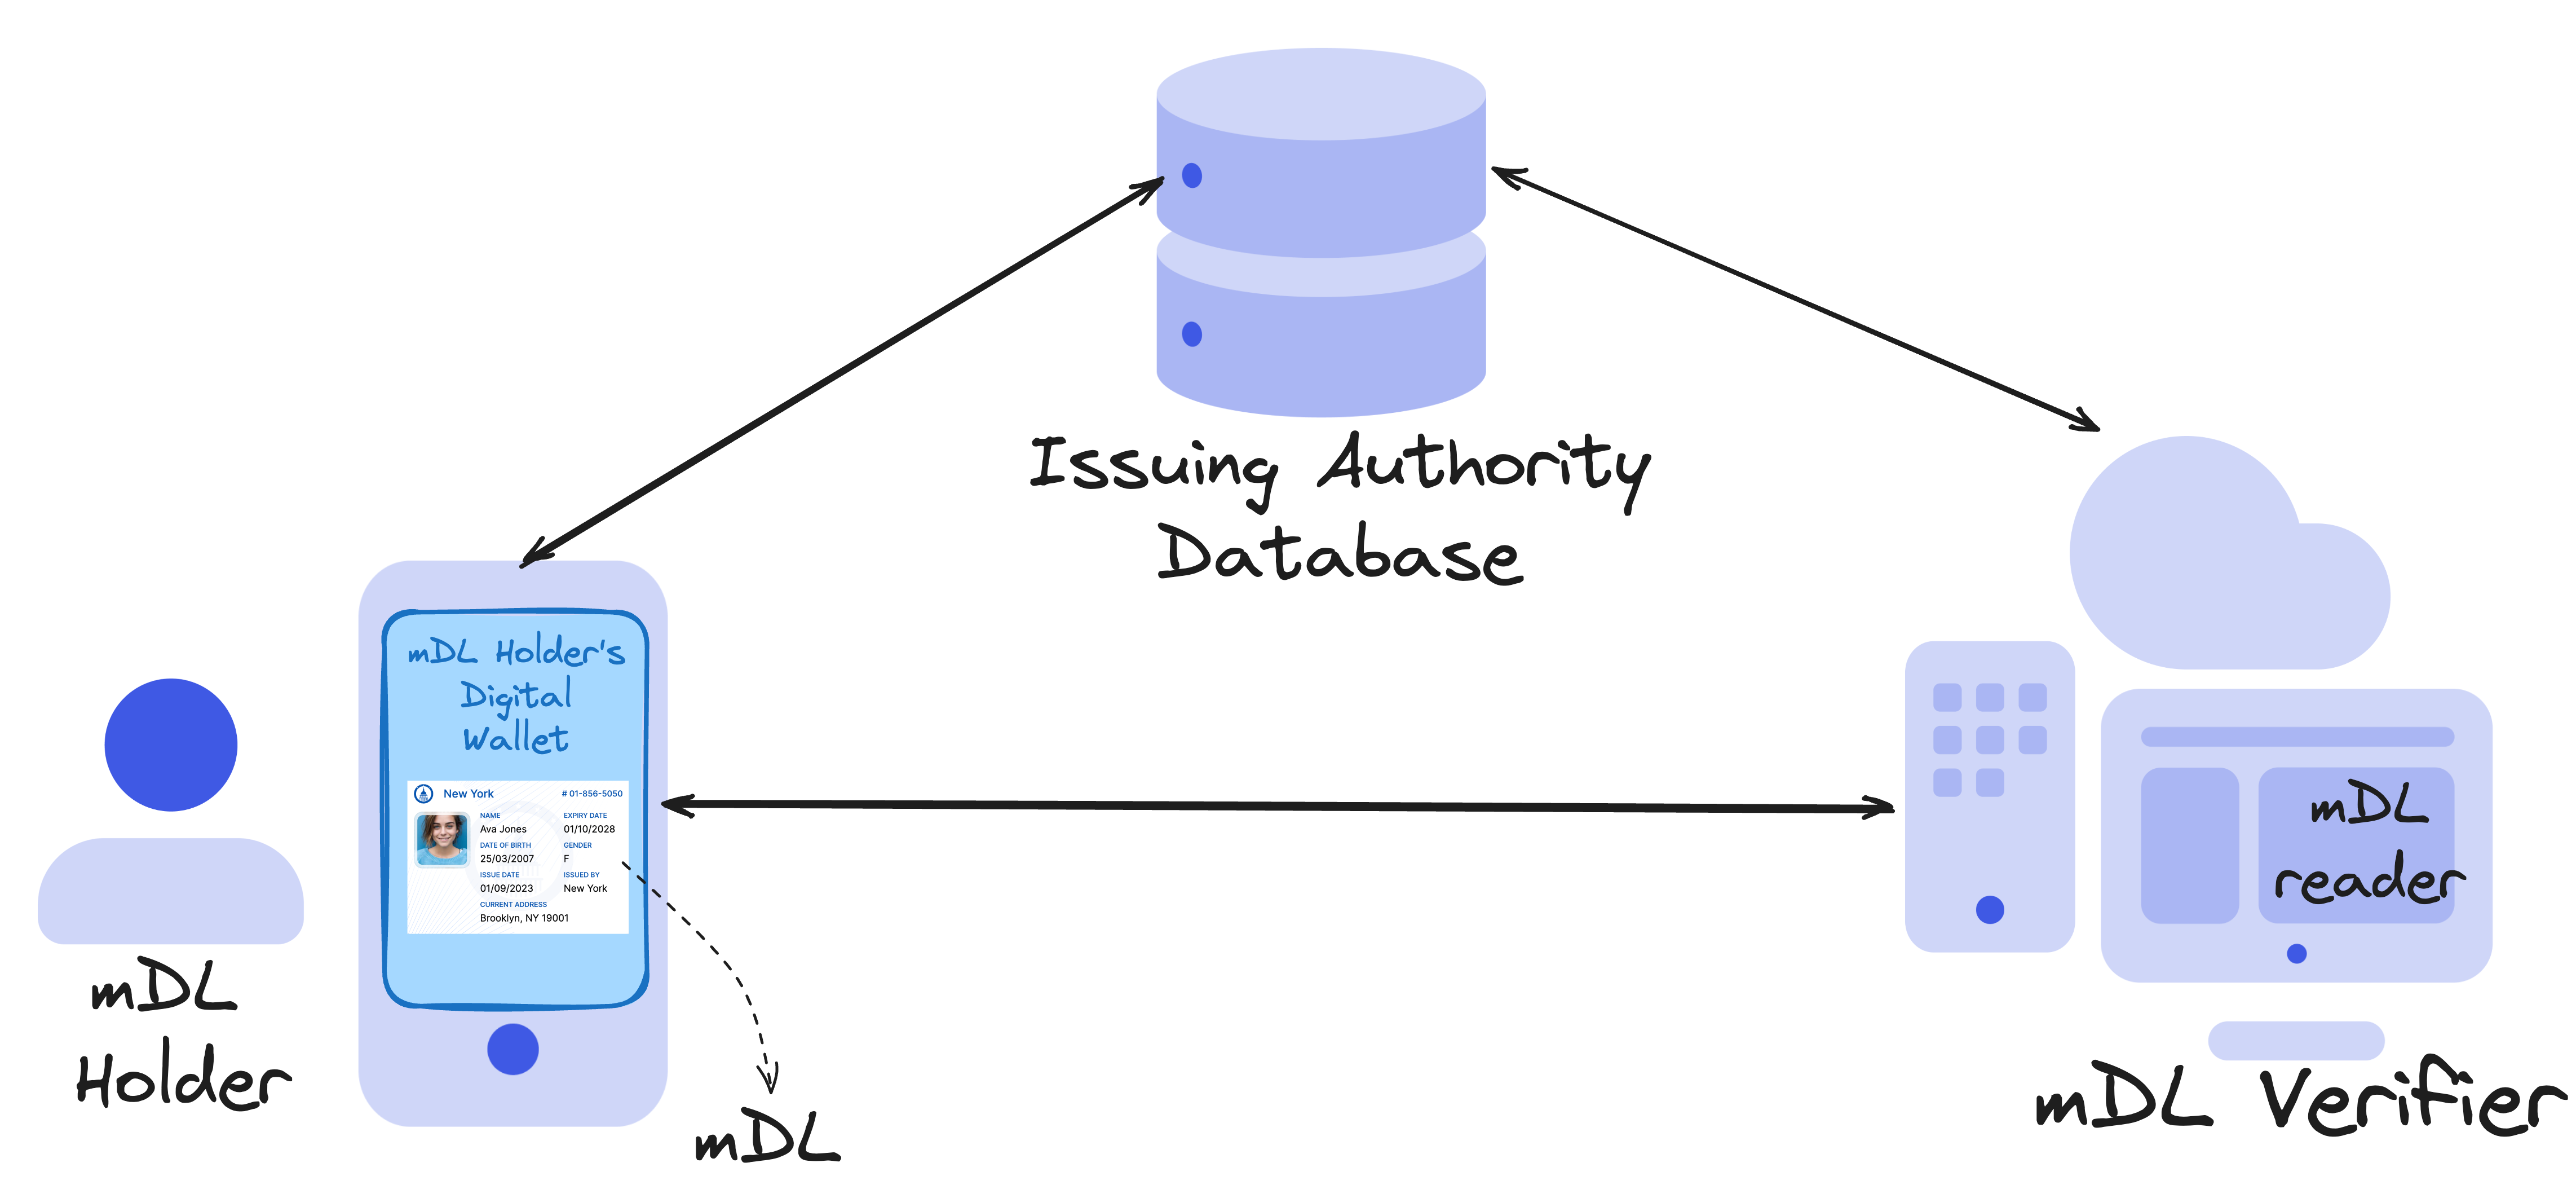
Issuing: A user can request an mDL from an issuing authority using their digital wallet. In mDL, this wallet is called an mDoc reader. An mDoc is a document that resides on a mobile device, so the mDoc reader can retrieve an mDoc for verification purposes. The issuer will verify the user's details and use their private key to sign and issue the mDL.
Presenting: A user can show their mDL using an application called an mDL reader to prove their identity, for example. This application would request the mDL data, which must be verified later.
Verifying: The mDL reader is in charge of cryptographically verifying the mDL data.
Where Are We Today?
Today, many countries have started implementing and deploying pilots for Mobile Driver's Licenses. In the US, for example, there are already multiple states that have mDL implementations in place. The TSA (Transport Security Administration) has been accepting digital credentials as proof of identity since early 2022.
In November 2023, the European Union also submitted a proposal to introduce mobile driver's licenses and make them fully equivalent to their physical counterpart.
These are just a few examples to tell you that Mobile Driver's Licenses are coming to stay, and many other countries will start piloting and adopting them. Many companies are also beginning to build their own mDL readers and implementations; in fact, the mDL ISO Standard was tested at the Interoperability Event where companies joined forces to test their implementations. Some mDL readers and mDL implementers included Google, the National Institute of Standards and Technology (NIST), Okta, Samsung, and more. You can read more about it in the event results publication.
Where to Use mDL?
Mobile Driver's Licenses have many potential use cases, but some of the most relevant are:
- Prove your Identity: as mentioned above, many countries use driver's licenses as proof of identity, and mDLs should be equivalent to prove someone's identity.
- Two-Factor Authentication: instead of relying on an OTP sent via SMS or push notification, you could use your mDL.
- Improve business processes involving Know Your Customer (KYC) and Anti-Money Laundering (AML)
Getting Started with mDL
There are a few ways you can get started with mDL, the first one being going to mdl.me to learn more about it, how it works, and use the debugger to understand what's happening under the hood.
You can also start playing with a library like the one we crafted at Auth0 Lab, mDL. This NodeJS library allows you to issue and verify mDL CBOR encoded documents. This library allows you to have a good start to understand how mDL works but it's important to mention the library alone allows you to create, parse and validate mDL but it's not enough if you need to exchange mDLs. So for example if you want to present mDL you need to implement a protocol such as the one in the ISO/IEC DTS 18013-7.
Using the mDL library
First, you need to install the library. For that, run the following in your terminal:
npm install @auth0/mdlNote this blog post is for educational purposes and not meant to be used in production. In order to use mDL you'd need a protocol on top to exchange the data, such as the one in ISO/IEC DTS 18013-7 for presenting mDLs.
Issuing a Credential
Let's take a look at what the code for issuing a new credential would look like:
import { MDoc, Document } from "@auth0/mdl";
import fs from "node:fs";

// Create Document: representation of the mDL data
const document = await new Document('org.iso.18013.5.1.mDL')
  .addIssuerNameSpace('org.iso.18013.5.1', {
    family_name: 'Jones',
    given_name: 'Ava',
    birth_date: '2007-03-25',
  })
  .useDigestAlgorithm('SHA-512')
  .addValidityInfo({
    signed: new Date('2023-10-24'),
    validUntil: new Date('2050-10-24'),
  })
  .addDeviceKeyInfo({ deviceKey: devicePublicKeyJWK })
  .sign({
    issuerPrivateKey,
    issuerCertificate,
    alg: 'ES256',
  });

// Create MDoc
const mdoc = new MDoc([document]);

// CBOR encode the MDoc
const encodedMdoc = mdoc.encode();
This script is doing a few things. First, it adds the document type org.iso.18013.5.1.mDL to the Document instance; this refers to the mDoc document type that is used to identify the ISO driving license standard. Then, it adds the name and birth date attributes of the holder.
The digest algorithm is set to SHA-512, and it's used to compute the digest of each attribute. A digest algorithm is a cryptographic hash function that maps a large block of data into a fixed-size output (512 bits or 64 bytes in this case). The verifier will use the same algorithm to verify the disclosed attributes. This is related to the way that selective disclosure is implemented in mDL.
Then you'll see the validityInfo, which is the period of time the document is valid, and finally the device key information in the addDeviceKeyInfo method. Here, you specify the public key of the device that will hold the mDL to ensure that the mDL will only be used by the device that holds the corresponding private key. In other words, a presentation will only be accepted if it's signed with the private key that corresponds to the public key in the mDL.
Finally, you use the sign method to sign the document using the issuer's private key and certificate.
Requesting a Credential
Now let's take a look at what should happen on the verifier side. The verifier is the entity that will request the mDL from the holder to later on verify its authenticity.
Depending on the use case, the holder could have an application on their device that can serve as mDL reader (for example if they're opening a bank account online from their phone) or they could have be requested to show their mDL and the mDL reader resides in another device (for example, to enter a bar and prove that the holder is 18 years old or more, the person at the entrance could have an mDL reader where people can present their mDLs).
The mDL reader requests the mDL data that it needs and the holder uses the digital wallet to present the credential. When the holder presents the credential, the verifier needs to first generate an ephemeral key pair and a nonce. An ephemeral key pair it's a short-term key pair generated when needed, and the nonce is a random value that is used to prevent replay attacks. The verifier then sends the nonce and the ephemeral public key to the holder.
You could use the JOSE package, for example, to generate these short-term keys. After installing jose with npm install jose you could do something like the following:
const {generateKeyPair} = require('jose');
const ephemeralKey = await generateKeyPair('ES256')
Generating a Device Response
Once the holder receives the nonce and the ephemeral key, their device can generate a device response. The device response is a signed message that contains the mDL and the nonce.
const deviceResponseMDoc = await DeviceResponse.from(mdoc)
  .usingPresentationDefinition(PRESENTATION_DEFINITION_1)
  .usingHandover([holderNonce, clientId, responseUri, verifierGeneratedNonce])
  .authenticateWithMAC(DEVICE_JWK, ephemeralPublicKey, 'HS256')
  .addDeviceNameSpace('com.foobar-device', { test: 1234 })
  .sign();

const encodedSessionTranscript = getSessionTranscriptBytes(
  { client_id: clientId, response_uri: responseUri, nonce: verifierGeneratedNonce },
  holderNonce,
);

const deviceResponse = deviceResponseMDoc.encode();

sendToVerifier({ deviceResponse, encodedSessionTranscript });
With the mDL issued to the holder, the device creates a new device response using the DeviceRespose class. The usingHandover method is used to specify the date the verifier sent along with a nonce generated by the holder. Here, the PRESENTATION_DEFINITION_1 constant refers to which proofs the verifier is requesting from the holder. An example could be:
export const PRESENTATION_DEFINITION_1 = {
  id: 'mdl-test-age-over-18',
  input_descriptors: [
    {
      id: 'org.iso.18013.5.1.mDL',
      format: {
        mso_mdoc: {
          alg: ['EdDSA', 'ES256'],
        },
      },
      constraints: {
        limit_disclosure: 'required',
        fields: [
          {
            path: ["$['org.iso.18013.5.1']['age_over_18']"],
            intent_to_retain: false,
          },
        ],
      },
    },
  ],
};
In this case, the verifier is asking for an mDL with just one of the holder's attributes to verify that the holder is over 18 years old. You can find other examples in the mDL repository.
The authenticateWithMAC method is used to specify the way in which the device response is authenticated. In this case, it's authenticated with a MAC using the HS256 algorithm. The secret for this MAC is computed as follows:
- On the holder's side it uses the public ephemeral key generated by the verifier plus the private key of the device.
- On the verifier's side it uses the private ephemeral key generated by the verifier plus the public key of the device.
The addDeviceNameSpace method adds a namespace to the device response.
Finally, the sign method is used to sign the device response.
Verifying the Device Response
Finally the verifier verifies the DeviceResponse.
const verifier = new Verifier([ISSUER_CERTIFICATE]);
await verifier.verify(encoded, {
  ephemeralReaderKey: ephemeralPrivateKey,
  encodedSessionTranscript,
});
First you need to construct a Verifier instance with a list of the issuer's certificates you trust.
Then you call the verify method with the encoded device response, the private key of the ephemeral key pair, and the encoded session transcript. This is a structure defined by the ISO standard. You can learn more about it in the ISO 18013.5 (section 9.1.5.1 - Session transcript)
What's Coming: Verify mDL with Auth0
You can sign up for the waitlist to be one of the first to know when mDL with Auth0 is available in Early Access.
You can also go to mdl.me to learn more, and if you know about any other mDL libraries out there, let us know so we can include them in the list of resources!


