Configure Passkey Policy
You can enable passkeys as an authentication method and configure your passkey policy in the Auth0 Dashboard.
Prerequisites
To enable passkeys as an authentication method for your database connection, you must configure your Auth0 tenant to fulfill the following prerequisites.
If these prerequisites are not met and you try to enable passkeys, the Auth0 Dashboard displays the Passkey Authentication Prerequisites readiness checklist and shows any unmet requirements.

After you enable passkeys as an authentication method for a database connection, you can use the readiness checklist to monitor the status of each requirement and access the relevant settings.
To view the Passkey Authentication Prerequisites readiness checklist:
In the Auth0 Dashboard, go to Authentication > Database.
Select a connection.
Switch to the Authentication Methods view.
Select Configure on the Passkeys card.
Enable New Universal Login Experience
Enable and configure the New Universal Login Experience.
Disable Custom Login Page setting
The Customize Login Page setting allows you to customize login pages when using a custom domain.
In the Auth0 Dashboard, go to Branding > Universal Login > Advanced Options > Login.
Disable the Custom Login Page toggle.
Enable Identifier First authentication
Enable and configure Identifier First authentication.
Update database connection settings
You must update specific settings for your database connection to use passkeys as an authentication method.
Disable Requires Username setting
The Requires Username setting requires users to provide both a username and their email when logging in to a database connection.
In the Auth0 Dashboard, go to Authentication > Database.
Select a connection.
Switch to the Settings view.
Disable the Requires Username toggle.
Disable Use my own database setting unless Import Users to Auth0 setting is enabled
The Use my own database setting allows you to use an external database to store users on a custom database connection.
The Import Users to Auth0 settings allows you to automatically import users from an external database to Auth0. For more information, read Import and Export Users.
If the Import Users to Auth0 setting is not enabled on your tenant, you must disable the Use my own database setting to configure passkeys:
In the Auth0 Dashboard, go to Authentication > Database.
Select a connection.
Switch to the Custom Database view.
Disable the Use my own database toggle.
Best practices
To ensure the best experience for end users when using passkeys, consider the items below.
Configure a custom domain: When a user enrolls a passkey, it associates with the relying party domain. If the domain name changes at any time, all of the passkeys associated with the old domain become invalid. Configure a custom domain for your tenant prior to enabling passkeys to avoid any interruptions for end-users.
Enable passkeys for a single database connection: Enable passkeys for a maximum of one database connection.
Consider limitations for Organization users: Users cannot use passkeys when creating an account through an Organization invitation email. To allow these users to create passkeys, use an alternate method of user creation or ensure progressive enrollment is enabled.
Enable passkeys as an authentication method
You can enable passkeys as an authentication method for your database connection in the Auth0 Dashboard:
Go to Authentication > Database.
Select a connection.
Switch to the Authentication Methods view.
Enable the toggle on the Passkey card.
Configure your policy
You can configure the passkey policy for your database connection in the Auth0 Dashboard:
Go to Authentication > Database.
Select a connection.
Switch to the Authentication Methods view.
Select Configure on the Passkey card.
Passkey Challenge
This setting determines how users can trigger passkey authentication during login and signup.
| Passkey authentication UI | Description |
|---|---|
| Autofill | Users must log in with their browser’s autofill feature to leverage passkeys. Autofill allows users to select a saved account from a dropdown menu when engaging with the login prompt. With autofill, users do not need to manually enter their credentials. |
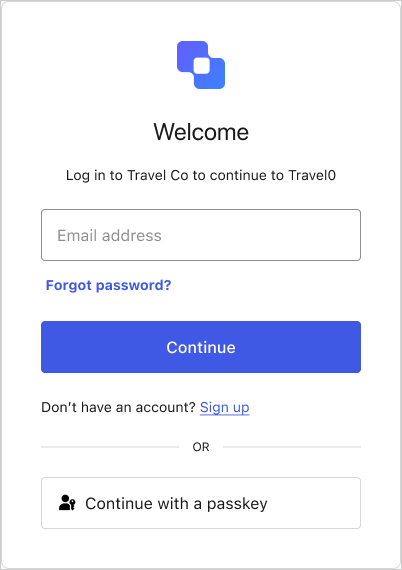
| Passkey button | Users must select the Continue with a passkey button on the login prompt. |
| Both | Users can trigger passkey authentication using autofill or by selecting the Continue with a passkey button on the login prompt. |

Progressive Enrollment
Enabled by default, progressive enrollment prompts users to create a passkey (if they have not done so already) after logging in with their email and password. This step is not required and users can choose to delay this action every 30 days.
Progressive enrollment is useful when migrating users to a new passkey flow as it offers a more seamless transition between authentication methods.
When a user creates their passkey, it is added to their account as an authentication method. Their standard email or username and password remain valid and can be used to log in as needed. Passkeys do not replace or invalidate users’ standard credentials.
Local Enrollment
Enabled by default, local enrollment prompts existing users to create a local passkey when using a cross-device passkey to log in to a new device.
For example, existing passkey users can use a QR code to log in to a new device that is within physical proximity of a previously-enrolled device. If local enrollment is enabled in this scenario, the user is prompted to create a local passkey on the new device after they log in with the QR code. If desired, users can choose to skip this action.